How To Fit Your Backpack Correctly
Author: Trekitt Gear Team
With years of hands-on experience fitting and using hiking backpacks across the UK’s varied terrain, our team understands how rucksack comfort and load distribution perform beyond the shop floor. From lightweight daypacks designed for fast summer hikes to larger trekking packs carrying heavy loads through the mountains of Snowdonia, the Lake District and the Scottish Highlands, we know what genuinely makes a difference over long days outdoors.
Why should you focus on how to fit your backpack correctly? Are you tired of discomfort or pain during hikes caused by a poorly adjusted pack? Learn why proper backpack fitting is essential for comfort, safety, and protecting your gear investment.
In SHORT…
-
How do you measure and adjust your backpack to fit your unique torso length? Discover the key steps to match your pack’s size with your body for optimal support.
-
What adjustments should you make to straps, hip belts, and tensioners? Understand how to fine-tune each component for balanced weight distribution and stability.
-
What common fitting issues can cause pain or inefficiency, and how do you fix them? Learn simple solutions to common problems like slipping hip belts, shoulder strain, and overheating for a better hiking experience.
Ensuring a proper fit for your backpack i as important as getting the right fit for your boots. A badly fitting pack can inflict misery and discomfort on your outdoor adventure. It can drastically reduce the lifespan of the product itself.
That is why we recommend coming to visit us at the Hereford shop. Here we can offer you our Personal Rucksack Fitting Service, complete with friendly chat and advice. This allows you to try on multiple options with a realistic weight inside. Followed by having an experienced member of staff adjust the pack perfectly to your frame. However, if you can’t come to us then we shall come to you in the form of this blog. Here, we’re assuming you already have a rucksack in your possession.
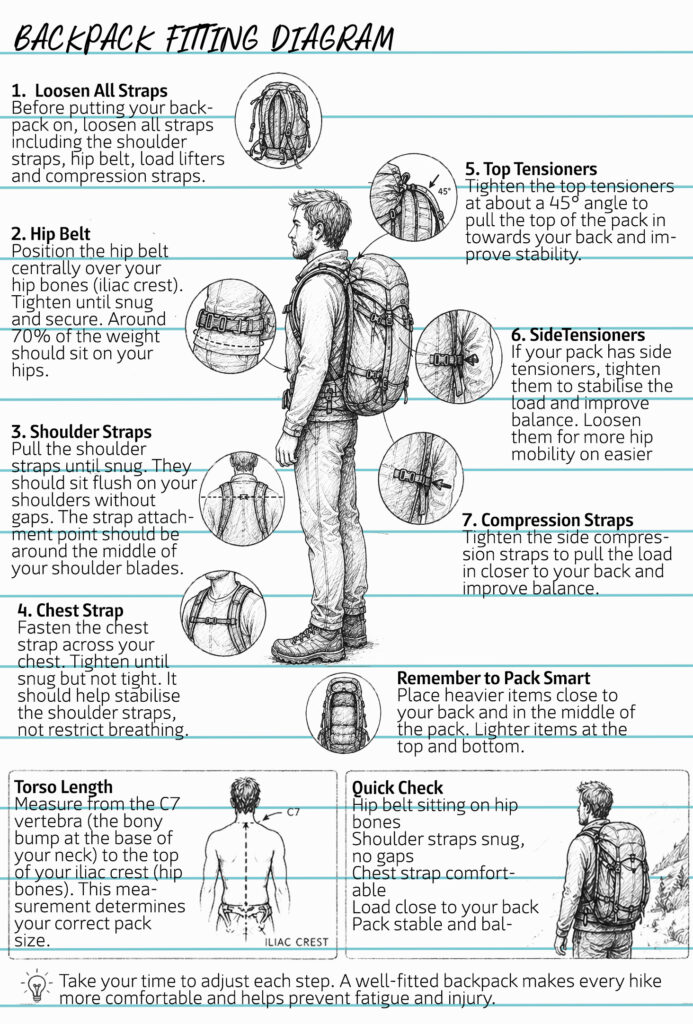
Adjusting the Back Length
Firstly, we need to find out how long your back is. Your back length is not related to your height but your torso length. Two people who are both the same height may have drastically different back lengths. Many packs, specifically the bigger and more technical packs, are available in different back lengths or feature adjustable back systems.
Your torso length can be found by measuring from your C7 vertebra (the bony protrusion at the back of your neck when looking down).
To the height of your iliac crest (top of your hip bones, where you put your hands on your hips).
This measurement will give you an idea of which pack back length to choose.

As a rough guide, most sized back lengths fit as follows:
SMALL OR WOMENS: 15-20”
REGULAR PACK: 19”-22”
LARGE PACK: 19”-24”
Once you’ve got the back length sorted, either select the correct size pack or adjusting the back system. Begin to follow these simple steps to help achieve a comfortable carry.
Tips for fitting your backpack correctly
Loosen off all straps
Start by loosening off all straps- this initial step ensures you have a blank canvas to work with before meticulously adjusting the backpack to your specific size and comfort needs. Take your time during the whole process. It will help you enjoy a more comfortable and hassle-free outdoor adventure.
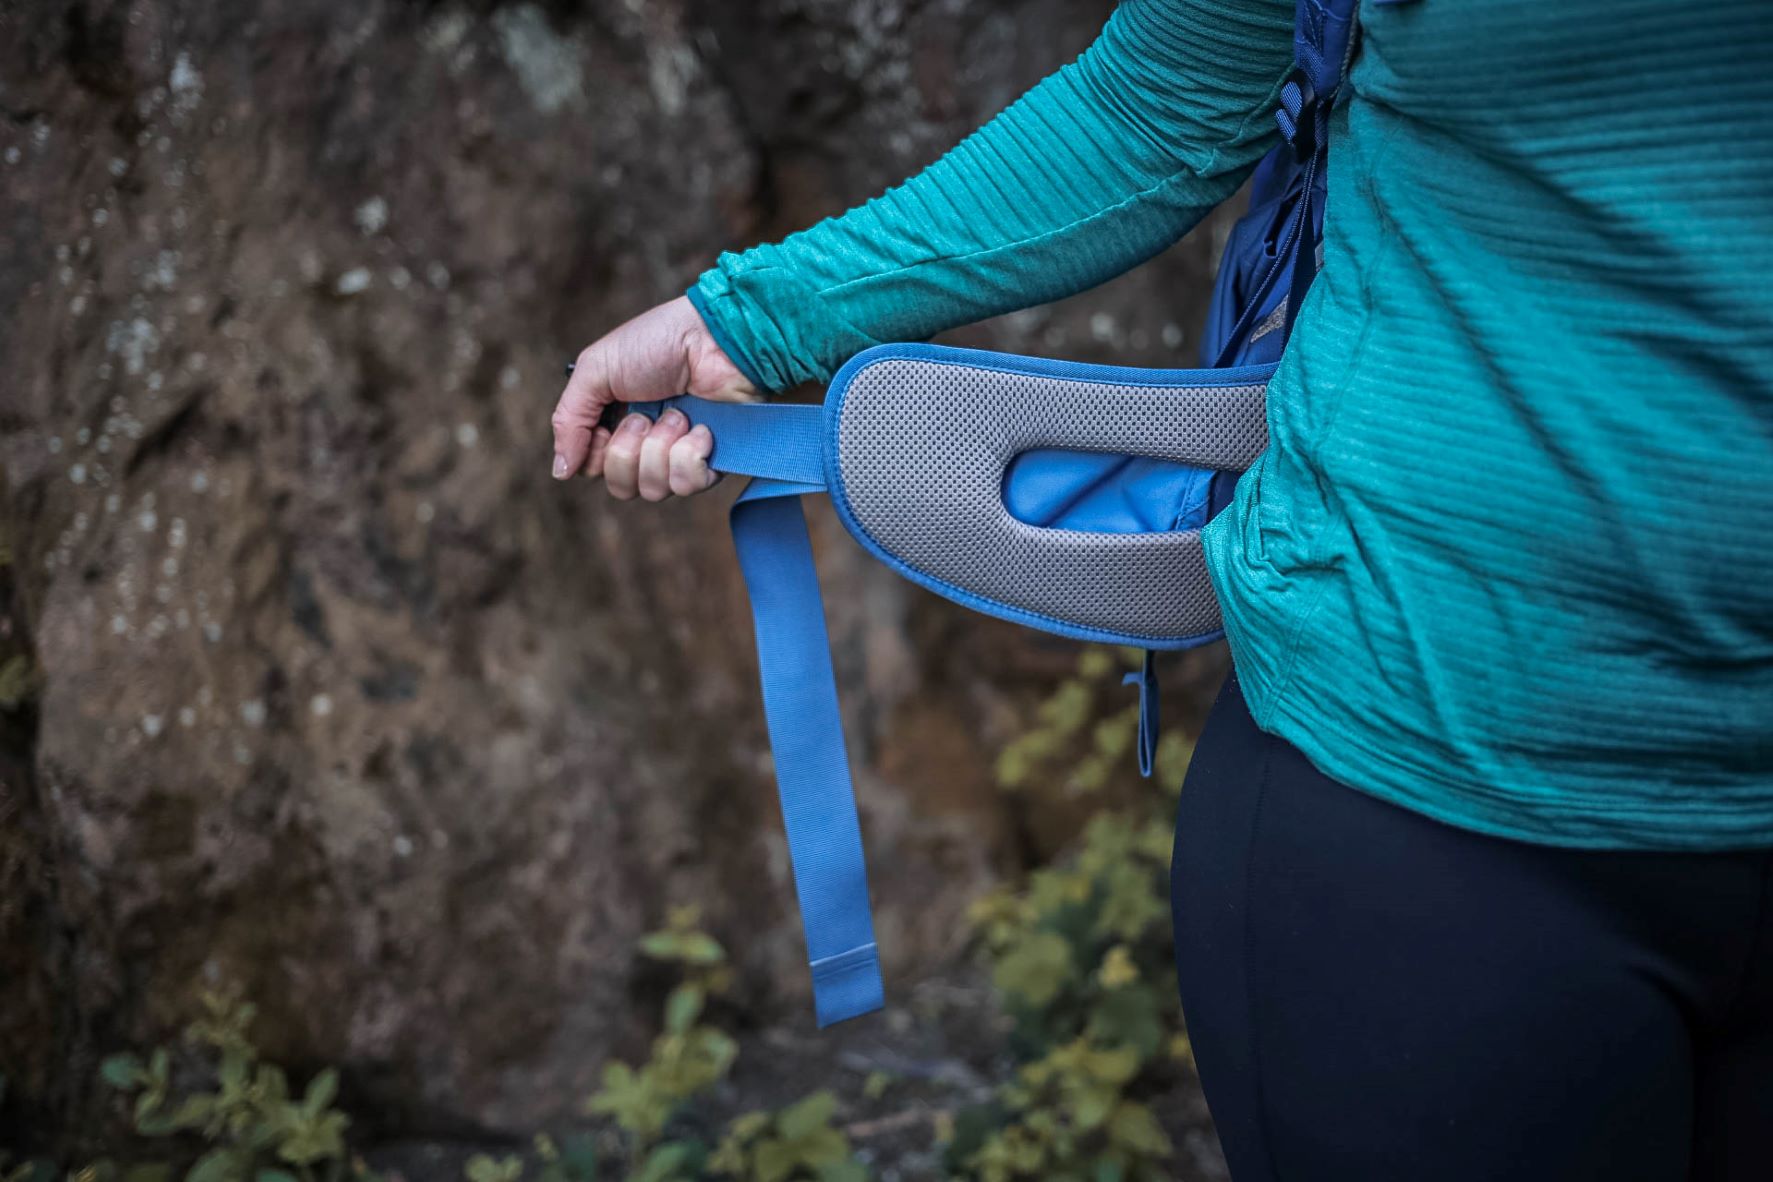
Tighten the hipbelt
The general position is the same as where you’d put your ‘hands on hips’.
This area is called the pelvic girdle, and what you can feel when you rest your hand on the area is the bony protuberance—the iliac crest.
The iliac crest can support the weight from a pack comfortably, and for sustained periods. The padded section of the hipbelt should encompass this and fit securely.
Tighten the straps so the hipbelt feels secure and held firmly around your body. Remember that your hips carry most of the weight of the pack, so this should be firm but comfortable.
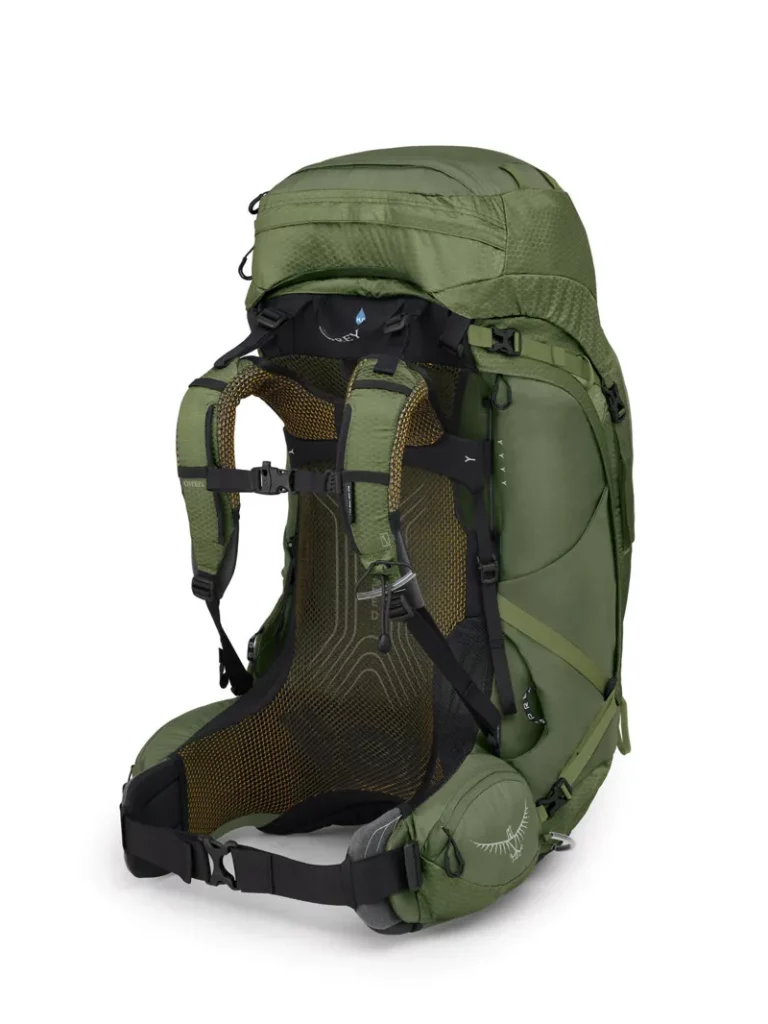
Adjust the Shoulder Straps
Pull the shoulder straps until they start to become snug, but ensure that they are not too tight as to lift the pack off your hips.
You should feel as if around 70% of the weight is sitting on your hips and the other 30% on your shoulders.
If the back length of the pack is correct, the shoulder straps will be flush to your shoulders whilst the hipbelt sits in place comfortably.
The point where the shoulder straps attach to the main body of the pack should be roughly half way down your shoulder blades. This ensures that the shoulder straps rolls evenly over the top of your shoulders to distribute the weight correctly.

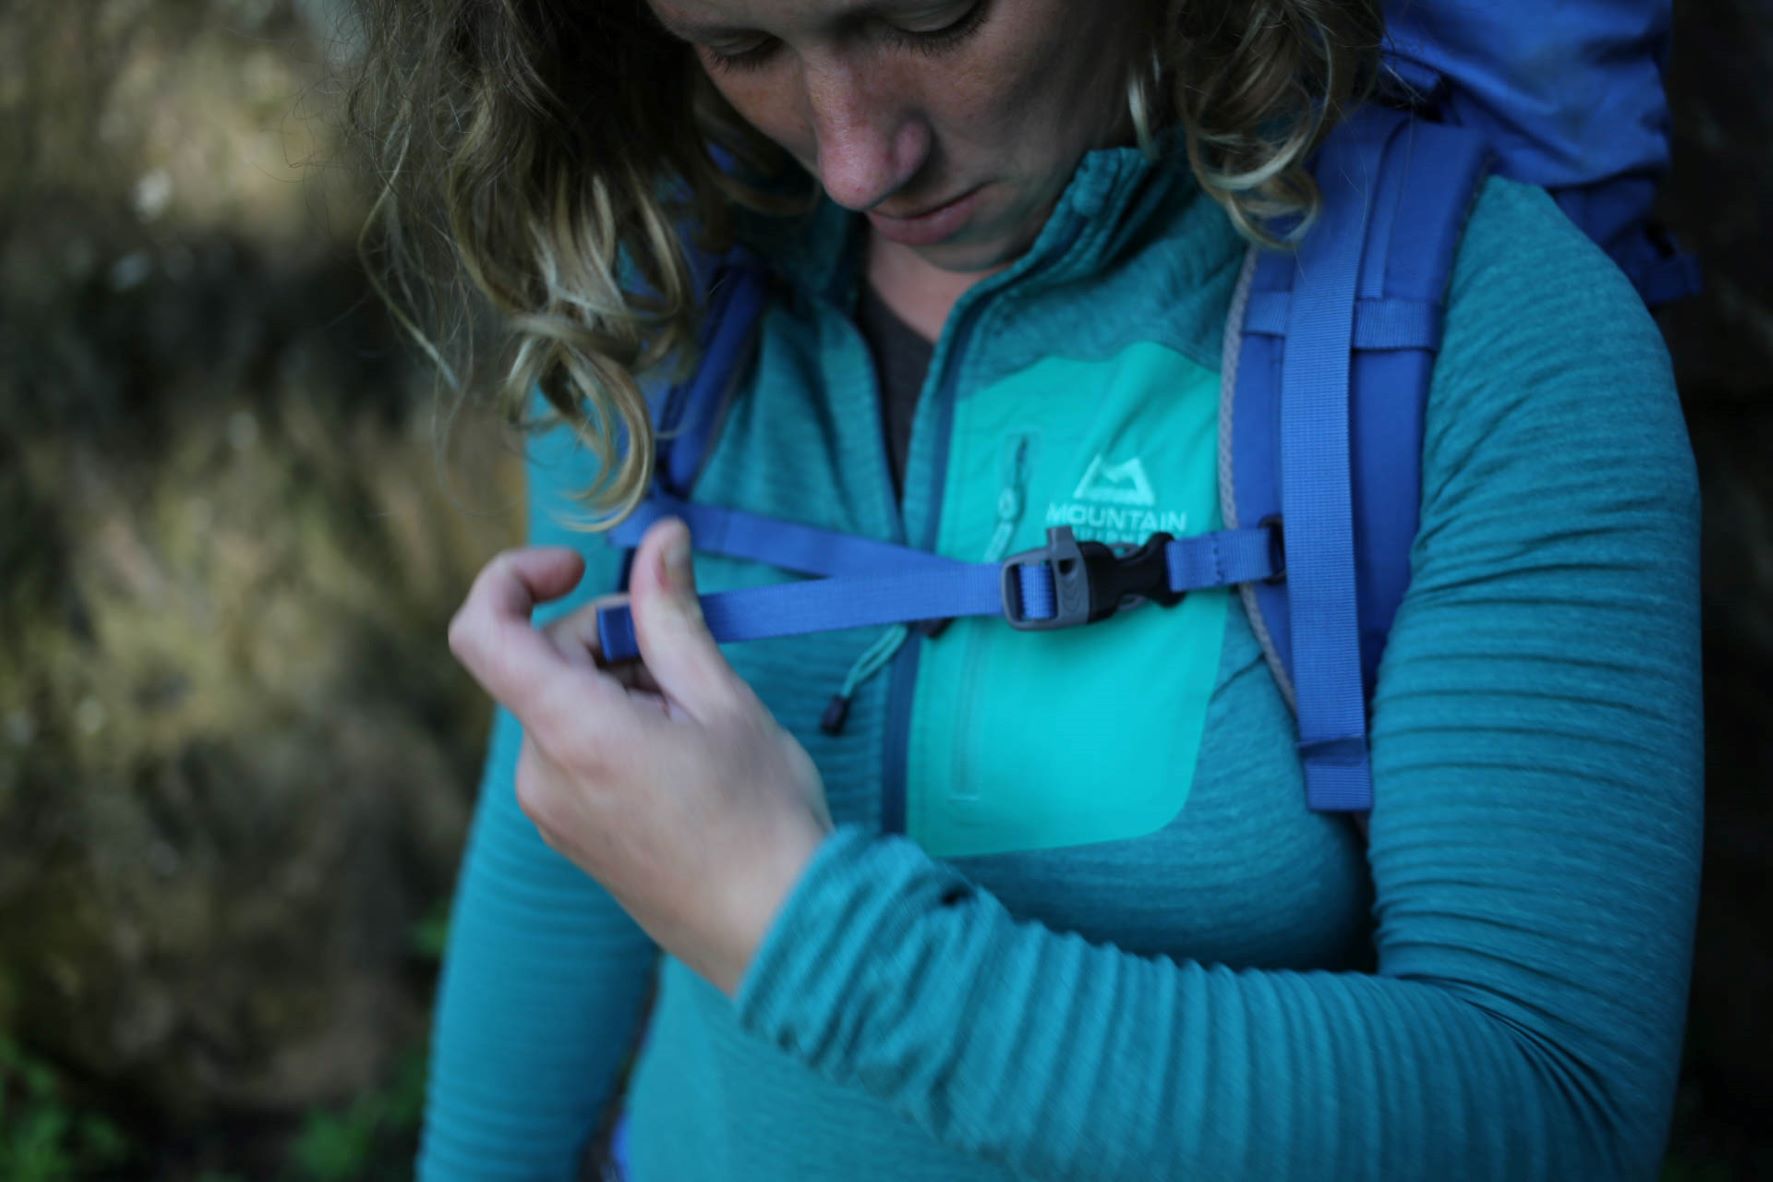
Adjust the Chest Strap to fit your backpack correctly
Fasten the chest strap and pull until taut but not tight—the elastic section should not be extended.
The purpose of the chest strap is to prevent the shoulder straps migrating to your shouldersIt also protects you from falling off entirely and ending up on your arms.
If you can feel the shoulder straps digging into your neck, you’ve pulled too tight.
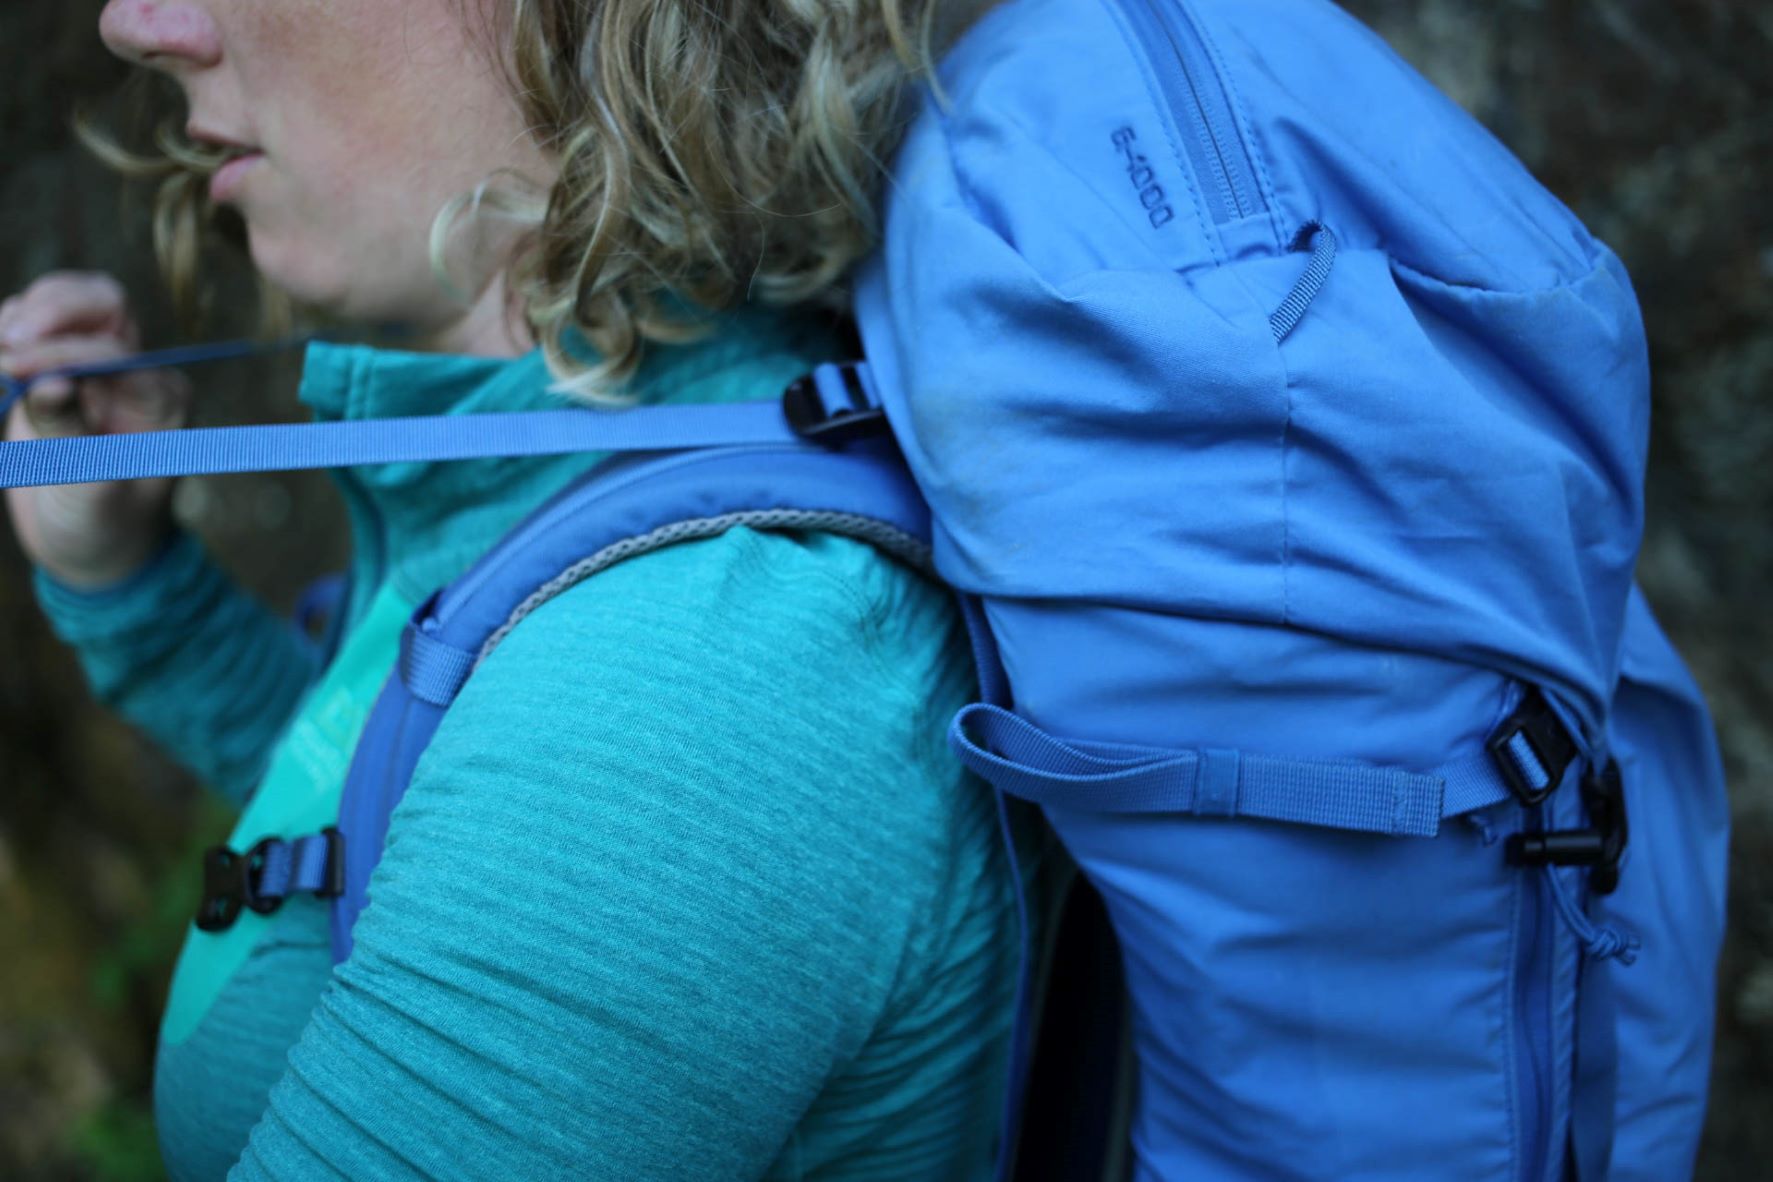
Adjusting the Top Tensioners
Top tensioner straps link the shoulder straps to the top of the pack.
When tightened, their main function is to stabilise the upper half of the pack.
The optimum angle for these straps in 45º, but they will stabilise the load even when horizontal or at a more obtuse angle.
Grip the strap with your finger and thumb and tighten them until you feel the top part of the pack rest against your pack. Over-tightening them will create excessive pressure on the front of your shoulders.
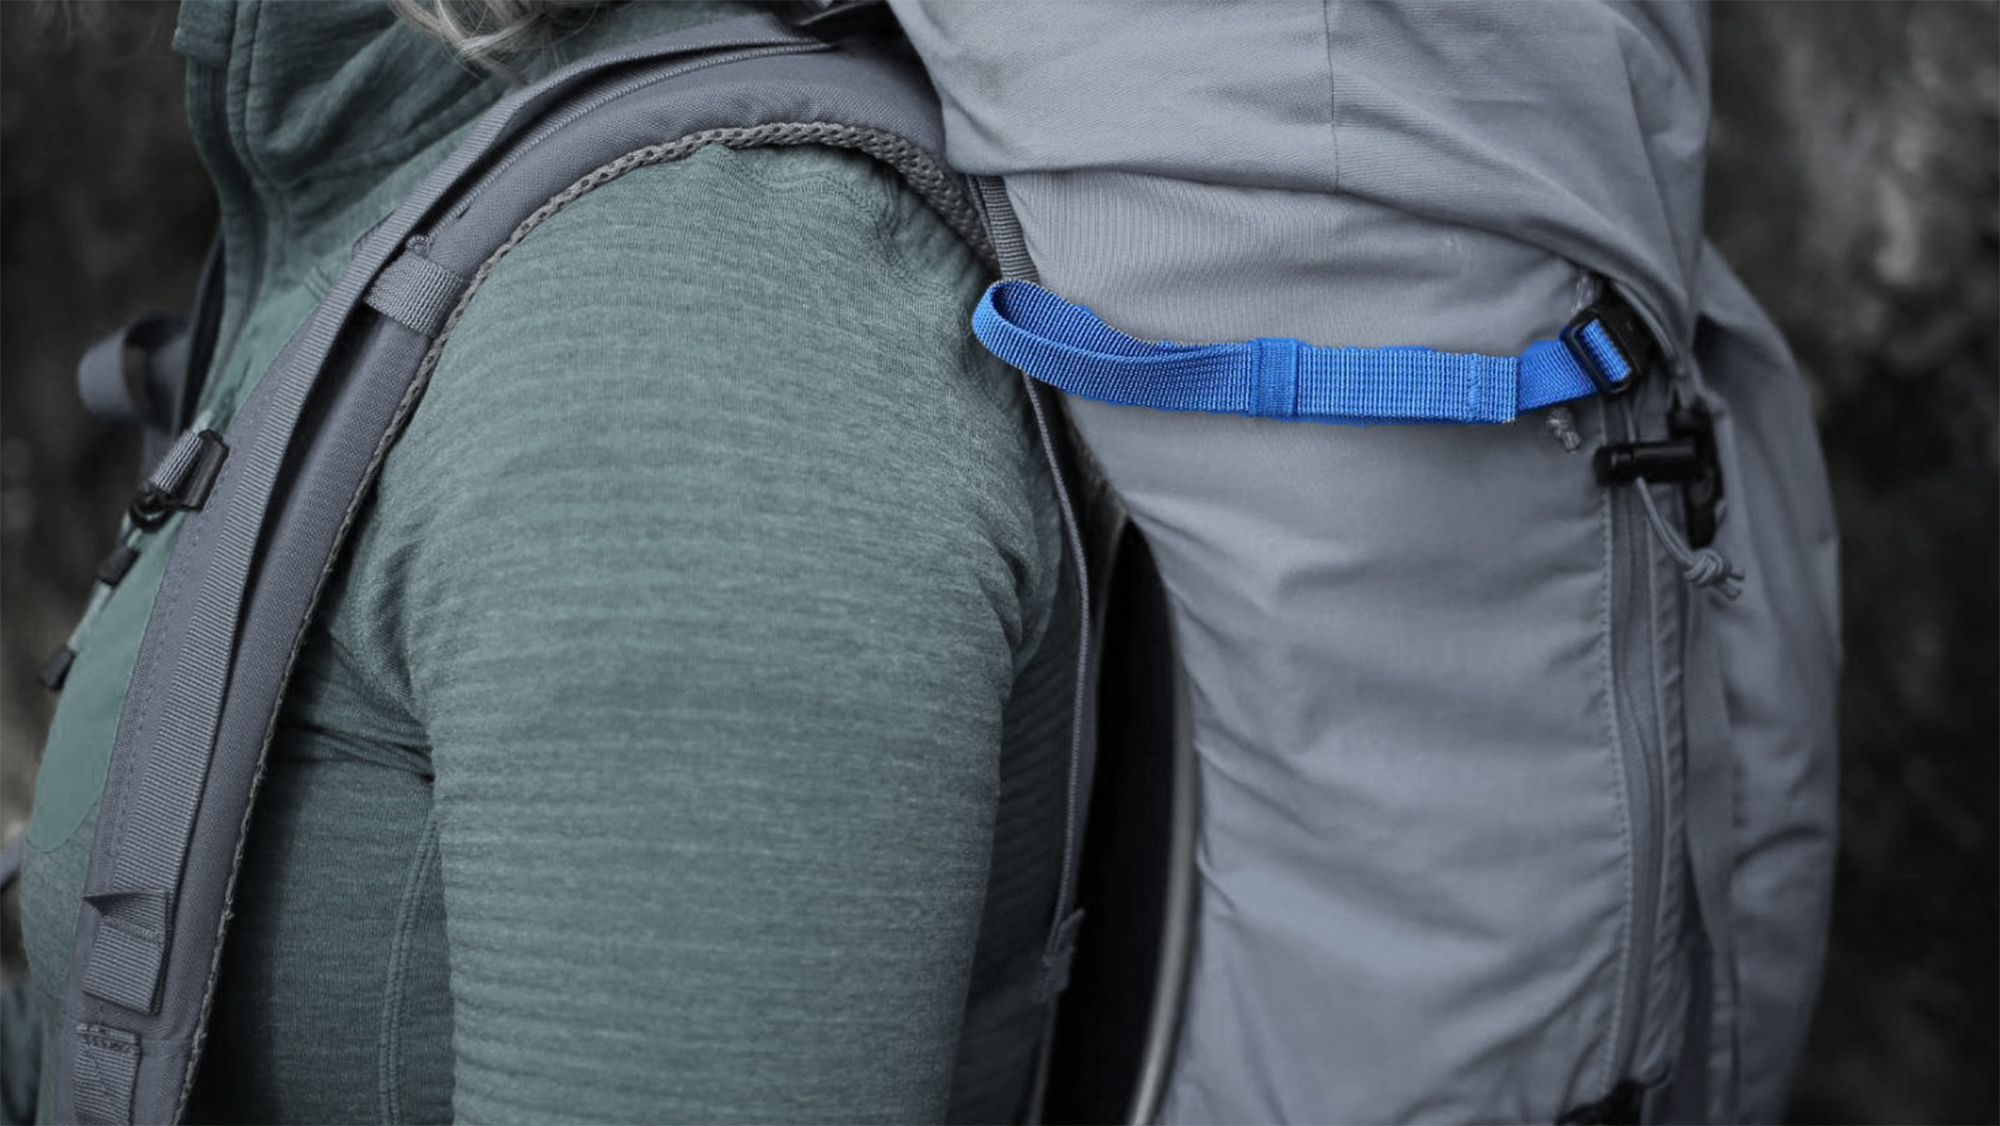
Adjust the Side Tensioners
If you have them, side tension straps link the main pack body to the hipbelt.
By tightening these straps you can stabilise the load but reduce the hipbelt flexibility. Where balance is critical tightening them can help you feel more secure.
However, if you are striding out over easy terrain it’s better to loosen these straps to allow full hip flexibility.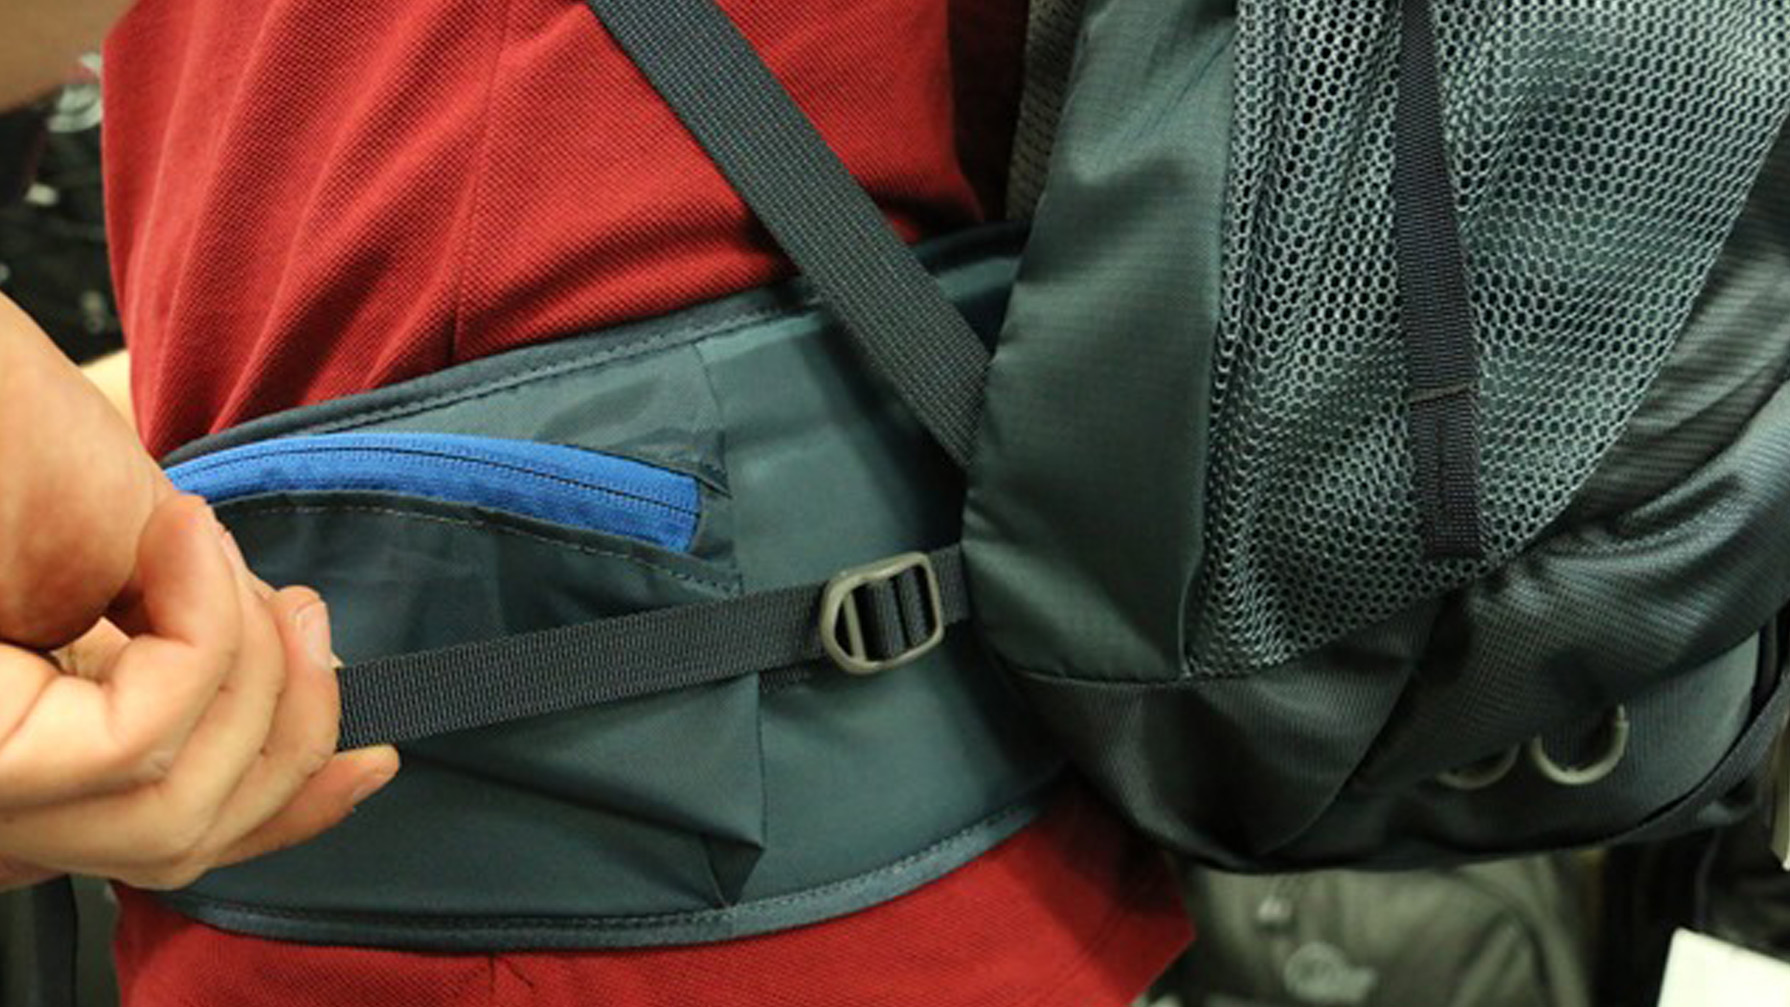
Adjust the Side Compression Straps
Side compression straps come next.
Pulling these tight does two things.
Firstly, it stabilises the load, preventing your kit from falling about inside if you’re not fully laden.
Secondly, it pulls the weight inside the pack closer to your back.
The closer it is to your back, the more centred it is over your hips, which consequently puts less strain on your back.
Fit your backpack: Achieving the perfect comfort and security
Following these steps should help you fit your backpack comfortably and securely, provided the rucksack you have chosen is suitable, but it may not be perfect straight away.
Adjustments will need to be made on the go depending on the terrain and the load you’re carrying.
Play around with the pack until you’ve got it to your liking—don’t be afraid to change things if something feels off.
The diagram below provides a helpful summary of the main backpack fitting steps and adjustment points discussed above.
If you can’t get it quite right, you can contact our helpful customer service team who will be able to assist you; either helping you fit your backpack correctly or to advise on a suitable alternative. You can contact them here.
How To Fit A Backpack For Men And Women
The overall process for fitting a hiking backpack is largely the same for both men and women. The goal is always to transfer most of the load onto the hips while keeping the pack stable and comfortable across uneven terrain.
However, some backpacks are designed specifically around different body shapes and proportions.
Women’s Hiking Backpack Fit
Women-specific hiking backpacks often feature:
- Shorter back lengths
- Narrower shoulder strap spacing
- Curved shoulder straps
- More contoured hip belts
These adjustments help improve comfort and reduce pressure around the chest, shoulders and hips. Many women also find that women-specific packs prevent shoulder strap rubbing around the neck area.
Men’s Hiking Backpack Fit
Men’s or unisex backpacks are generally designed around:
- Longer average torso lengths
- Broader shoulder spacing
- Straighter hip belt shaping
However, fit is always more important than gender labels. Some women prefer unisex packs, while some men may suit shorter back systems depending on torso shape and proportions.
The Most Important Factor: Torso Length
Backpack fit should always be based primarily on torso length rather than height or gender. Two people of the same height can require completely different backpack sizes depending on their proportions.
Backpack Features That Can Improve Fit And Comfort
Modern hiking backpacks include a range of features designed to improve comfort, load stability and ventilation across different types of terrain and carrying styles. While correct adjustment is still the most important factor, certain backpack designs can make achieving a comfortable fit much easier.
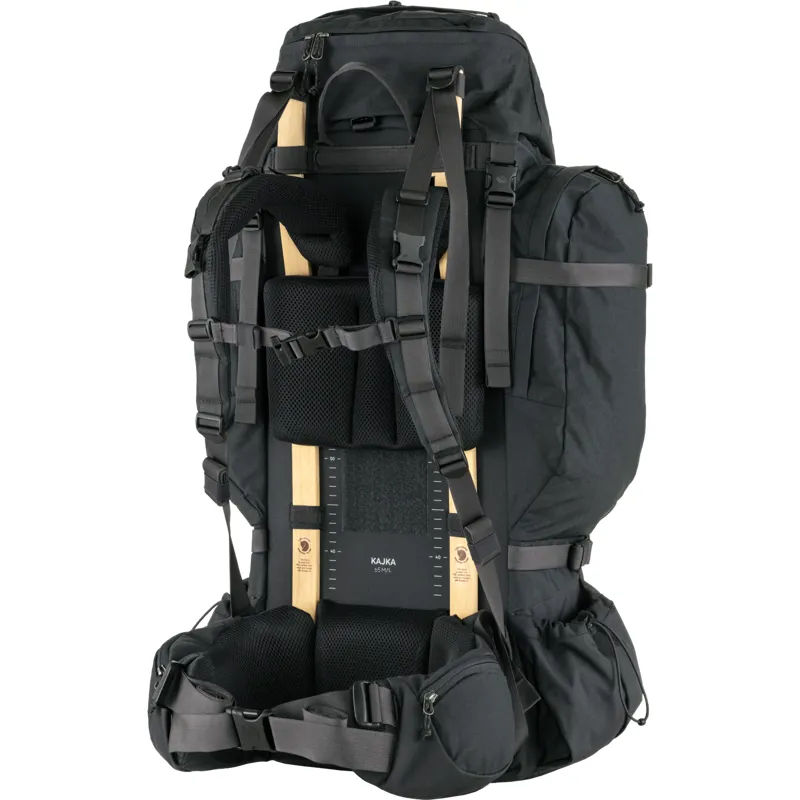
Adjustable Back Systems
Many larger hiking and trekking backpacks feature adjustable back systems that let you adjust the torso length of the pack. This helps position the hip belt correctly and ensures the shoulder straps sit flush without gaps.
- Adjustable systems are particularly useful if:
- You are between sizes
- You carry heavier loads
- Multiple people use the same pack
- You struggle to achieve proper weight distribution
Many trekking-focused Osprey backpacks and Lowe Alpine backpacks feature adjustable torso systems designed for long-distance comfort and load carrying.
Ventilated Back Panels
Ventilated back systems help increase airflow between the backpack and your back, reducing heat build-up and sweat during warmer conditions or sustained climbs.
These systems commonly use:
- Suspended mesh panels
- Airflow channels
- Trampoline-style back designs
Ventilation can significantly improve comfort on summer hikes, though some highly ventilated systems position the load slightly farther from your back than close-fitting mountain packs.
Women-Specific Backpack Fit
Some hiking backpacks are designed specifically around different average body proportions, including shorter torso lengths, narrower shoulder spacing and more contoured hip belts.
Women-specific backpacks can help improve:
- Shoulder comfort
- Chest clearance
- Hip belt positioning
- Overall stability
However, fit always matters more than labels alone. Many hikers are equally comfortable with unisex packs if the torso length and harness shape suit their bodies.
Several Osprey backpacks and Lowe Alpine backpacks are available in dedicated women’s fit backpack versions.
Lightweight Hiking Packs
Lightweight hiking backpacks are designed to reduce fatigue and improve freedom of movement on faster hikes and lower-volume trips.
Compared to traditional trekking packs, lightweight packs often feature:
- Simplified back systems
- Fewer adjustment points
- Lighter frame structures
- Reduced padding
Because of this, achieving the correct fit becomes even more important, especially when carrying heavier loads close to the pack’s capacity.
Many lightweight-focused Rab packs prioritise close body movement and mountain-focused stability for hiking, scrambling and fast-moving days in the hills.
Recommended Walking Rucksacks
A properly fitted rucksack starts with choosing the right pack. Even the best adjustments can’t compensate for a rucksack that’s the wrong size, has an unsuitable back system or isn’t designed for your type of adventure. When buying a new pack, consider your back length, how much gear you carry, and whether you’ll be hiking for a few hours or several days.
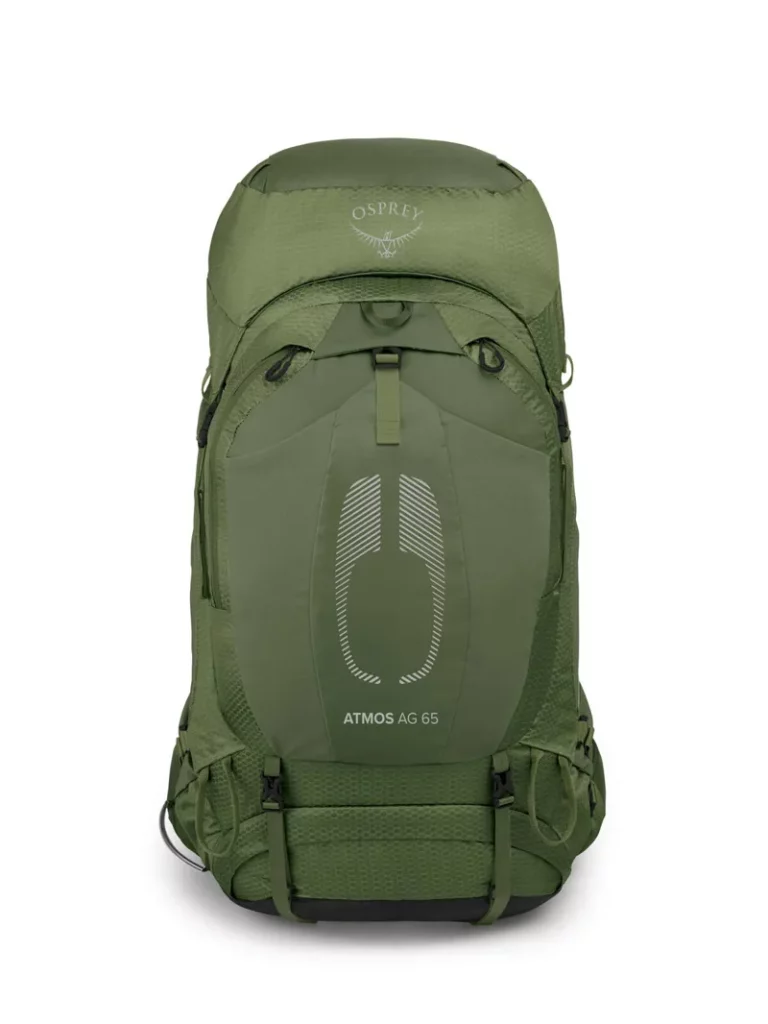
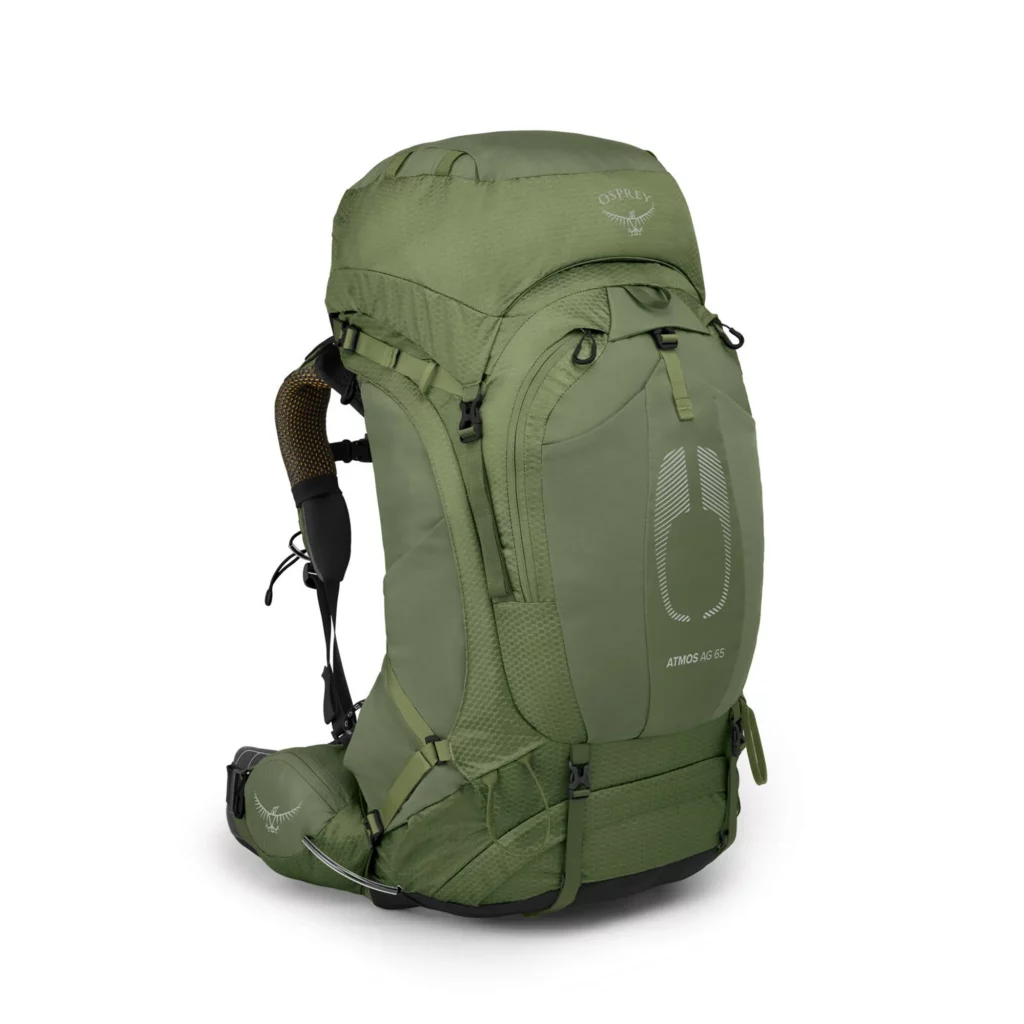
Osprey Atmos AG
Best for: Multi-day hiking and backpacking
The Osprey Atmos AG is one of the most comfortable packs for carrying heavier loads over long distances. Its innovative AntiGravity suspended back system wraps around your back and hips, providing exceptional support and ventilation while reducing pressure points. Combined with a highly adjustable harness and supportive hipbelt, it’s an excellent choice for backpackers and long-distance walkers carrying camping gear.
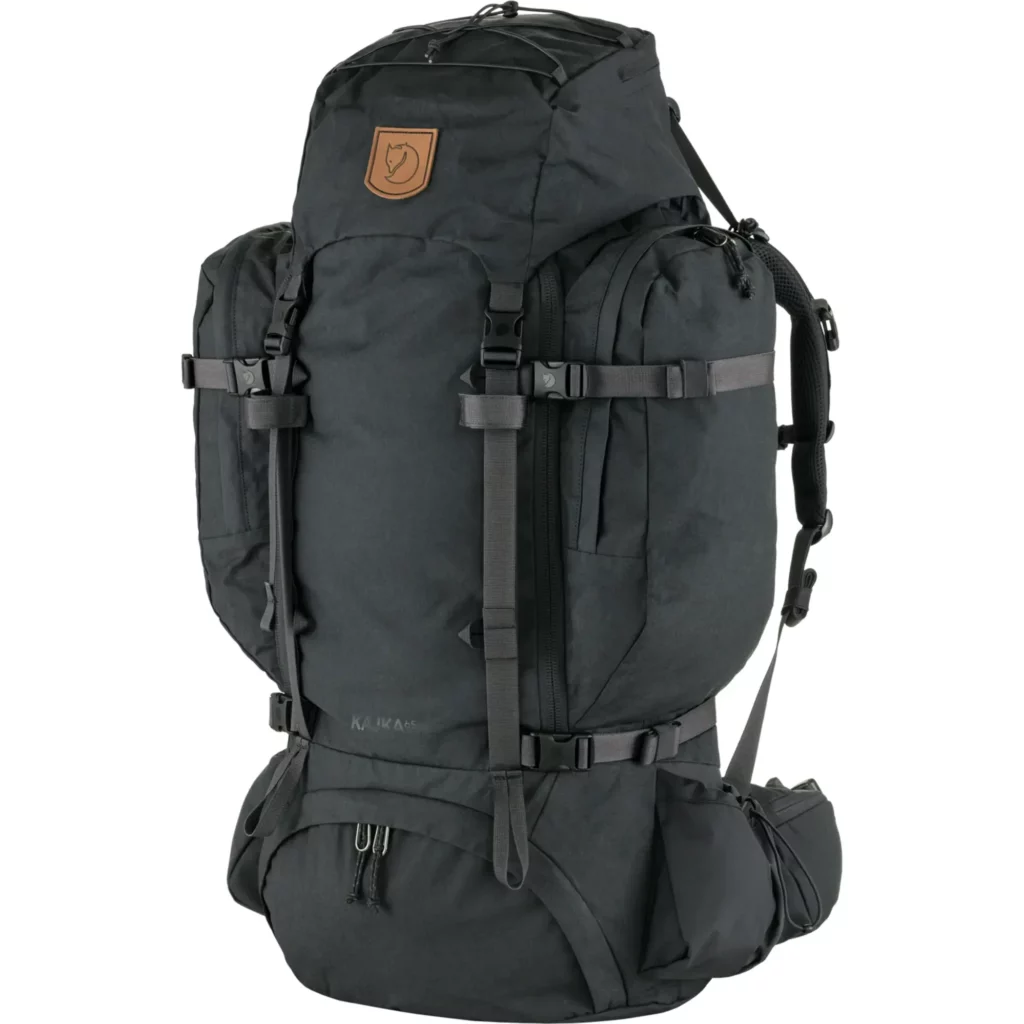
Fjällräven Kajka
Best for: Heavy loads and extended trekking
If you’re planning multi-day expeditions or carrying larger loads, the Fjällräven Kajka offers outstanding load transfer and long-distance comfort. Its adjustable carrying system helps achieve an excellent fit, while the robust construction is built to withstand years of trekking in demanding environments.
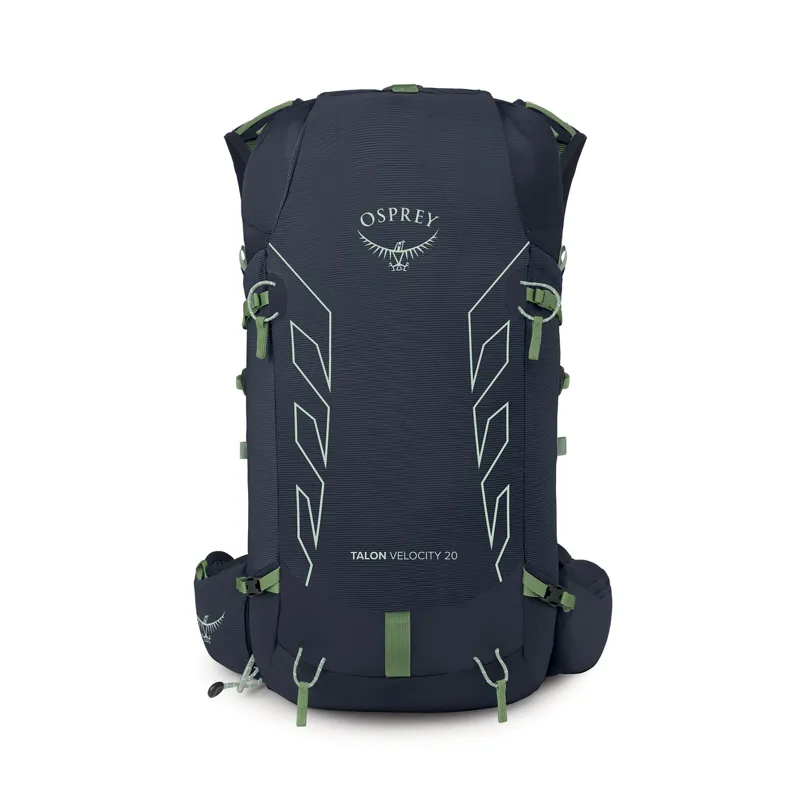
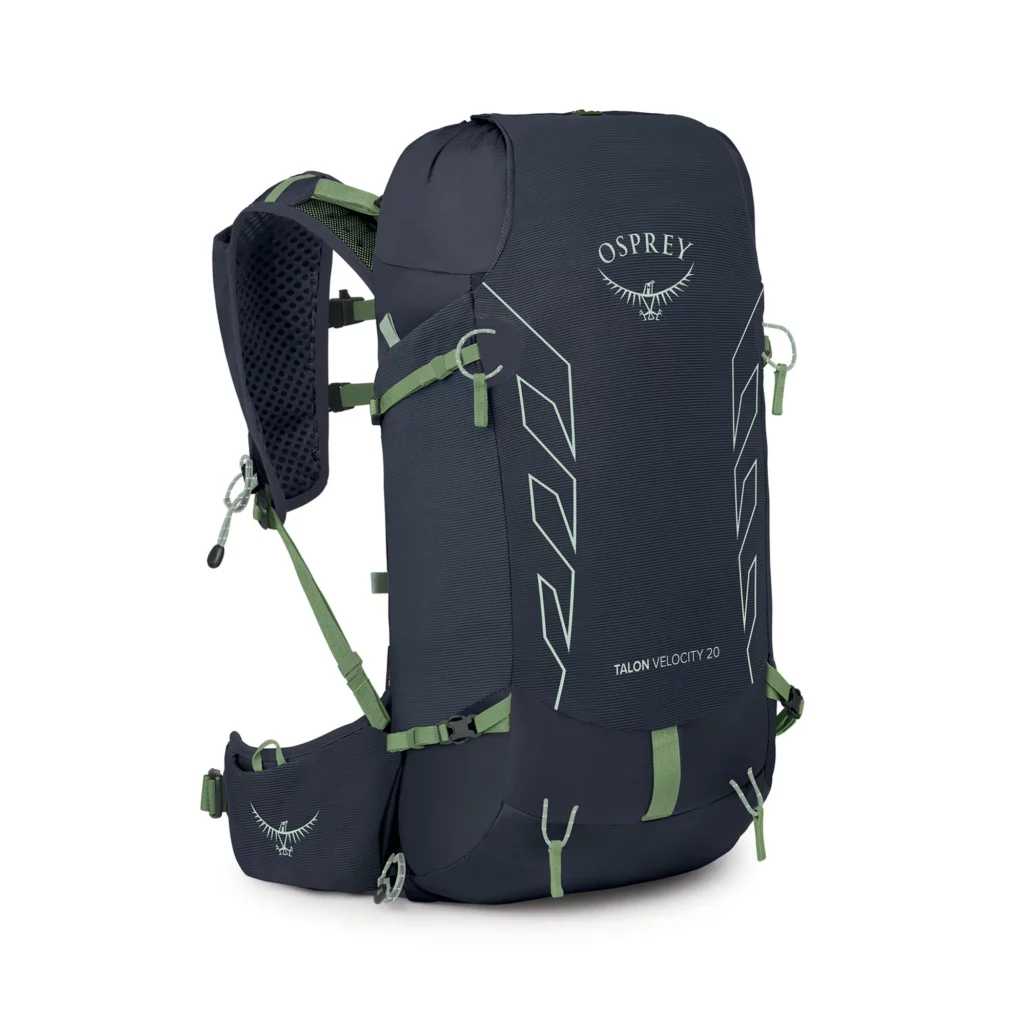
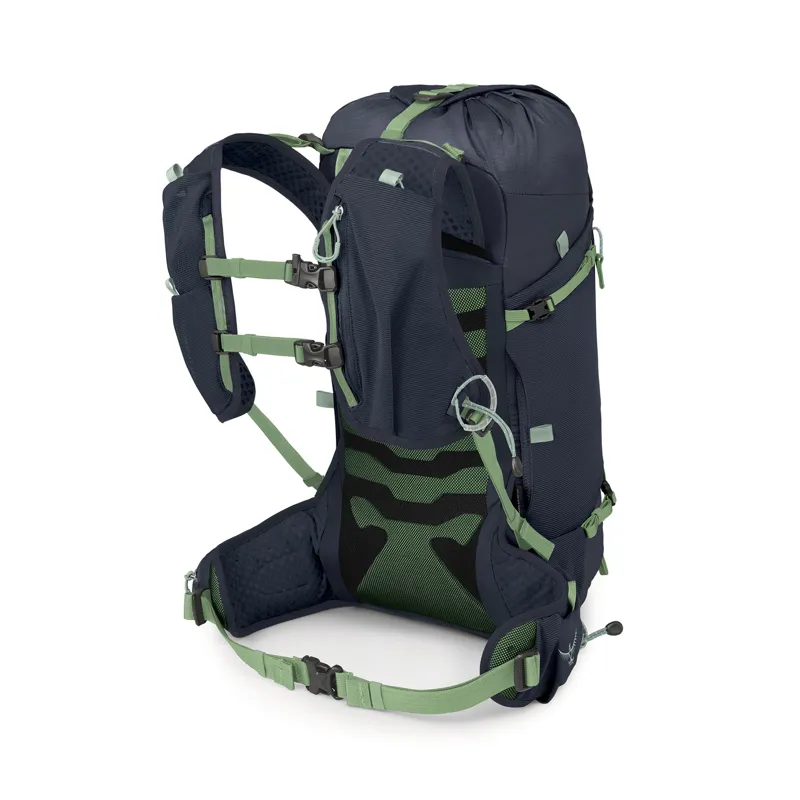
Osprey Talon & Tempest
Best for: Fast hiking and lightweight adventures
The Osprey Talon and Osprey Tempest are lightweight, versatile rucksacks designed to move with you on the trail. Their adjustable back system, close-to-body fit and supportive hipbelt provide excellent comfort for day hikes, fastpacking and lightweight mountain adventures.
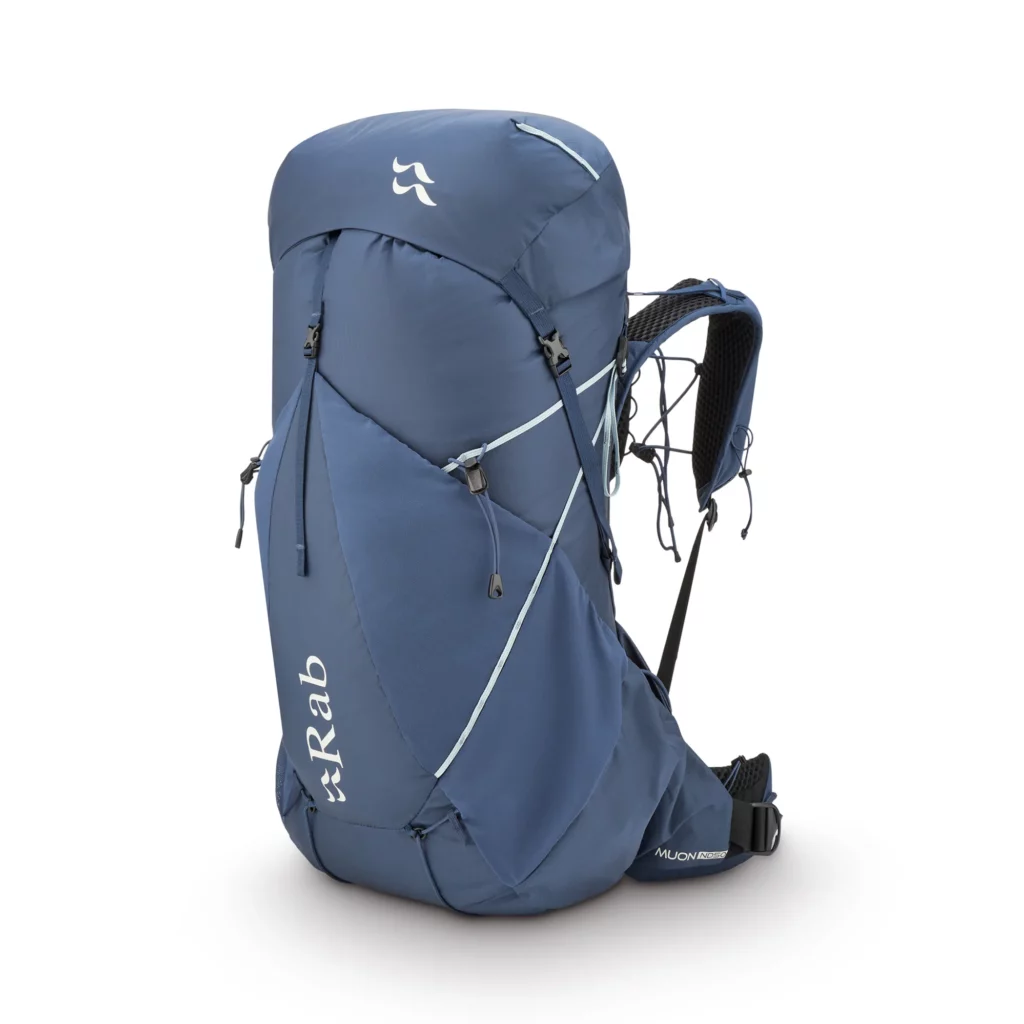
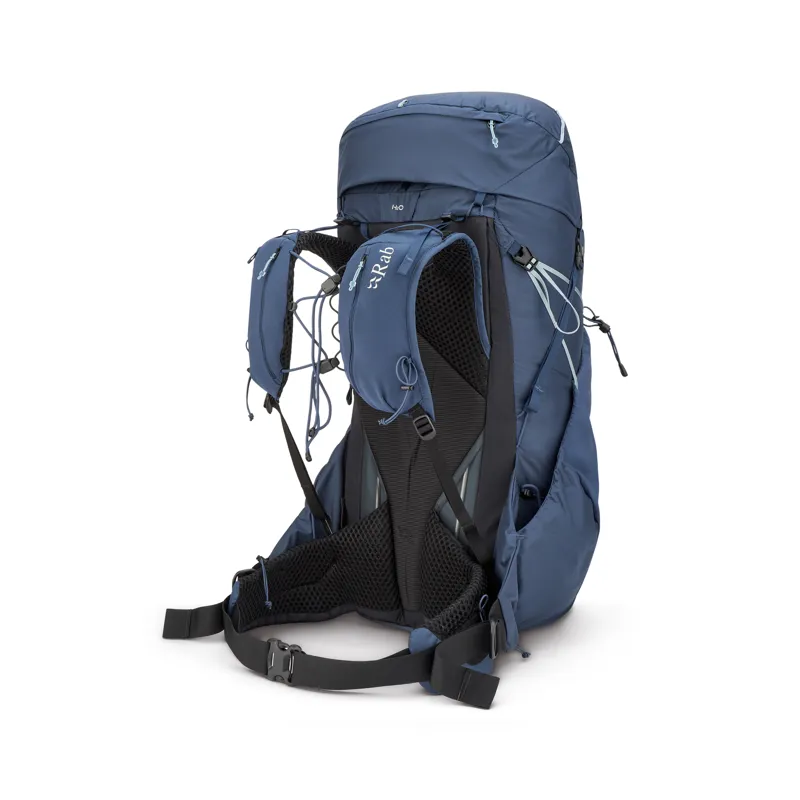
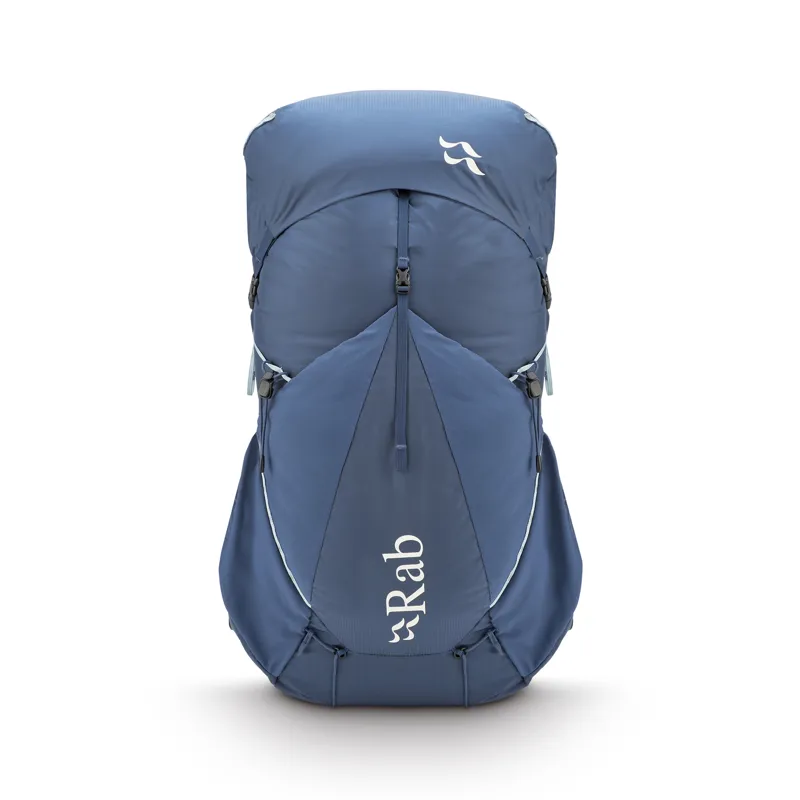
Rab Muon
Best for: Lightweight backpacking
If you’re looking to reduce pack weight without sacrificing comfort, the Rab Muon is an excellent option. Designed for lightweight backpacking, it combines a supportive carrying system with a streamlined design that remains comfortable over long distances while keeping unnecessary weight to a minimum.
Looking for the Right Rucksack?
Browse our collection of Walking Rucksacks to find packs for everything from short countryside walks to multi-day mountain adventures. If you already have a favourite brand, explore our ranges of Osprey Rucksacks and Fjällräven Rucksacks, each offering different carrying systems and features to suit a variety of activities.
Not sure which pack is right for you? Visit our Rucksack Knowledge Centre for expert buying guides, packing tips and advice on choosing the best rucksack for hiking, backpacking and everyday outdoor use. Whether you’re buying your first hiking pack or upgrading for your next adventure, you’ll find everything you need to make the right choice.
Common Issues When Fitting a Backpack (And How to Fix Them)
Even when following the correct steps to fit a backpack, some common issues can still arise that make your pack feel uncomfortable or ineffective. Let’s go over the most common problems and how you can resolve them to ensure a comfortable and secure fit.
| Backpack Problem | Likely Cause | Quick Fix |
| Shoulder pain | Hip belt too loose | Tighten the hip belt so more weight sits on your hips |
| Pack pulling backwards | Weight too far from your back | Tighten load lifters and compression straps |
| Hip belt slipping down | Incorrect torso length or loose fit | Adjust the back length and retighten the hip belt |
| Shoulder strap gaps | Back length too long | Shorten the backpack’s back system |
| Shoulder straps digging into the neck | The chest strap is too tight or has a poor strap shape | Loosen and reposition the sternum strap |
| Lower back discomfort | Poor weight distribution | Pack heavier items closer to your spine |
| The back is getting too hot and sweaty | Limited airflow behind the pack | Loosen tensioners slightly or use a ventilated back panel |
| The pack feels unstable on uneven terrain | Loose compression straps | Tighten side compression straps to stabilise the load |
| Shoulder pressure on long hikes | Too much weight on the shoulders | Transfer more load onto the hips using the hip belt |
| Hip belt rubbing or chafing | Incorrect belt position | Reposition the belt directly over the iliac crest |
1. Backpack Sitting Too Low on Your Back
The Issue: If your backpack is hanging too low on your back, it can put unnecessary strain on your lower back and shoulders, making it uncomfortable to carry, especially on long hikes.
The Fix: First, adjust the hip belt to ensure it sits snugly on your iliac crest (top of your hips). The weight of the pack should sit on your hips, not your shoulders. Then, tighten the shoulder straps to bring the pack closer to your back, but don’t lift the pack off your hips. If the shoulder straps are still too low, you may need a pack with an adjustable back length or a different size.
2. Shoulder Straps Digging into Your Neck
The Issue: Shoulder straps that are too close together can dig into your neck, causing discomfort and even pain over time. This is a common issue for people with broader shoulders.
The Fix: Adjust the chest strap to pull the shoulder straps away from your neck. Move the chest strap higher or lower on your chest until the shoulder straps sit comfortably on the outside of your shoulders. If this doesn’t fix the problem, you may need a backpack with more anatomically designed shoulder straps.
3. Backpack Pulling You Backward
The Issue: If the weight of your pack feels like it’s dragging you backwards, it’s a sign that the load is too far away from your body. This can lead to poor posture and back strain.
The Fix: Tighten the top tensioners. These straps pull the top of the pack closer to your upper back, stabilising the load. Ensure that the weight inside the pack is well-balanced, with heavier items packed closer to your spine. You can also tighten the side compression straps to bring the load closer to your centre of gravity, reducing the backward pull.
4. Hip Belt Sliding Down
The Issue: If the hip belt keeps sliding down while you hike, it can lead to improper weight distribution and cause shoulder strain, as your shoulders end up bearing more of the load than they should.
The Fix: First, make sure the hip belt is sitting correctly on your iliac crest. If you’ve got it positioned right and it’s still slipping, try tightening it further. Sometimes, belts can slide if they’re not snug enough. If that doesn’t help, it could be a sign that your pack’s back length is too long for your torso, so consider adjusting the back system if possible.
5. Excessive Pressure on Your Shoulders
The Issue: If you’re feeling too much weight or pressure on your shoulders, it’s a sign that your hips aren’t carrying enough of the load or the pack isn’t sitting properly.
The Fix: Start by tightening the hip belt to shift most of the weight to your hips (around 70%). Then, adjust the shoulder straps so they’re snug but not bearing the full weight of the pack. If the pressure persists, double-check the back length of your pack; an incorrect back length can misplace the weight distribution and overload your shoulders.
6. Shoulder Straps Gapping
The Issue: If your shoulder straps are gapping and not lying flush against your shoulders, this means the pack’s back length is too long for your torso. This can result in uncomfortable weight distribution and cause instability while hiking.
The Fix: Adjust the back length of your backpack. If your pack has an adjustable back system, shorten it so that the shoulder straps sit comfortably on your shoulders without any gapping. If your pack doesn’t have an adjustable back length, you may need to look for one that’s better suited to your torso size.
7. Chest Strap Riding Too High or Too Low
The Issue: If the chest strap is positioned too high, it can restrict your breathing, while a strap too low won’t stabilise the shoulder straps properly.
The Fix: Adjust the position of the chest strap by sliding it up or down the rails until it sits at a comfortable level, ideally across the middle of your chest, just above your sternum. It should keep the shoulder straps in place without restricting movement or breathing.
8. Backpack: Too Hot and Sweaty
The Issue: If your back is getting too sweaty or you feel the pack is retaining too much heat, it could be due to a poor ventilation system or too tight straps, causing the pack to sit too flush against your body.
The Fix: Loosen the top tensioners slightly to create some airflow between the pack and your back. You can also look for packs that feature ventilated back panels, which help increase airflow and reduce heat buildup.
Prefer to Watch Instead?
If you’d rather see the fitting process in action, this video walks you through the key backpack adjustments step by step — including hipbelt positioning, shoulder straps, load lifters and how to fine-tune the fit on the move.
FAQ
The hip belt should be snug but not so tight that it feels restrictive or uncomfortable. The goal is to have about 70% of the pack’s weight resting on your hips. It should sit on your iliac crest (the bony area where you’d naturally place your hands on your hips). If the belt feels loose or is sliding down, tighten it until you feel the load resting comfortably on your hips.![]()
Absolutely! In fact, you may need to make small adjustments throughout your hike, especially if the terrain changes or if you start to feel discomfort. Loosen or tighten the shoulder straps, hip belt, and tensioners as needed to redistribute the weight and maintain comfort. Don’t hesitate to stop and make these adjustments; it’s better than hiking with discomfort.![]()
If you’ve followed all the steps and your pack still doesn’t feel right, it could be due to one of several reasons:
The backpack might not be the correct size or fit for your body.
The load might be unevenly distributed, with too much weight in the wrong areas.
You may need more cushioning or padding on the straps or hip belt.
Try redistributing the weight and adjusting the pack again. If discomfort persists, consider visiting a store for professional help with fitting or investigating different packs that better suit your frame.![]()
You’ll know the back length is right if the shoulder straps sit flush on your shoulders without any gaps, and the hip belt sits snugly on your hips. The connection point of the shoulder straps to the backpack should be around the middle of your shoulder blades. If the straps are too high or low, adjust the back length accordingly.![]()
For heavier loads, make sure the hip belt is taking much of the weight. You’ll want the shoulder straps snug but not too tight. Additionally, tighten the top tensioner straps to bring the weight closer to your body and tighten the side compression straps to stabilise the load. Proper load distribution is key to comfortably carrying heavy packs.![]()
The chest strap keeps the shoulder straps in place and prevents them from shifting or sliding off your shoulders during the hike. It also helps relieve some pressure from your shoulders by evenly distributing weight across your chest. Make sure it’s snug but not too tight, as it could restrict your breathing.![]()
To minimise strain on your back, ensure the pack’s weight is evenly distributed, with most of it resting on your hips. Keep the heaviest items close to your back and centred in the pack. Adjust the top tensioners to keep the load stabilised and avoid overloading your backpack beyond your comfort level.![]()
Yes! On flat terrain, you can loosen the straps a little for more flexibility. On steep ascents or uneven ground, tighten the shoulder straps, hip belt, and compression straps to stabilise the load. This will give you more control and balance while hiking over challenging terrain.![]()
When you’re wearing additional layers, you may need to loosen the shoulder straps and hip belt slightly to accommodate the added bulk. Adjust the pack as needed to maintain comfort and ensure that the weight distribution remains balanced, even with extra clothing.![]()
At Trekitt in Hereford, we offer a dedicated Personal Rucksack Fitting Service where our experienced team can help measure your torso length, adjust backpack straps and back systems correctly, and test packs with realistic weight inside. This can be especially useful for trekking backpacks, multi-day hiking packs and women-specific backpack fits.
You can find more information about Trekitt’s backpack fitting appointments here:
https://www.trekitt.co.uk/pages/appointments/
Leave a Reply