How to choose the right shoe for your feet
Here at Trekitt we know all too well of the difficulties people face when purchasing footwear online. The hardest part is being confident that you have picked the correct fitting footwear, so that is what we will cover in this blog. In our Hereford shop we offer a professional boot fitting service where we assess your feet, find a selection of boots that match you foot shape and most importantly we make sure that they are comfortable. This is easy to do in the shop, where we have access to the right tools, the option of letting you try on as many styles as you like and a knowledgeable member of staff that can communicate directly with you regarding your needs. But let’s not dwell on what you don’t have; instead we shall teach you how to How to Fit Your Footwear at Home using some common household objects.
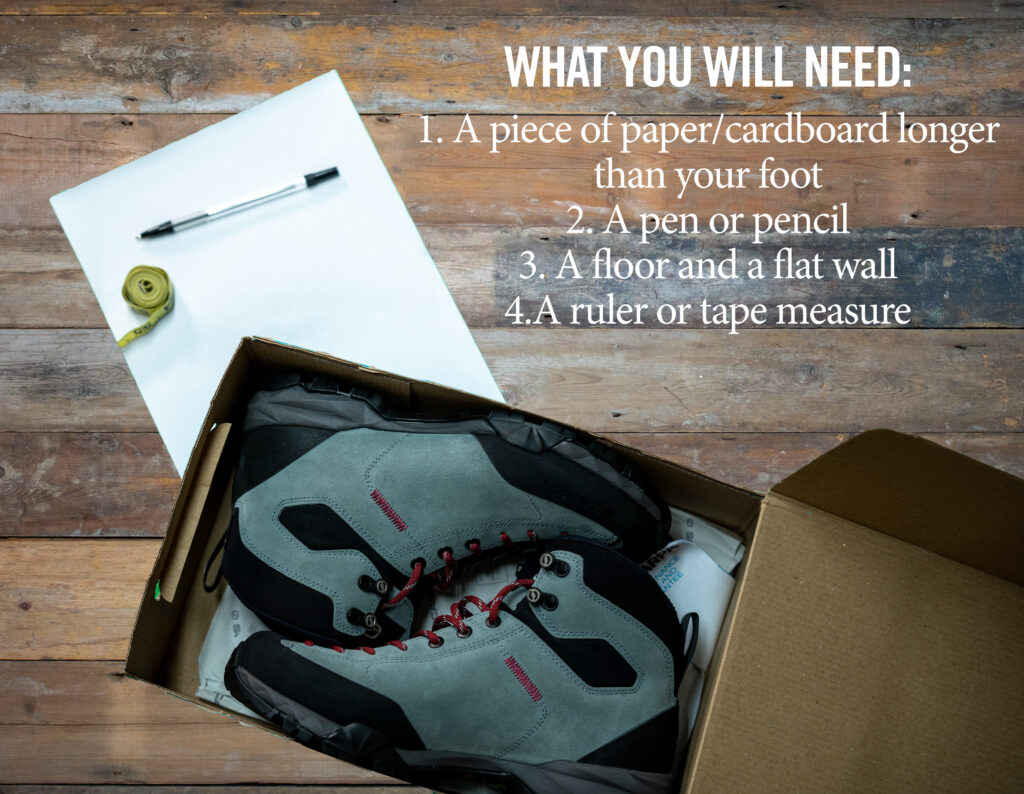
How to measure your feet at home: Step by step
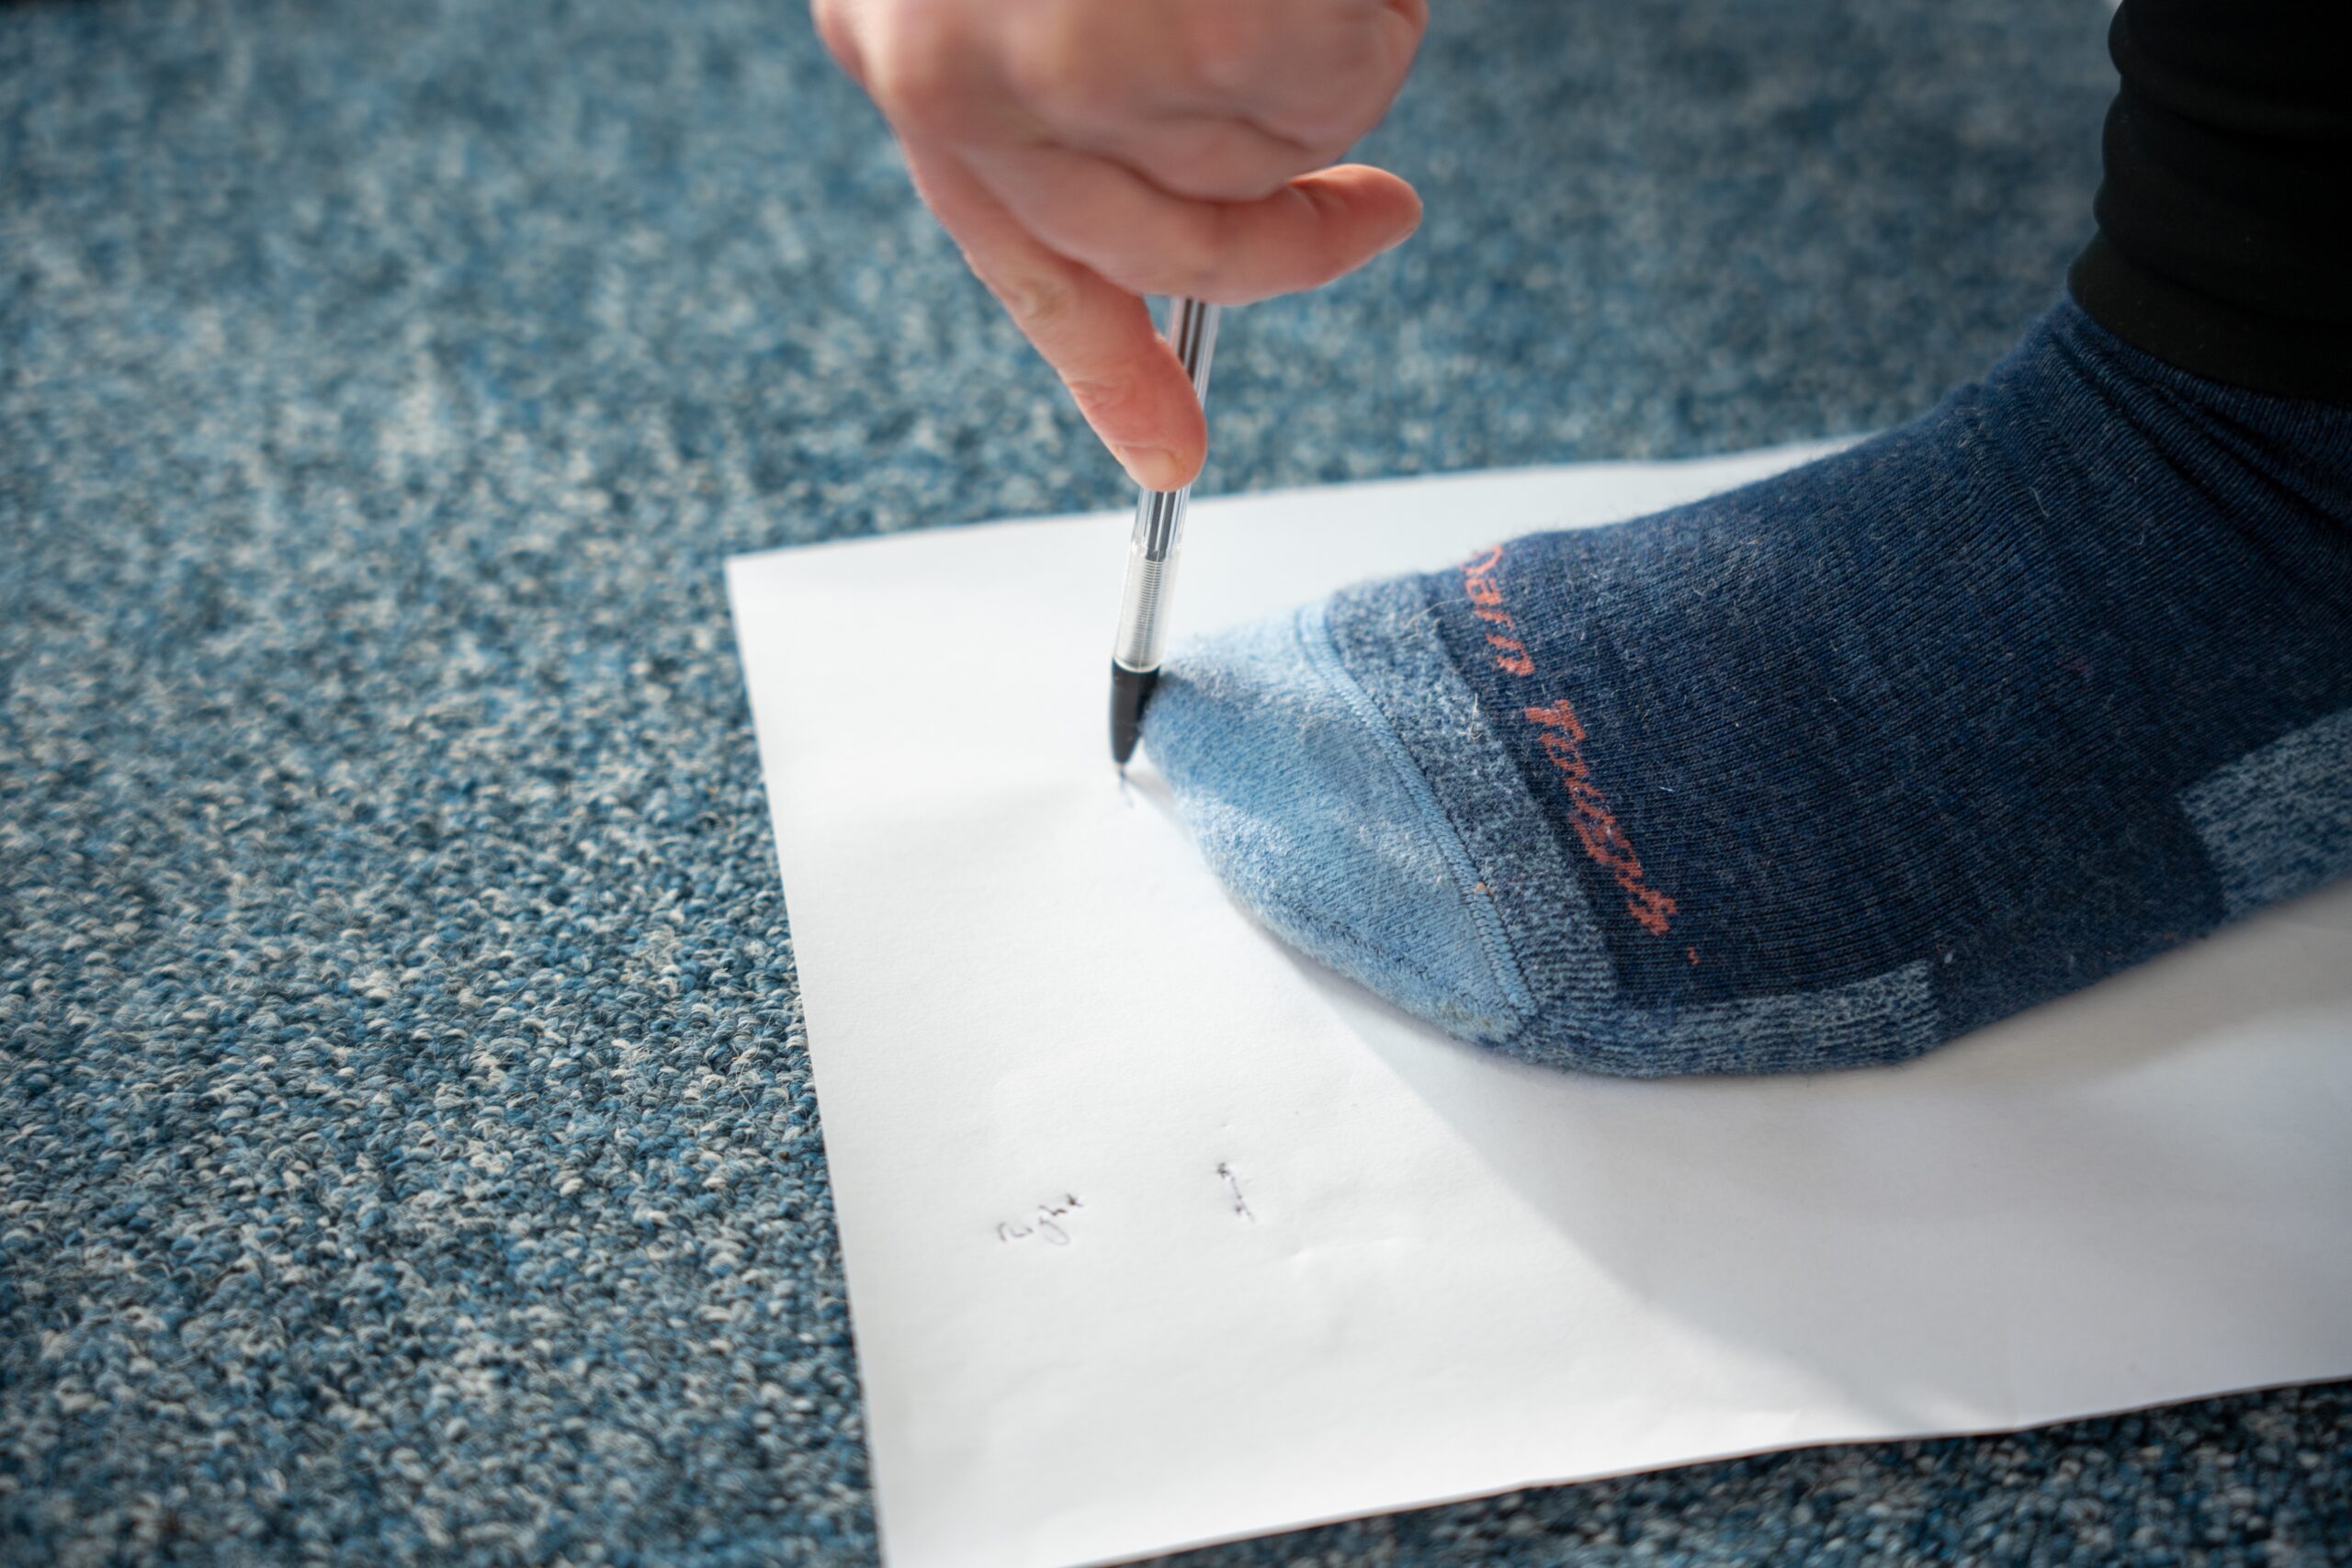
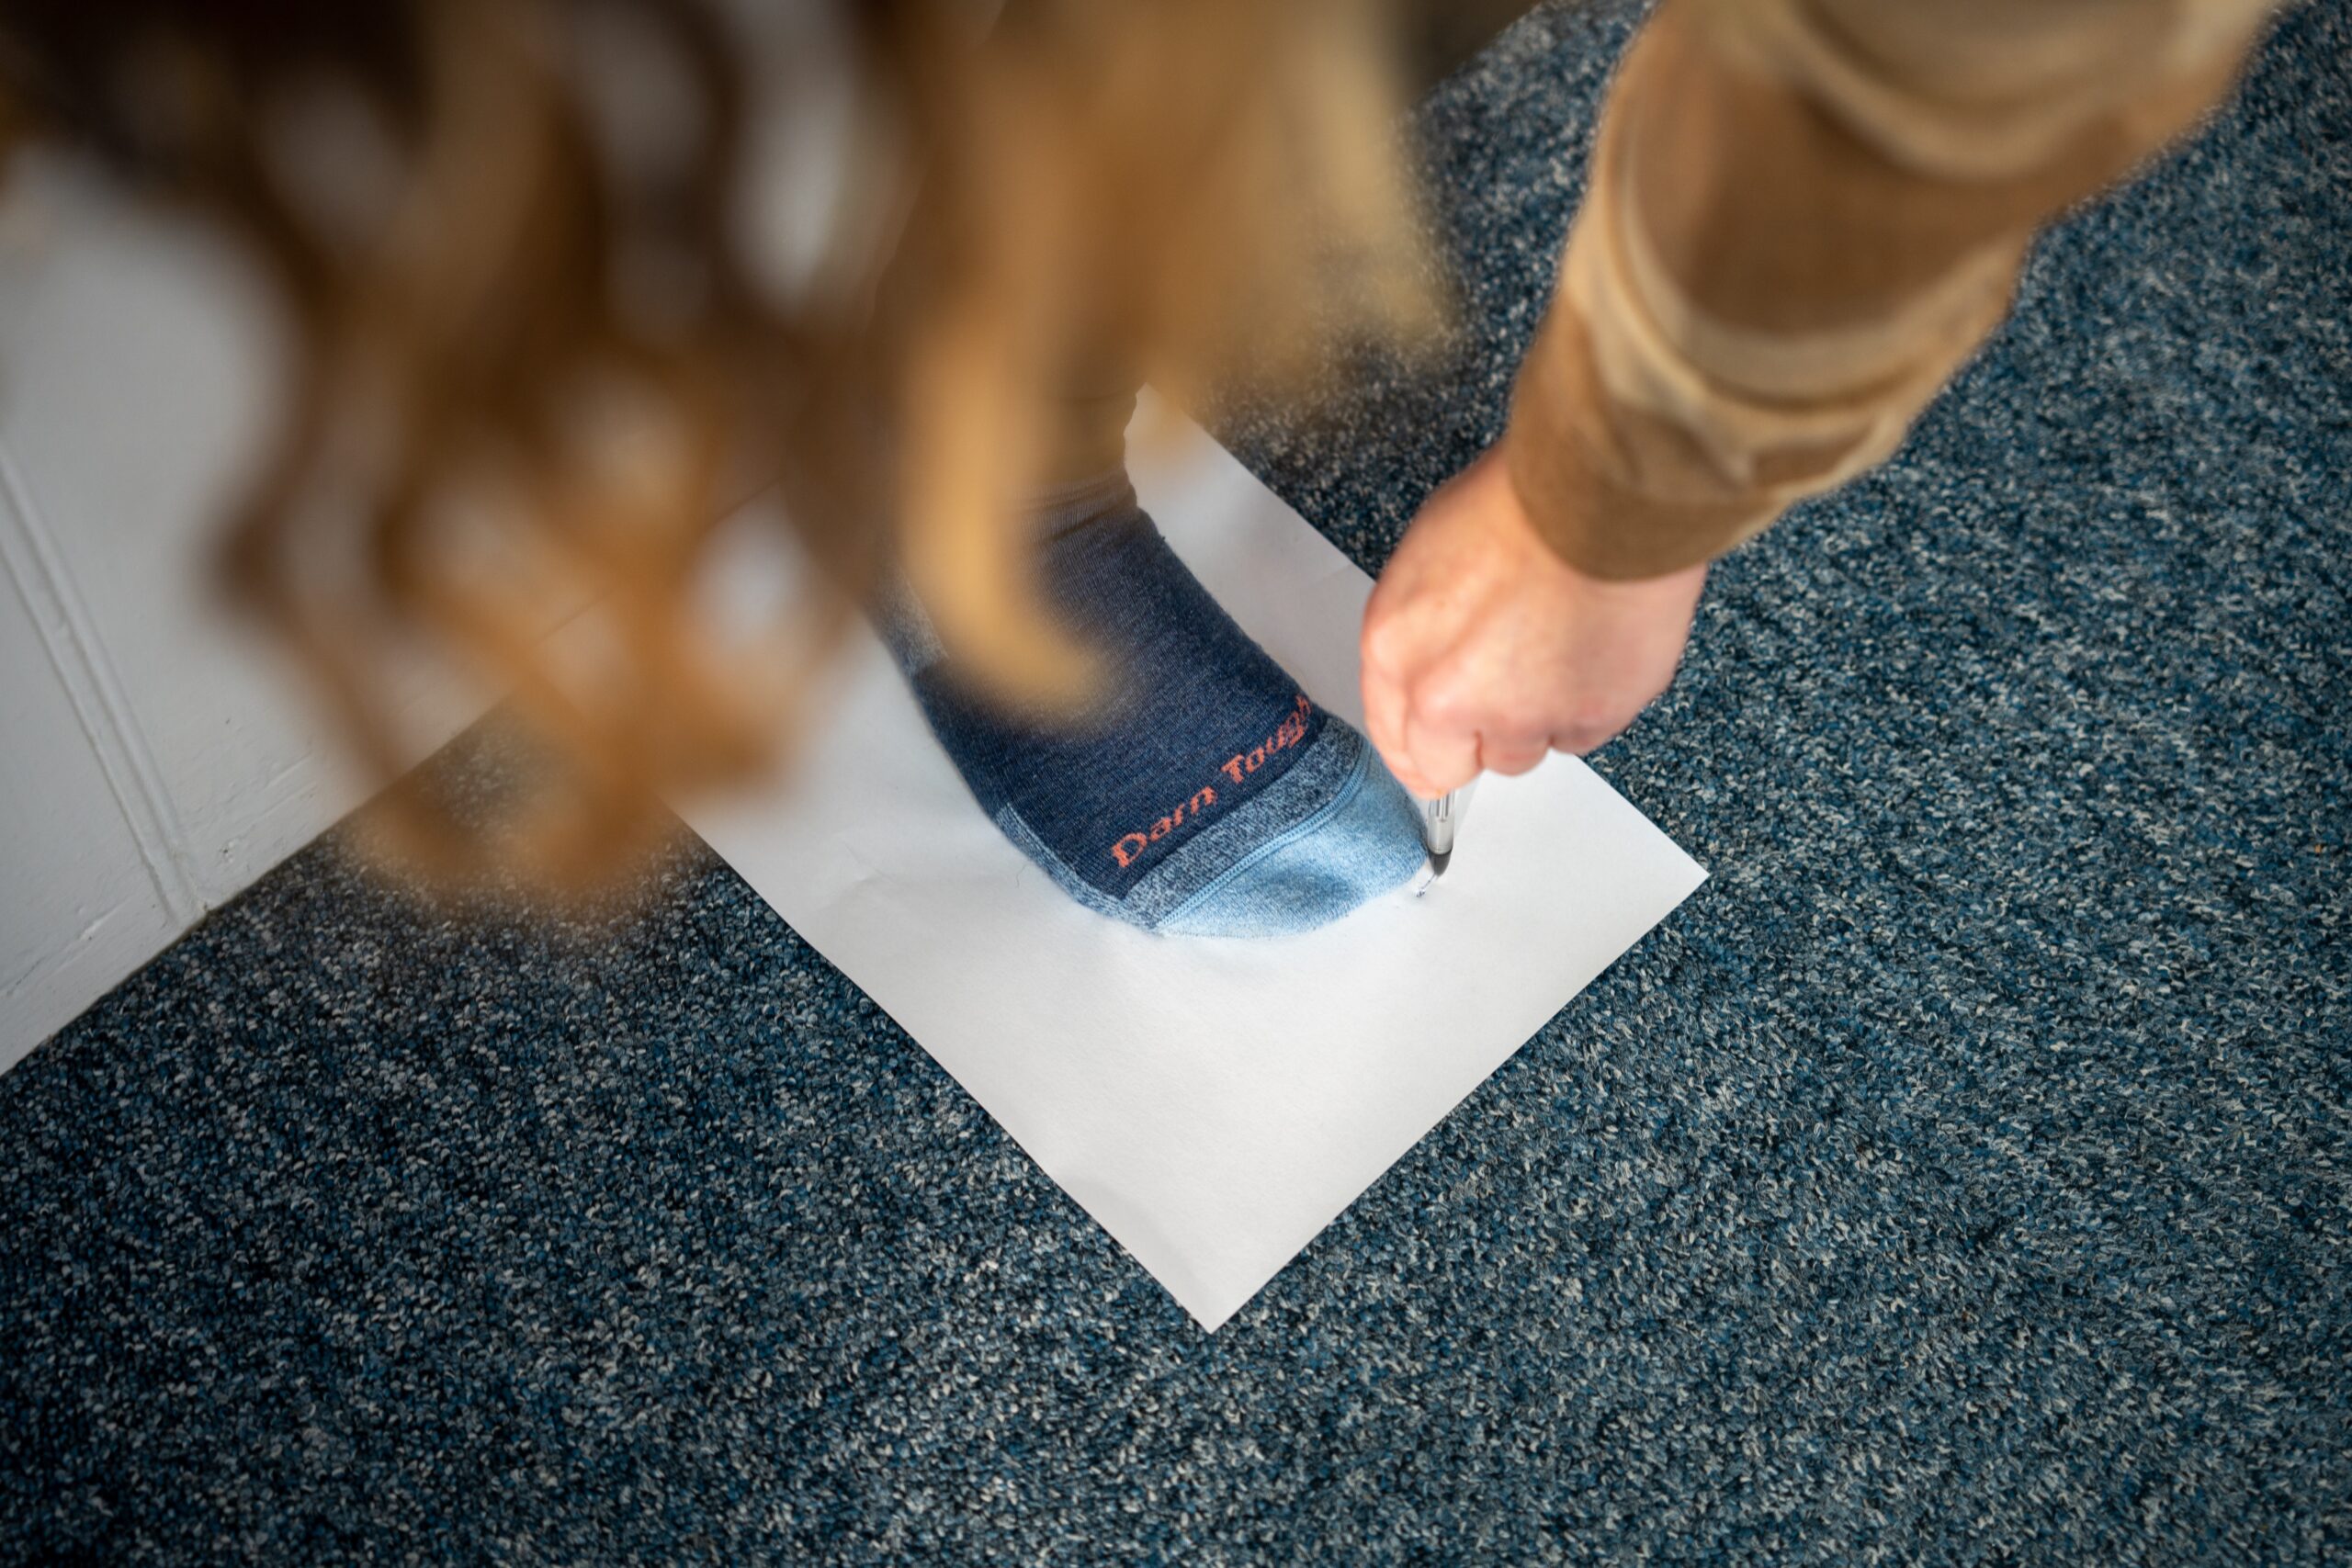
- Put on the socks that you intend to use with the footwear you have selected .
- Place the paper/cardboard on the floor with one end flush against a wall.
- Stand on the paper/cardboard with your heel pressed firm against the wall and your foot pointed forward in line with your knee.
- Draw a line just in front of your big toe.

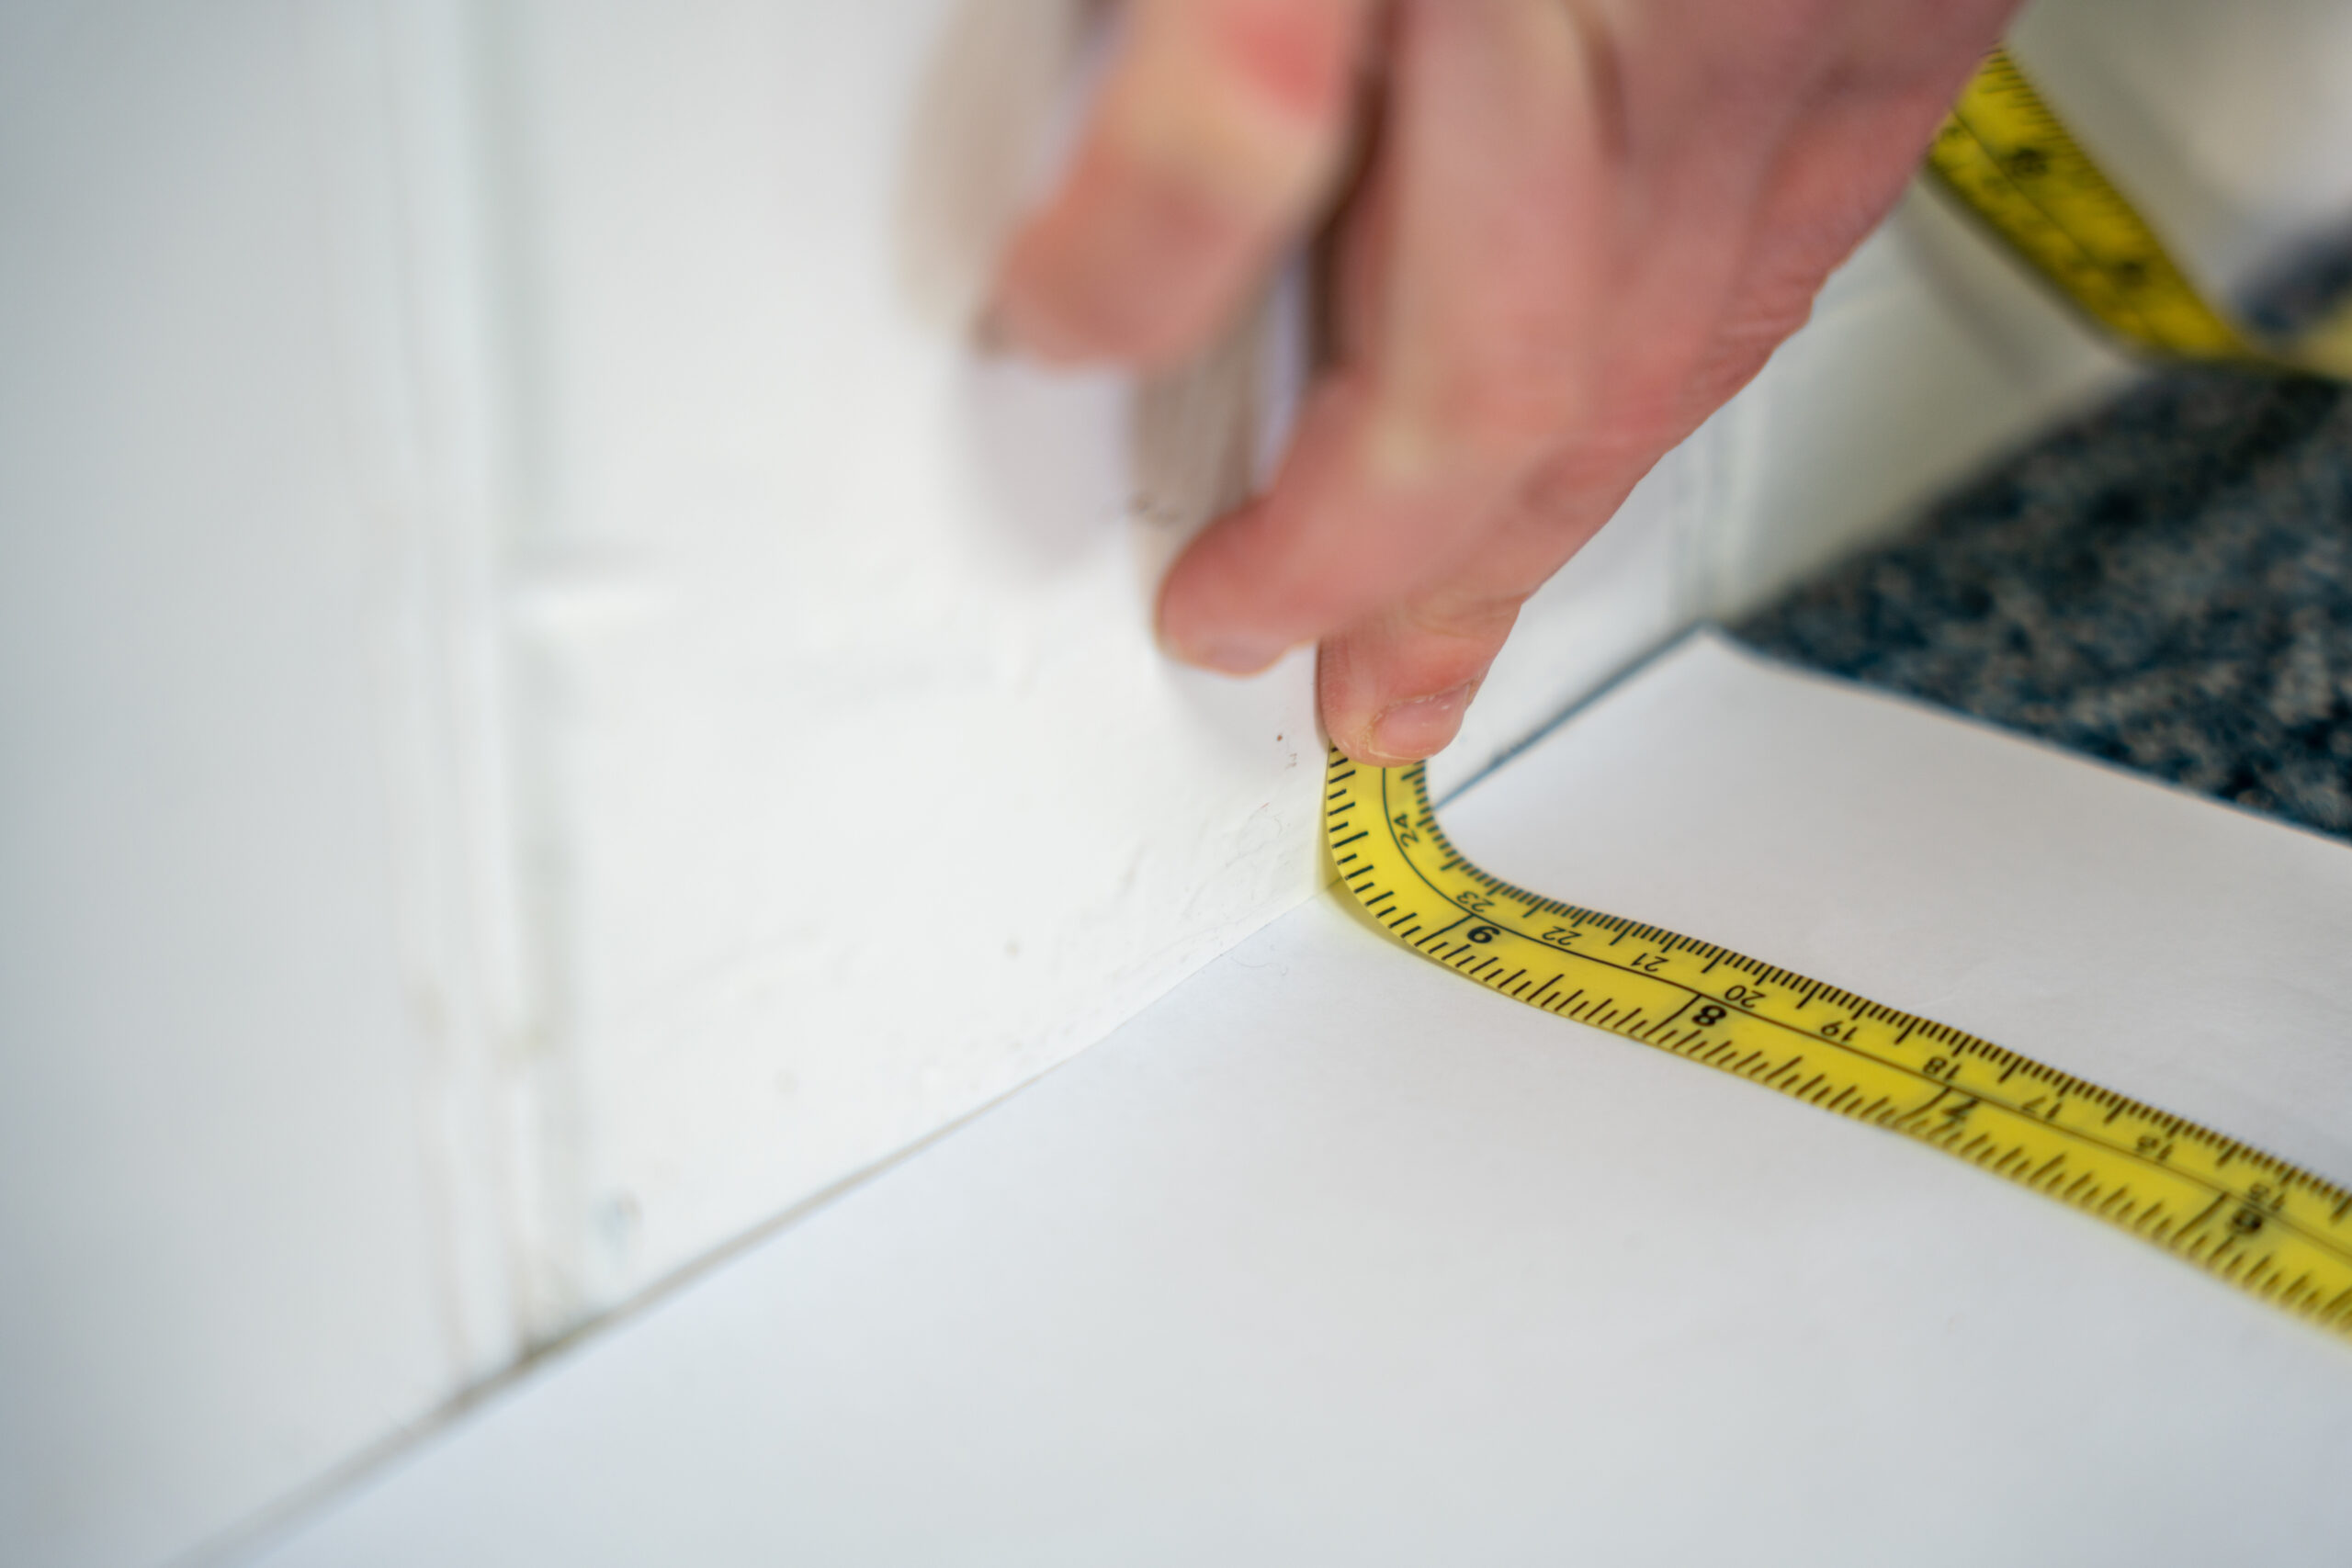
5. Measure the distance from the wall edge of the paper to the line you drew.
6. Repeat the process for the other foot.
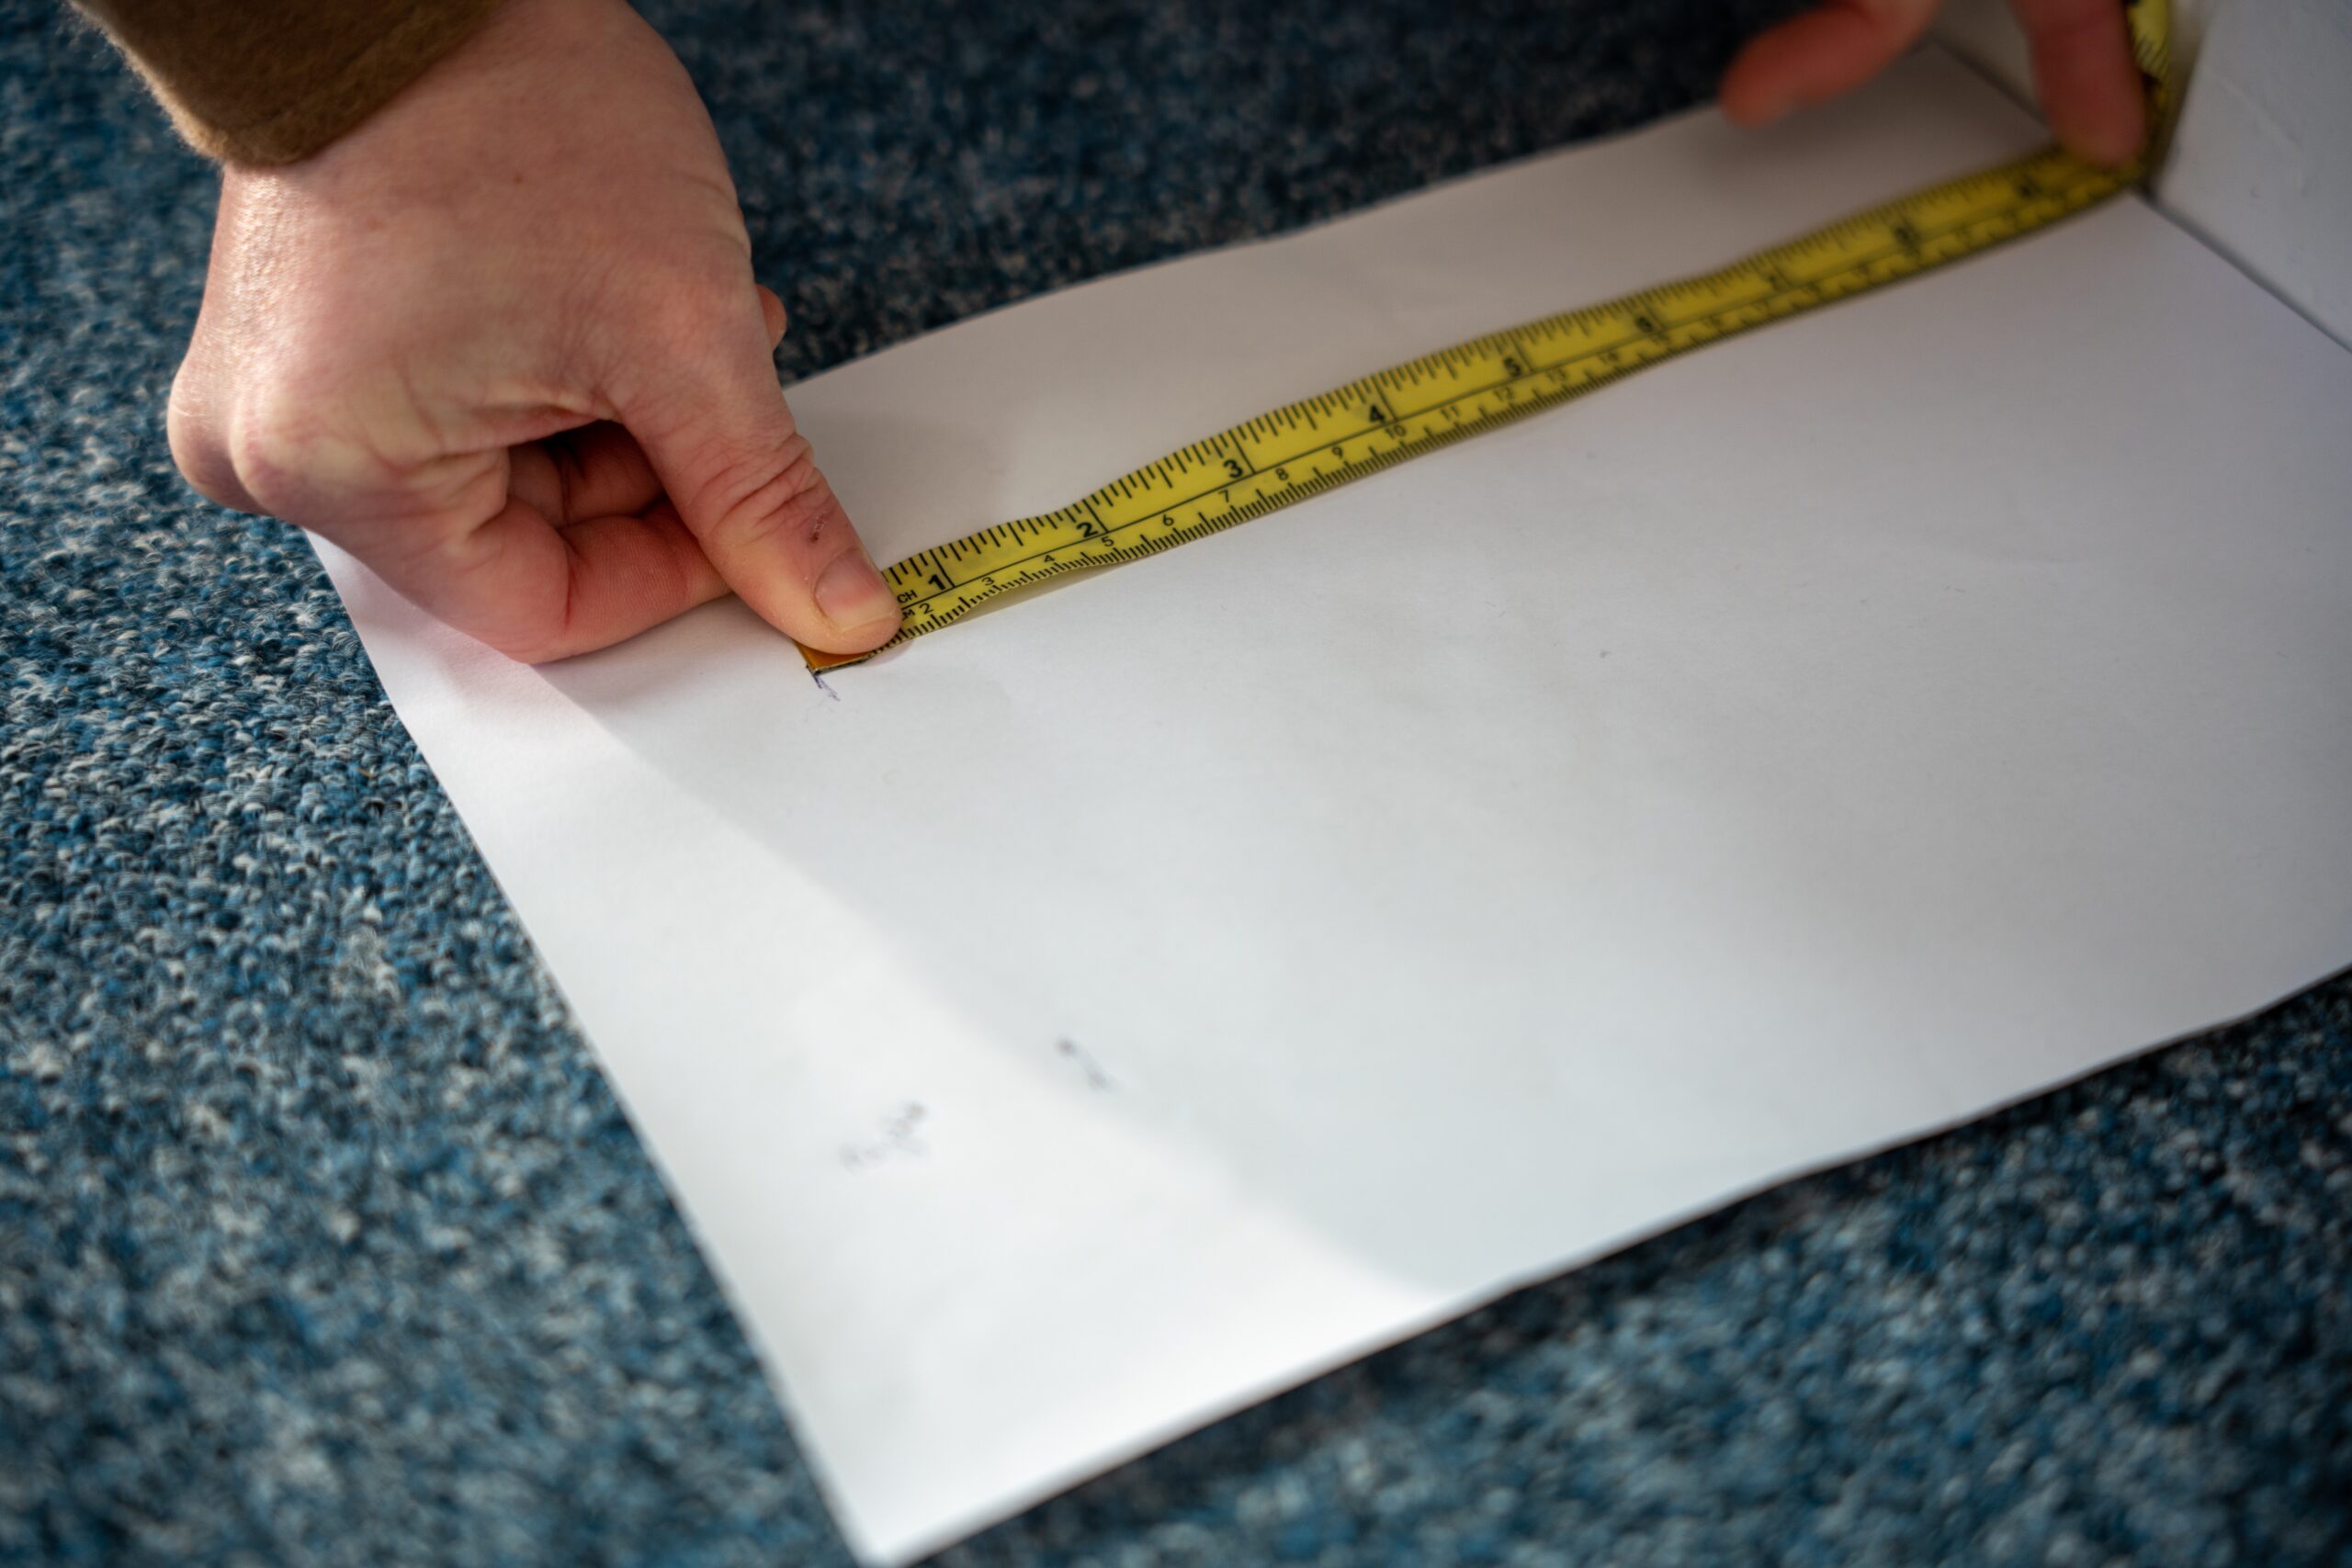

7. Finally, check the longer of the two measurements against the table below to find your size. (To reassure you, not everyone has the same size feet measurements).
Your measurement | UK Size | EU SIze |
|---|---|---|
22 | 3 | 35 |
22.1 | 3.5 | 36 |
22.5 | 4 | 37 |
22.9 | 4.5 | 37 |
23.3 | 5 | 38 |
23.7 | 5.5 | 38 |
24.1 | 6 | 39 |
24.5 | 6.5 | 39 |
24.9 | 7 | 40 |
25.4 | 7.5 | 40 |
25.8 | 8 | 41 |
26.2 | 8.5 | 41 |
26.6 | 9 | 42 |
27 | 9.5 | 42 |
27.4 | 10 | 43 |
27.8 | 10.5 | 43 |
28.3 | 11 | 45 |
28.8 | 11.5 | 45.5 |
29.2 | 12 | 46 |
29.6 | 12.5 | 47.5 |
30 | 13 | 48 |
30.4 | 13.5 | 49 |
NOTE: The above table is only a guide. Manufacturers don’t like to make it easy as every single one of them strays from the measurements above.
Once you have received your chosen footwear please take the time to do these simple tests to check they are actually the right size and that they fit the rest of your foot correctly.
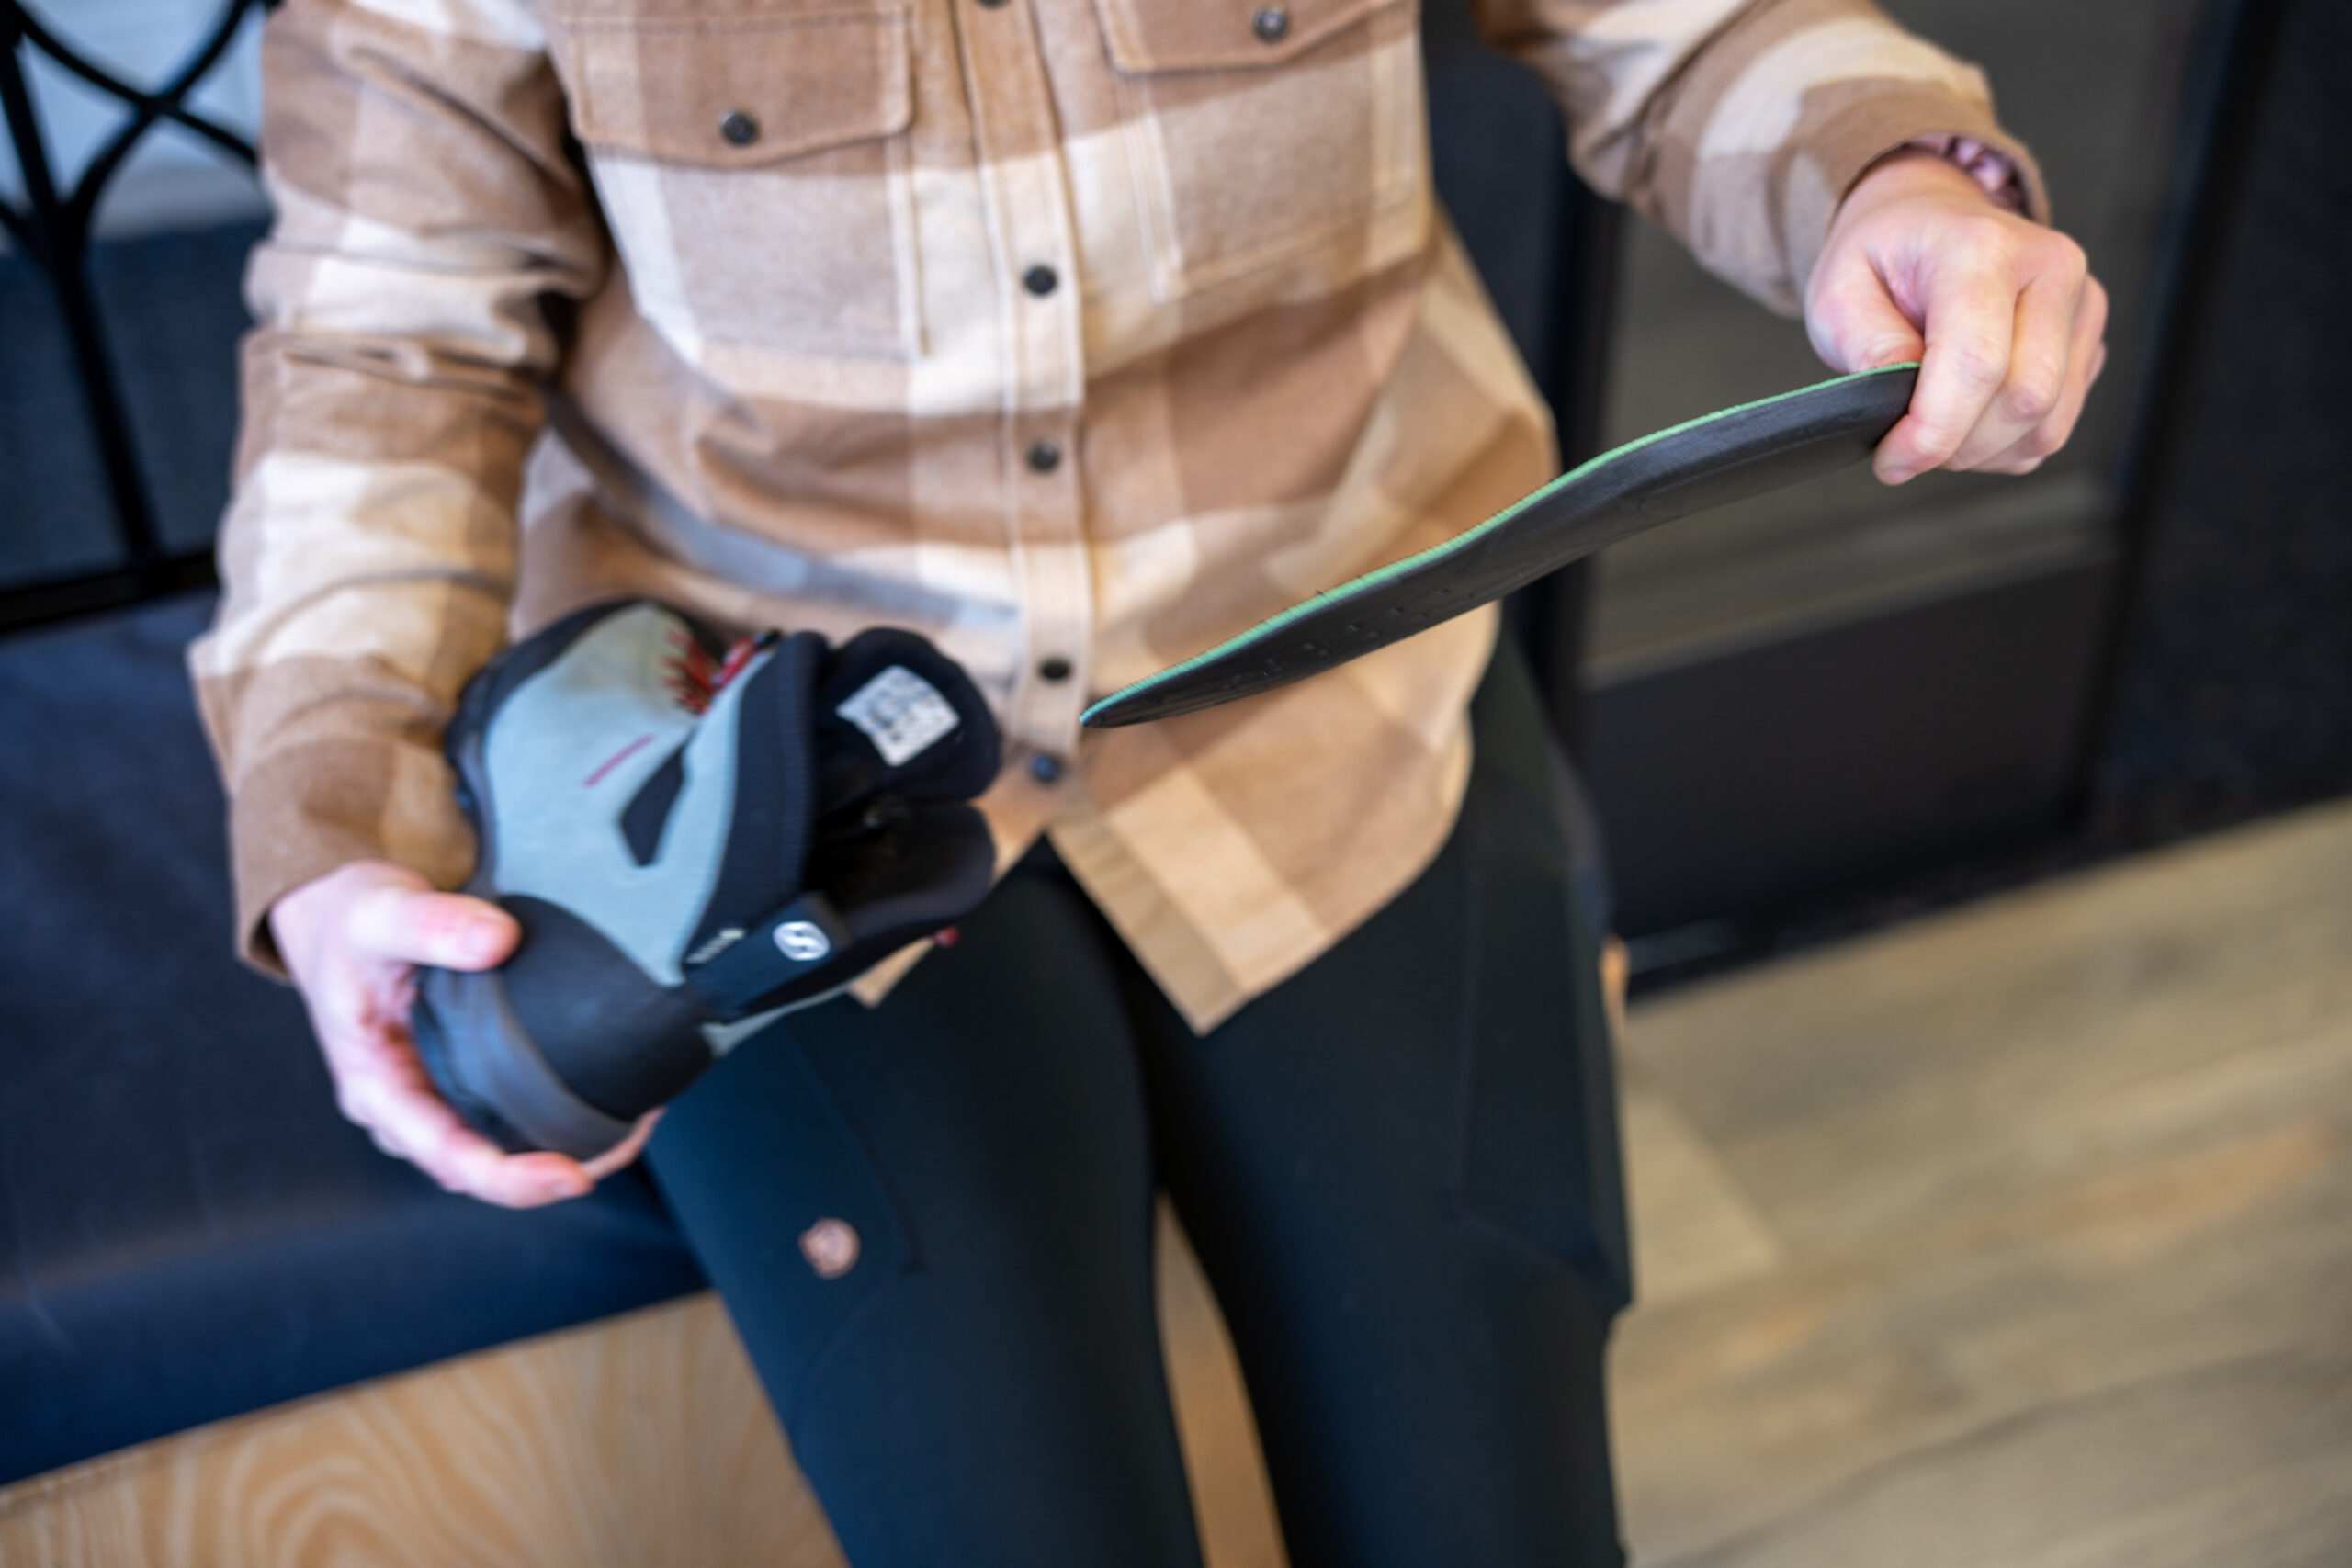
How much room should be in the toe of a shoe: The Length Test
- Whip out the removable footbed from the boots.
- Put them on the floor about shoulder width apart.
- With your socks on, stand on the footbeds making sure that your heels are right to the back of the heel cup.
- You should now be able to see approximately 2 cm (about an index fingers width) of the footbed poking out in front of your toes.
If you can see this amount of space then you are on the way to making sure that your boots are the correct size. This space in front of your toes at the end of the footbed ensures that you will not stub your toes on the inside of the boot when you descend. If you can’t see this amount of space then it’s a good bet that the boots will be too small.


The Heel Cup Fit Test: Ensuring a Secure and Blister-Free Hike
When it comes to a guide on how to fit your footwear at home it is essential to mention about the heel cup fit test. It will will tell you if the shape of the internal heel cup matches your heel to ensure it holds you securely, especially when ascending steep ground. We are trying to eliminate the dreaded heel blister.
Before you commence this test it is imperative that you have laced the boots correctly.
Heel Placement
Tap your heel so it’s as far back in the boot as possible, being sure to keep your foot at a right angle to your leg at all times during the next few steps.
Forefoot Lacing
Make sure that the laces have no slack in them across the forefoot by starting at the front of the boot and working the slack backwards and to the top. You should just be able to squeeze the end section of your finger under the laces; not easily, but just about.
Upper Lacing
If you are wearing shoes then ensure the last upper part of the lacing is tight, not ‘cutting off your circulation’ tight, but certainly comfortably snug as this will hold your heel back in the heel cup and will reduce any excess slipping (if you are wearing boots, this will be the eyelets that sit just below/inline the ankle).
Use of Lace Hooks
Please also make sure when trying out boots that you use all the lace hooks. Don’t be tempted to leave the top one undone as your foot needs to be held securely right in the back of the boot.
Walking Test
Now that your boots are done up properly stand up on your tiptoes and walk on the spot on the balls of your feet as if you are walking up a steep hill. If your heels lift more than approximately 5mm from the footbed you may need to pull the laces tighter, or the boots may just be the wrong shape for you. Walking up and down the stairs also tends to reveal the dreaded ‘heel slip’.
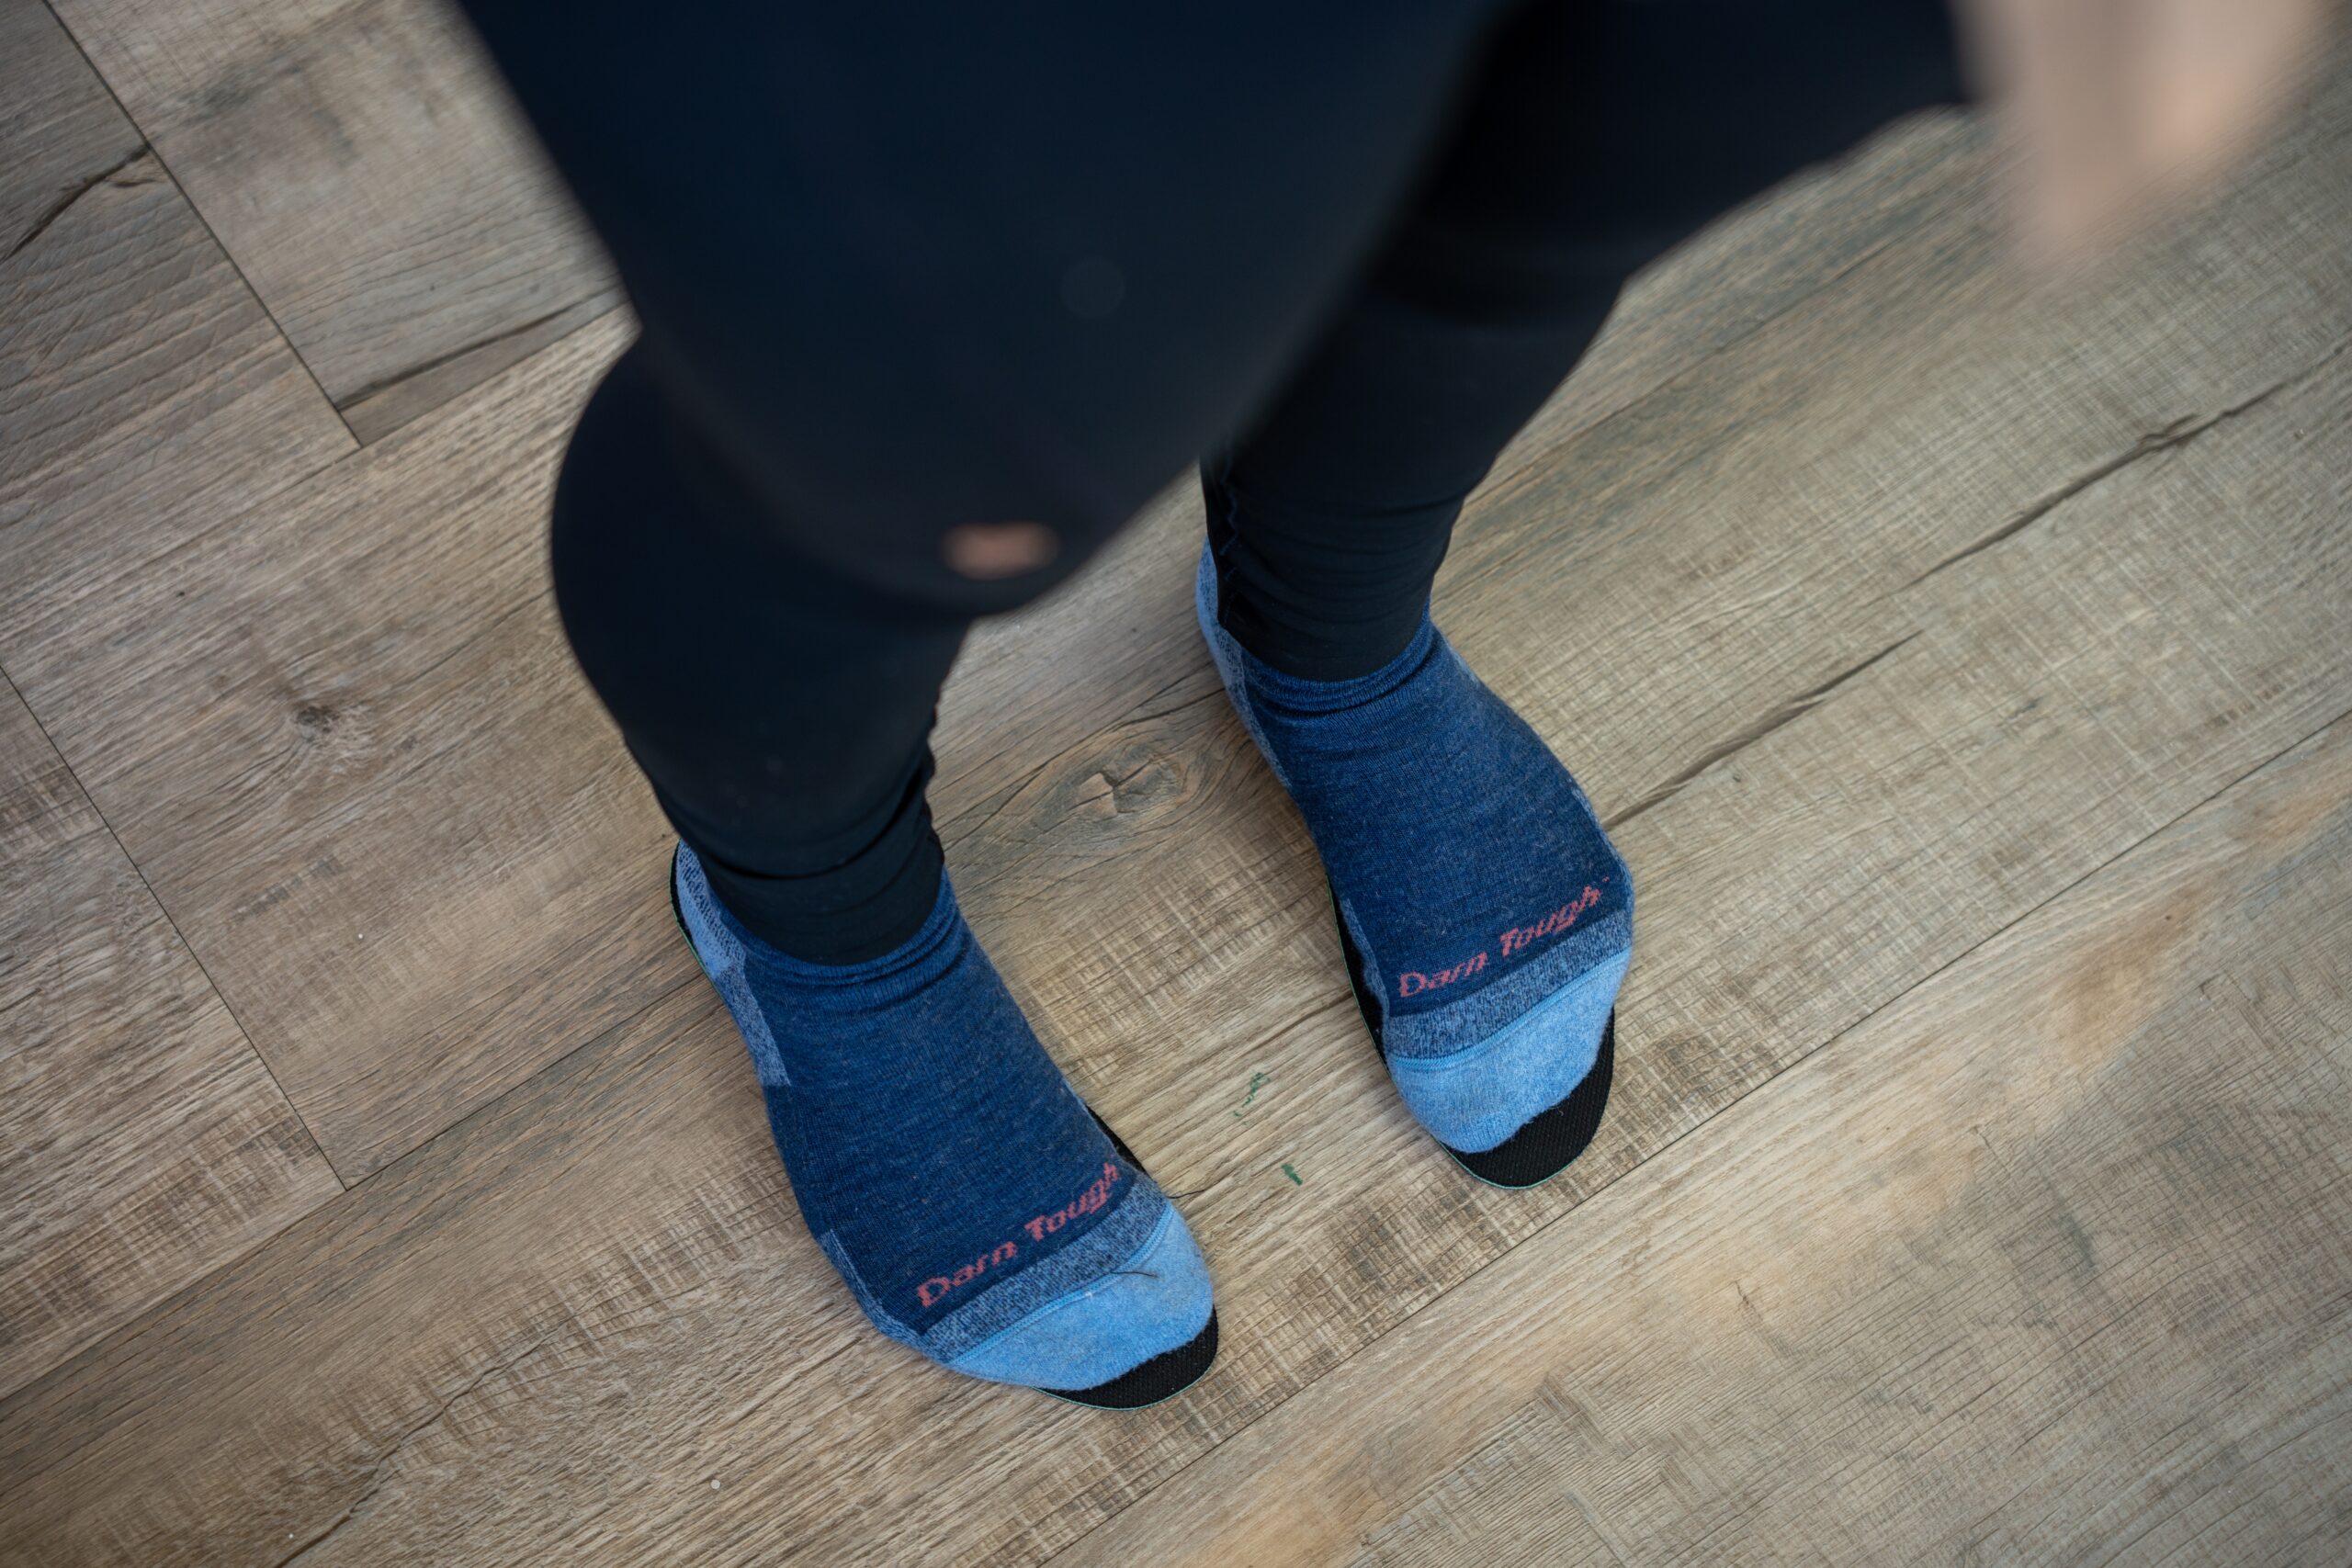
The Toe Wiggle Test
This test is designed to check whether you have enough room around your toes. They need to be in a happy place, not having enough room is definitely not a happy accident. Your toes need plenty of room to wiggle without being squashed together or cramped in from above. However, they don’t want to be swimming around in acres of space either, this will cause friction blisters and stability problems when traversing hillsides. So, with the boots done up properly, walk around your house and make sure that your toes can wiggle freely.
Home Trail Period
At our company, we believe that there is no substitute for actually experiencing a product before making a decision. That’s why we offer our exclusive ‘Home Trial Period’ for our boots, giving you the chance to wear them around your house for an extended period of time to get a true feel for how they fit and perform, before venturing outside. We recommend wearing them as much as possible during this period, at different times of the day, and during different activities such as going upstairs or simply resting. By following the easy-to-understand guidelines from our “How to Fit Your Footwear at Home” guide, you can be confident that you’ll get the perfect fit every time. I f you’re still not completely satisfied with the boots or their fit, we offer a hassle-free return policy.
IMPORTANT NOTICE:
As part of our home trial period policy, we kindly request that the boots are exclusively worn indoors. In order to be eligible for a refund or exchange, the footwear must be returned in pristine condition with the original packaging, swing tags, and proof of purchase. We reserve the right to decline any refund or exchange request if there are any indications that the footwear has been worn outside.
Thank you for reading our blog post on how to fit your footwear at home. We hope you found it informative and useful. Why not reading another one, like Trekitt Vegan Range, Happy exploring!
Leave a Reply