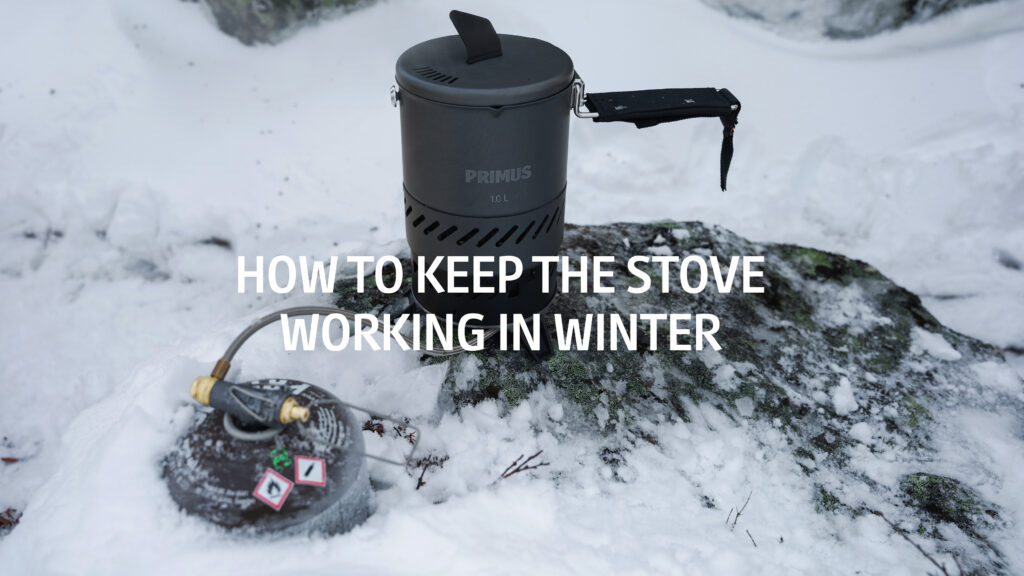
How to Keep Your Camping Stove Working in Winter
Author: Trekitt Gear Team
Outdoor gear specialists with decades of combined experience testing, maintaining,
and using camping stoves in real UK cold and winter conditions.
Cooking and eating in the cold means adapting your winter camp stove setup—because low temperatures cut fuel pressure, steal heat with wind, and make ignition and control fiddly, so small, predictable tweaks are what keep hot meals reliable.
KEY TAKEAWAYS
-
How cold affects stoves: expect weak flames, slow boils, cut-outs, and failed igniters because canister fuel won’t vaporise well, valves stiffen, and wind/air temperature sap heat fast.
-
How to choose the right winter stove: upright canister stoves struggle below freezing, remote canister stoves (with safe liquid-feed capability) perform better, and liquid fuel stoves are the most dependable in deep cold—especially for melting snow and long cook times.
-
How to keep winter cooking safe and efficient: warm your fuel, start with fuller canisters, carry extra fuel and backup ignition, build a solid base off the snow, shield the flame (not the canister), and prioritise ventilation to reduce carbon monoxide risk.
This article is part of our Winter Camping Basecamp, where you’ll find expert layering advice, technical gear deep dives and practical cold-weather tips.
Cooking outdoors is always a bit of a balancing act, but winter turns it into a whole different challenge. The same stove that happily boils water in July can suddenly feel temperamental, slow, or downright useless once temperatures drop.
Cold air robs heat from your pot, wind steals your flame, and snow makes even finding a stable place to cook feel like a small expedition. Fuel behaves differently in low temperatures, igniters stop sparking, and simple tasks become fiddly when your hands are cold and clumsy. Add shorter days and bigger energy demands, and suddenly a “quick brew” really matters.
The good news? Most winter stove issues aren’t bad luck; they’re predictable. And once you understand what’s going on, they’re easy to manage.
This guide isn’t about theory or lab conditions. It’s based on real, cold days out: stoves that won’t light, meals that take twice as long, and the small tweaks that make the difference between frustration and a proper hot meal. We’ll walk through what actually works in winter, so you can cook confidently when it matters most.
How Cold Affects Camp Stoves
When a stove starts misbehaving in winter, it’s rarely broken; it’s just cold. Low temperatures change how fuel, metal, and moving parts behave, and those changes stack up fast when you’re trying to cook in freezing air.
Gas canisters are the most common culprit. In cold conditions, the fuel inside doesn’t vaporise as easily, which means less pressure pushing gas to the burner. The result is a flame that looks tired, struggles to stay lit, or takes forever to boil water. Liquid fuel stoves don’t rely on internal canister pressure in the same way, which is why they tend to feel far more reliable once temperatures really drop.
Ignition systems also suffer in the cold. Piezo igniters can stop sparking altogether, valves can stiffen or partially freeze, and even turning a control knob with cold hands can be awkward. Add wind and heat loss into the mix, and even a working stove becomes noticeably less efficient.
All of this means winter cooking takes longer, uses more fuel, and demands a bit more patience than a summer brew stop.
What you’ll notice when it’s too cold
- A weak, sputtering flame
- Water taking much longer to boil
- The stove lighting, then cutting out
- Igniters that click but don’t spark
- A stove that simply won’t light at all
The key thing to remember: these are normal cold-weather behaviours, not failures. Once you understand what’s causing them, it becomes much easier to choose the right stove, manage your fuel, and avoid the usual winter cooking frustrations.
Choosing the Right Stove for Winter Conditions
Not all stoves are created equal once temperatures drop. A setup that’s perfect for three-season hiking can quickly feel out of its depth in winter, so choosing the right type of stove is one of the most crucial factors in whether winter cooking feels smooth or frustrating.
Let’s break down the main options and where each one shines (or struggles).
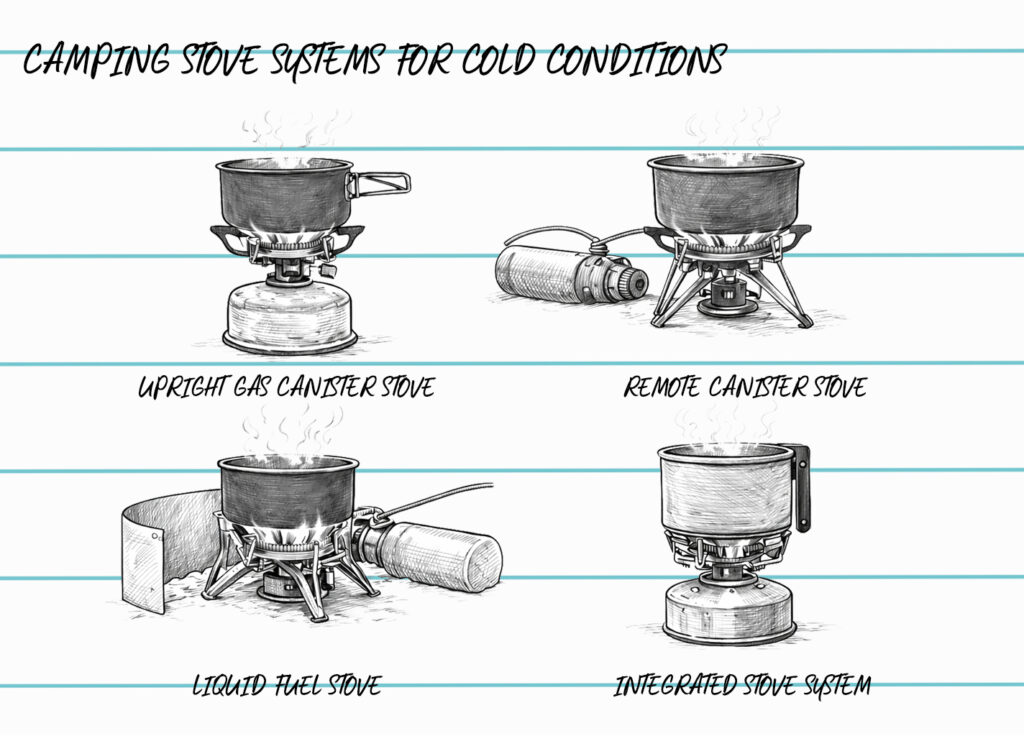
Gas Canister Stoves – When They Work (and When They Don’t)
Gas stoves are popular for a reason: they’re lightweight, quick to use, and clean. In winter, though, the design really matters.
Upright canister stoves
These screw directly onto the top of the canister. They’re simple and light, but also the most affected by cold. As temperatures drop, fuel pressure also drops, leading to weak flames and slower boil times. Fine for cool autumn days — far less reliable in proper winter conditions.
Remote canister stoves
These separate the burner from the fuel and often allow the canister to be used upside down (if the stove is designed for it). This helps feed liquid fuel rather than relying on vapour pressure, making them noticeably more dependable in the cold.
Fuel mix matters
Not all gas is equal. Winter-appropriate mixes contain a higher proportion of propane, which performs better at low temperatures than isobutane alone. Even so, gas has limits — once you get well below freezing, performance will always drop.
Bottom line:
Gas canister stoves can work in winter, but they need the right setup, the right fuel, and realistic expectations.
Liquid Fuel Stoves – The Cold-Weather Workhorses
If winter reliability is the priority, liquid fuel stoves are hard to beat.
Running on white gas or multiple fuel types, these stoves don’t rely on canister pressure. Instead, you manually pressurise the fuel bottle, which means they keep performing consistently even when temperatures plunge well below freezing.
Why Liquid Fuel Stoves shine in winter
- Reliable flame output in deep cold
- Strong heat for melting snow and long cook times
- Easy to judge fuel levels
The trade-offs
- Priming is required before lighting
- They’re noisier and smellier than gas
- More parts to maintain and clean
They’re not as convenient as gas stoves, but when conditions are harsh and hot food really matters, liquid fuel stoves earn their reputation.
Integrated Stove Systems in Winter
Integrated systems combine the burner, pot, and heat exchanger into one efficient unit. In cold, windy conditions, that efficiency really counts.
Why they work well
- Excellent heat transfer means faster boils
- Built-in wind protection
- Reduced fuel use in cold conditions
Integrated Stove Systems limits
- Still relies on gas, so extreme cold can be an issue
- Less flexible for cooking real meals
- Bulkier than minimalist setups
For winter hill days, basecamp cooking, or cold-but-not-Arctic trips, integrated systems can be a very tidy solution — just be aware of their temperature limits.
Winter Stove Comparison
| Stove type | Typical temperature range | Ease of use | Weight | Winter reliability |
| Upright gas canister stove | Cool to just below freezing | Very easy | Very light | Low |
| Remote canister stove | Cold conditions | Easy | Light–medium | Medium |
| Liquid fuel stove | Well below freezing | Moderate (requires priming) | Heavier | High |
| Integrated stove system | Cold but not extreme | Very easy | Medium | Medium |
Choosing the right stove isn’t about chasing the lightest option — it’s about matching your setup to the conditions. In winter, reliability always beats convenience.
Fuel Management: Keeping Your Stove Alive
In winter, your stove is only as good as the fuel feeding it. Most cold-weather stove failures aren’t really stove problems at all — they’re fuel management problems. Get this bit right and even marginal conditions become far less stressful.
Keep your fuel warm (it really matters)
Cold fuel = low pressure. It’s that simple. Keeping your canister or fuel bottle warm before you cook makes a huge difference to how well your stove performs.
- Carry gas canisters inside your jacket while walking
- Store fuel in your sleeping bag overnight
- Keep fuel out of the snow whenever possible
Even a small temperature boost can mean the difference between a strong flame and a weak, spluttering flame.
Inverting canisters (only when the stove is designed for it)
Some remote canister stoves are designed to run with the canister upside down, feeding liquid fuel to the burner. In cold conditions, this massively improves performance.
Important caveat:
- Only invert canisters on stoves specifically designed for liquid feed
- Never try this with upright canister stoves
Used correctly, inversion turns a struggling winter setup into a reliable one. Used incorrectly, it’s unsafe.
Carry more fuel than you think you need
Winter cooking uses more fuel — full stop. You’ll boil water more slowly, melt snow, and spend longer running the stove.
- Plan for increased fuel consumption
- Always carry a spare canister or bottle in winter
- Don’t rely on “just enough” calculations
Running out of fuel in summer is annoying. In winter, it’s a genuine problem.
Why half-empty canisters struggle
As a canister empties, internal pressure drops even further — something that’s barely noticeable in summer but painfully obvious in winter.
A half-empty canister in freezing conditions often:
- Produces a weaker flame
- Cuts out mid-boil
- Feels unreliable even when “not empty”
In winter, fuller canisters perform better. Save the part-used ones for milder trips.
Pro tip: Do this before you cook
Quick winter fuel checklist
- Warm the fuel before lighting the stove
- Check you’re using the right fuel mix
- Make sure canisters are sufficiently full
- Shield fuel from direct snow contact
- Keep spare fuel accessible, not buried in your pack
Common winter fuel mistakes
- Leaving fuel outside overnight
- Using summer gas mixes in freezing conditions
- Relying on nearly empty canisters
- Trying to invert stoves not designed for it
- Underestimating fuel use in cold weather
Dial in your fuel management, and winter cooking becomes far more predictable. It’s one of the simplest changes you can make — and one of the most effective.
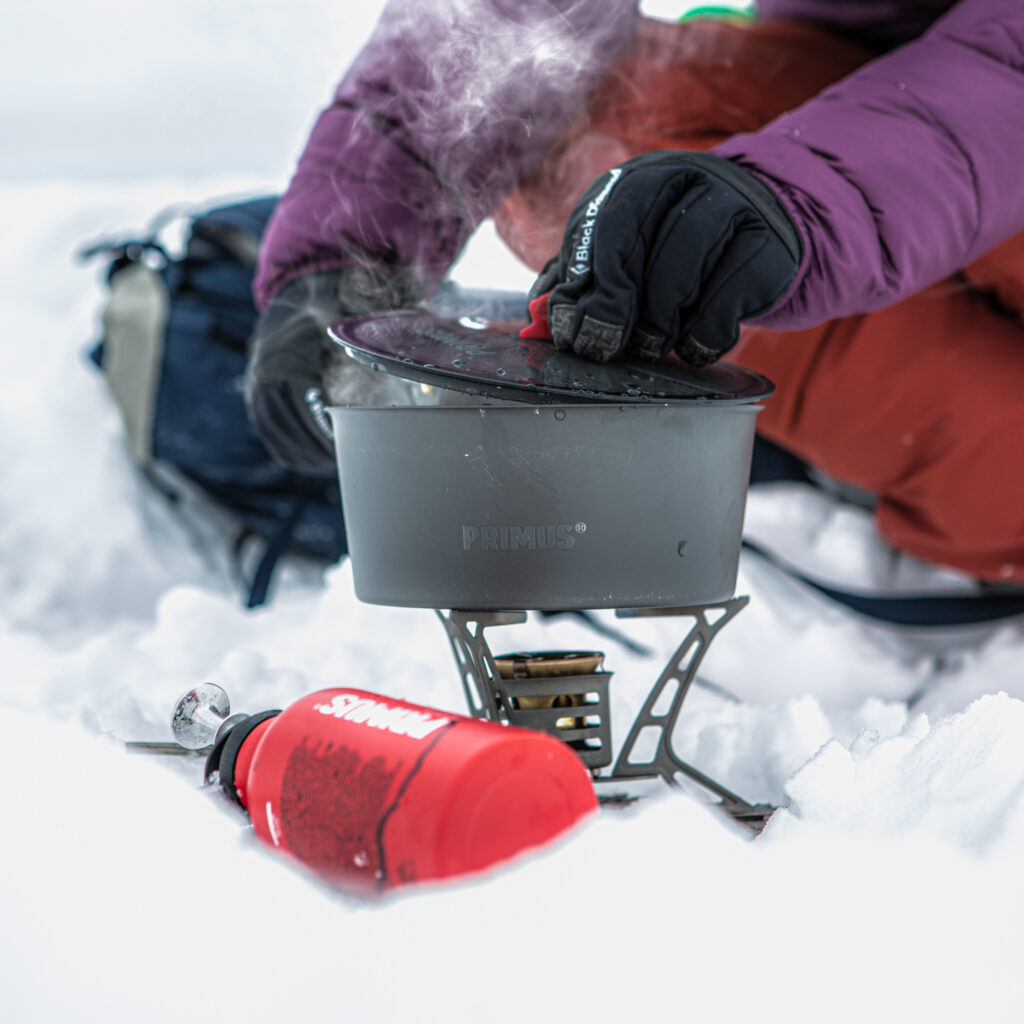
Stove Setup in Snow and Wind
Winter stove setup is where efficiency and safety overlap. Do it well and you’ll get faster boils, use less fuel, and cook without drama. Do it badly and you can end up with a stove sinking into snow, a flame getting battered by wind, or (worst case) dangerous fumes building up where you’re cooking.
Create a stable base in snow
Snow looks solid until you add heat. Once the stove starts running, it melts a little pocket underneath itself, and suddenly your “flat spot” becomes a wobbly crater.
Good options:
- Pack the snow down hard and let it set for a minute
- Use a stove base plate, flat board, or even a pot lid as a platform
- Choose a spot sheltered from spindrift and gusts if possible
The goal is simple: prevent the stove from slowly sinking while it’s in use.
Never cook directly on snow
It’s tempting — especially on a quick stop — but it’s a classic winter mistake. Snow melts, the stove drops, your pot tilts, and you’re one knock away from a spill.
At best: slower boils and wasted fuel.
At worst: a tipped stove and hot water/fuel where you don’t want it.
Windshields: what’s safe and what’s dangerous
Wind is a fuel thief. Even a gentle breeze can double the boiling time, so some protection is worth it — but it must be done safely.
Safe-ish approaches
- Use natural shelter (a boulder, bank, pack) without blocking airflow
- Use a windshield designed to work with your stove type
- Keep a clear gap around the canister/burner area
Where it gets dangerous
- Wrapping a tight foil windshield around an upright canister stove
- Trapping heat around the fuel canister
- Blocking airflow so the stove and canister heat up too much
If the canister starts feeling hot rather than just “not cold”, stop and rethink the setup.
Ventilation and carbon monoxide risk
This is the part people underestimate. In winter, you’re more likely to cook in places that feel sheltered — vestibules, bothies, tent doors cracked open — and that’s where ventilation really matters.
Key rule: a stove needs fresh air and a way for fumes to escape.
Carbon monoxide is odourless and dangerous, and cold-weather “snug” cooking spots can trap it.
If you’re cooking in a sheltered space:
- Keep doors/vents open
- Don’t cook in a fully sealed tent
- Position the stove so fumes aren’t collecting around you
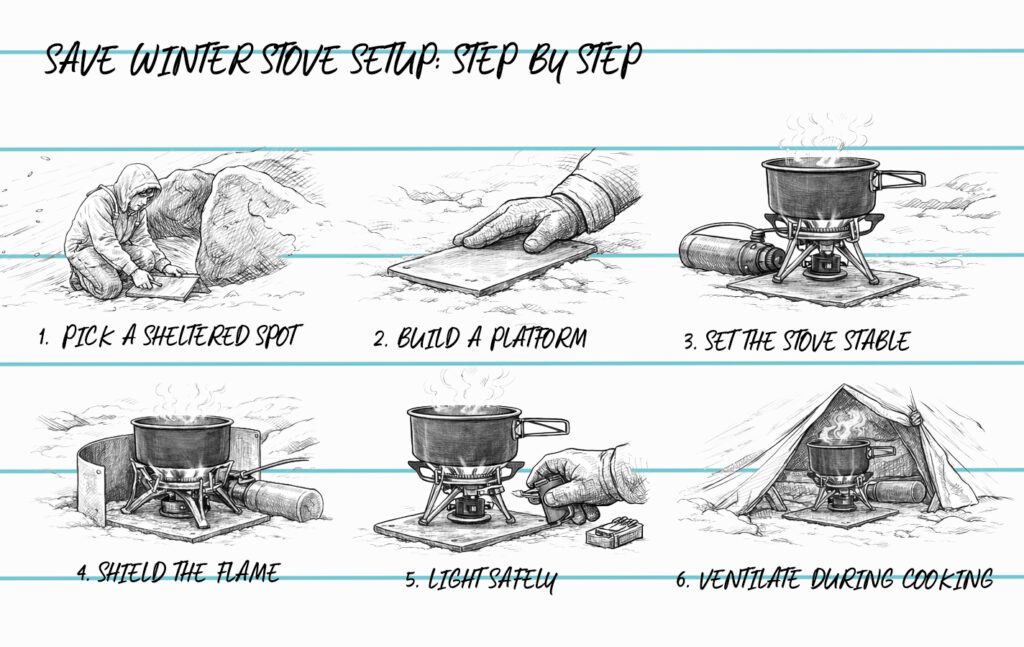
Step-by-step: a safe winter stove setup
- Pick a sheltered spot out of the strongest wind (behind a rock, bank, or in a shallow dug-out kitchen area).
- Build a platform: stamp snow flat, let it firm up, then place a solid base (plate/board/lid) under the stove.
- Set the stove stable and check that it doesn’t wobble. Give it a gentle nudge test before lighting.
- Shield the flame, not the fuel: use natural wind protection first; if using a windshield, keep it well clear of the canister and allow airflow.
- Light safely with a backup ignition ready (lighter/matches), because cold piezo igniters love to quit at the worst moment.
- Ventilate if you’re sheltered: door cracked, airflow moving, fumes escaping.
- Monitor during cooking: if the stove starts sinking or the canister warms up too much, stop and reset.
Get your setup right, and winter cooking becomes way less of a battle. You’re not just making it faster — you’re making it safer, too.
Lighting and Operating Your Stove with Cold Hands
This is the moment winter cooking usually goes wrong. You’re hungry, the wind’s up, your hands are cold — and suddenly the stove that worked fine at home refuses to cooperate. Cold fingers turn simple tasks into clumsy ones, and ignition systems aren’t always fans of freezing temperatures either.
Piezo igniters vs matches vs lighters
Piezo igniters are brilliant when they work… and frustrating when they don’t. Cold can weaken or even stop the spark, especially if moisture has seeped in. They’re convenient, but never something to rely on as your only option.
Matches are reliable in cold weather, but can be awkward in wind and snow. Waterproof matches help, but they still need careful handling with numb fingers.
Lighters are the most common backup — and also the most likely to fail. Standard gas lighters struggle because the fuel doesn’t vaporise well in the cold, giving you that familiar useless “click”.
The takeaway? Always carry more than one ignition method.
Why lighters fail in the cold
Most disposable lighters use butane, which stops vaporising properly around freezing. When the lighter itself is cold, it cannot produce a flame, even though it appears to be full.
Simple fix:
- Keep lighters in a pocket close to your body
- Warm them in your hands before use
- Carry a second lighter in a different pocket
Gloves-on operation tips
Taking gloves off in winter just to cook is a fast way to lose heat. A stove that’s fiddly with bare hands becomes even worse with cold fingers.
Helpful habits:
- Practice lighting and adjusting your stove with gloves at home
- Use gloves with enough dexterity for small controls
- Avoid over-tightening valves, which makes them harder to turn when cold
If you can’t operate your stove comfortably with gloves on, it’s worth rethinking your setup.
Avoiding frozen valves and seals
Cold, combined with moisture, can cause valves and seals to stiffen or partially freeze.
To reduce the risk:
- Keep stoves dry before packing them away
- Avoid breathing directly onto cold metal parts
- Store the stove inside your pack rather than strapped outside
If something feels stuck, don’t force it. Warming the stove gently with your hands is far safer than applying force with your muscles.
Quick winter ignition checklist
Keep these accessible in your pockets:
- Primary lighter (body-warm)
- Backup lighter or matches
- Fire steel (optional but reliable)
- Stove control knowledge — know where everything is without looking
Winter cooking rewards preparation. When your hands are cold and your patience is low, having simple, reliable ignition options ready to go makes all the difference between a quick hot meal and a very long, frustrating stop.
Winter Cooking Tips: What (and How) to Cook
Once your stove is working reliably, the next challenge is what you actually cook. Winter isn’t the time for complicated camp cuisine — cold hands, longer cook times, and higher energy needs all push things in a simpler, more efficient direction.
Choose foods that cook fast
In cold conditions, every extra minute on the stove costs fuel and patience. Foods that rehydrate or heat quickly are your best friends.
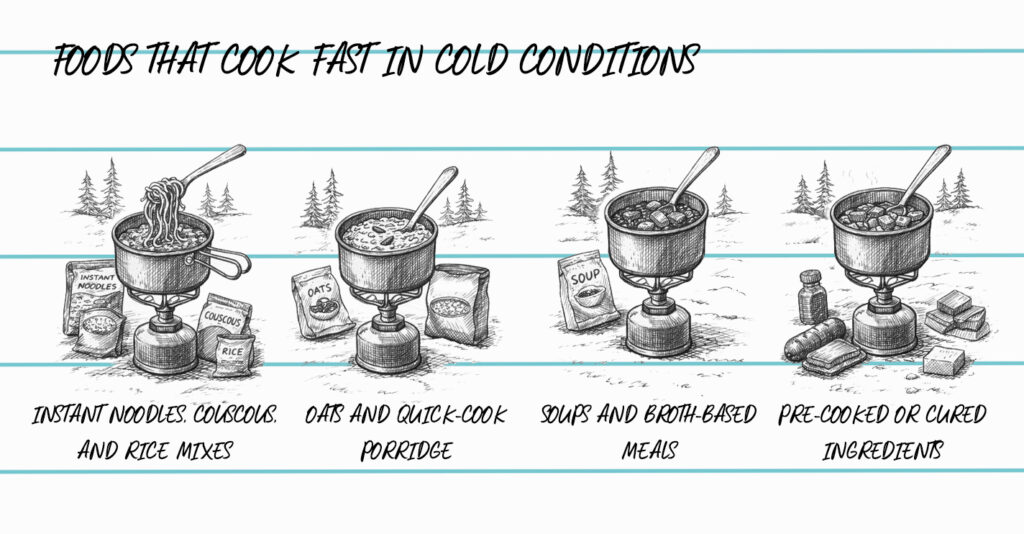
Good winter options:
- Instant noodles, couscous, and rice mixes
- Oats and quick-cook porridge
- Soups and broth-based meals
- Pre-cooked or cured ingredients
The faster it cooks, the less fuel you burn — and the quicker you get warmth back into your body.
One-pot meals beat complex cooking
Multiple pans and long simmer times might be fun in summer. In winter, they’re mostly just a faff.
Why One-Pot Meals Work Better in Winter
- Use less fuel
- Mean fewer frozen dishes to clean
- Keep cooking time predictable
If a meal requires constant stirring, precise timing, or extensive preparation, it’s probably better saved for warmer trips.
Dehydrated meals vs fresh food
Both have a place in winter — it’s about making the right choice.
Dehydrated meals
- Extremely quick and fuel-efficient
- Lightweight and easy to pack
- Ideal when conditions are harsh or time is short
Fresh food
- More satisfying and often higher morale
- Needs more fuel and attention
- Can freeze solid if not stored carefully
Many winter campers mix the two: dehydrated meals for reliability, fresh food for morale boosts.
Stop food freezing before you cook
Frozen food equals longer cooking times and more fuel use.
Simple Ways to Prevent Food Freezing
- Store food inside your jacket while moving
- Keep meals in your sleeping bag overnight
- Pack ingredients close to your back in the rucksack
If water freezes, break the ice before putting it on the stove — melting a solid block takes far more fuel.
Simple, high-calorie winter meal ideas
When it’s cold, calories matter.
- Porridge with nuts, seeds, and powdered milk
- Noodles with added cheese, salami, or olive oil
- Instant mash with gravy and cured meat
- Hot chocolate or soup as a starter before your main meal
Warm, simple, and energy-dense food isn’t boring in winter — it’s exactly what keeps you moving, thinking clearly, and enjoying the trip.
Winter cooking isn’t about eating fancy. It’s about eating well, with minimal effort and maximum warmth.
Eating in the Cold: Staying Warm and Fuelled
In winter, eating isn’t just about satisfying hunger; it’s part of staying warm, alert, and safe. Food is fuel, and in cold conditions your body burns through it far faster than you might expect, even when the pace feels steady.
Hot meals help regulate body temperature
A hot meal does more than taste good. Warm food and drinks raise your core temperature and give your body the energy it needs to generate heat. That combination can be the difference between feeling chilled and feeling comfortable, especially once you stop moving.
Cold snacks might be quick, but they don’t offer the same warming effect as a proper hot meal when temperatures are low.
Eat before you get cold
One of the most common winter mistakes is waiting until you feel cold to eat. By that point, your energy levels are already dipping and warming back up takes longer.
Better approach:
- Eat regularly, even on short stops
- Plan hot food or drinks before long breaks
- Refuel before camp tasks, not after
Staying ahead of the cold is far easier than trying to recover from it.
Hot drinks are underrated morale boosters
There’s something about a hot drink in winter that goes beyond hydration. Tea, coffee, soup, or hot chocolate can lift spirits instantly and make a tough day feel manageable again.
They’re also:
- Quick to prepare
- Easy to digest
- A reliable way to add warmth fast
In cold, windy conditions, that morale boost matters more than you might think.
Eat even when you don’t feel hungry
Cold suppresses appetite, but your body still needs energy, often more than usual. Skipping meals or snacks can lead to fatigue, poor decision-making, and difficulty staying warm.
If you’re not hungry:
- Eat smaller amounts more often
- Choose energy-dense foods
- Pair food with hot drinks
Winter eating is as much about discipline as it is about desire. Keep fuelling yourself, and your body will do a much better job of keeping you warm and functional.
In short: cook well, eat early, drink hot, and don’t skip meals. In winter, those small habits add up to big gains in comfort and safety.
Common Winter Stove Mistakes (and How to Avoid Them)
Most winter stove problems are completely avoidable. They tend to come from habits that work fine in summer — but fall apart once temperatures drop. Here are the big ones to watch for, and how to stay one step ahead of them.
- Leaving fuel outside overnight
Cold-soaked fuel means low pressure and weak flames the next morning.
Avoid it: Keep canisters or fuel bottles inside your sleeping bag or jacket overnight. - Using a summer stove setup in winter
Lightweight, upright gas stoves can struggle badly in the cold.
Avoid it: Match your stove type and fuel to winter conditions, not just weight savings. - Blocking airflow with unsafe windshields
Wrapping a tight foil windshield around an upright gas stove can dangerously overheat the canister.
Avoid it: Use natural shelter first, or a windshield designed for your specific stove — and always leave airflow around the fuel. - Not testing your stove before the trip
Discovering a problem at home is an inconvenience. Discovering it in the cold is a nightmare.
Avoid it: Test your stove, fuel, and ignition system in cold conditions before you go. - Relying on half-empty canisters
Part-used canisters lose pressure fast in the cold.
Avoid it: Start winter trips with full canisters and save part-used ones for warmer weather. - Carrying only one ignition method
Piezo igniters and lighters tend to fail more frequently when it’s cold and windy.
Avoid it: Carry at least two ignition options, kept in warm pockets. - Cooking in poorly ventilated spaces
Cold weather encourages sheltered cooking — sometimes too sheltered.
Avoid it: Always ensure good airflow and never cook in fully enclosed spaces.
Avoid these mistakes and winter cooking becomes far more predictable. It’s rarely about tougher gear — it’s about smarter habits.
Final Thoughts – Preparation Is Everything
Winter cooking doesn’t have to be stressful or unreliable. When your stove, fuel, and food are matched to the conditions, it can be every bit as dependable as summer cooking — just a little slower and more deliberate.
The biggest difference is preparation. Testing your stove at home, checking how it performs in cold conditions, and practising simple setups before a trip removes most of the uncertainty. The same goes for food: choosing meals that cook quickly, deliver real energy, and don’t freeze solid overnight makes life far easier when the temperature drops.
It’s also worth remembering that winter is not the time to chase weight savings at all costs. A slightly heavier stove that works every time, extra fuel, or a proper hot meal is a small price to pay for warmth, energy, and peace of mind.
Get the basics right, plan for the cold, and winter cooking becomes something you rely on — not something you dread.
FAQ
No. Cold can temporarily affect fuel pressure, ignition systems, and valve movement, but it doesn’t permanently damage a functioning stove. Once warmed up and used correctly, performance should return to normal.![]()
Yes. Temperatures often drop rapidly after sunset, which lowers fuel pressure and increases heat loss. A setup that feels reliable earlier in the day can struggle later unless fuel is warmed and wind protection is improved.![]()
For short day trips, usually, no, good fuel management and a backup ignition are enough. For multi-day winter trips or remote locations, some people carry a second stove or travel with a partner running a compatible system as redundancy.![]()
Only gently and with care. Lukewarm water (not hot) can help restore pressure but never pour boiling water over a canister or place it near direct heat. If it feels hot to the touch, stop immediately.![]()
Changes in fuel pressure and vapour flow can alter the sound of the flame. A quieter or uneven sound often indicates low pressure rather than a fault, especially with gas stoves in freezing conditions.![]()
Not usually. Frost forms when fuel vaporisation cools the canister surface. It’s a sign of heat loss and reduced performance, not a failure, but it does mean warming the fuel will help.![]()
Yes, as long as you understand its limits. Many stoves work year-round with the right fuel, setup, and expectations. Problems often arise from assuming that summer performance will carry over unchanged.![]()
Indirectly. Snow doesn’t change the boiling point by itself, but cold air, wind, and heat loss dramatically increase cooking time. Altitude can also lower boiling temperatures, making meals take longer to cook.![]()
Often, yes. In winter, reliability and heat output matter more than minimal weight. A slightly heavier stove that works consistently can save fuel, time, and stress — especially in poor weather.![]()
User expectations. Most stoves don’t fail — they’re just used with cold fuel, poor wind protection, or summer habits that don’t translate to winter conditions.![]()
Not essential, but wider pots with lids and heat exchangers improve efficiency in cold and wind. Thin, lidless cookware wastes heat and fuel much faster in winter conditions.![]()
A stove can help with hot food and drinks, but it should never be relied on as a primary heat source. Clothing, shelter, and insulation are far more critical for staying warm and safe.![]()
Leave a Reply