How to Organise and Protect Your Hiking Gear
Wondering how to organise and protect your hiking gear to keep it dry, secure, and ready for every adventure? Here are practical ways to pack smarter and shield your outdoor essentials from damage and weather.
In SHORT…
-
How do drybags revolutionise gear protection? Learn why waterproof, colour-coded drybags are essential for keeping your kit dry and organised on the trail.
-
What’s the easiest way to pack for quick access? Discover how layering your gear by use and priority simplifies hiking and boosts comfort.
-
How can you prevent common packing issues? Find out simple tricks for stopping leaks, avoiding shifting loads, and reducing discomfort on long hikes.
Gear Up for Adventure: How to Organise and Protect Your Outdoor Essentials
Are you an avid adventurer who loves spending time outdoors? If so, you know how important it is to have high-quality gear that can withstand the elements. But, do you know how to organise and protect your hiking gear to ensure it lasts for years to come? We will provide you with some helpful tips and tricks on how to organise and protect your hiking gear
No More Soggy Bottoms
In the early days of mountain walking, the only way to keep your kit relatively dry was to stuff a bin liner inside your rucksack and crudely cram everything into it. Whilst this was an effective solution, it had its drawbacks. Remember that spare layer you packed? It’s right at the bottom, and to get to it, you’ll need to take everything out. Not ideal, especially if that layer if a waterproof and it’s tipping it down. And, despite being ‘waterproof’, quite often they simply aren’t, and you’d end up with wet kit anyway.
Most of us just dealt with the issue with a metaphorical shrug of the shoulders and an unwillingness to go through the fairly arduous process of designing something better. However, some clever clogs with time on their hands came up with an ingenious invention called the drybag.
Stay dry and organised with drybags – Cause who likes wet sandwiches?
Drybags work the same way as the hull of a large boat. If the hull is damaged, there are lots of smaller compartments within to limit the amount of water ingress. If you’ve got one big drybag, the boat is sinking; with lots of smaller ones, you can continue on your way.
Multicoloured Waterproof Bags
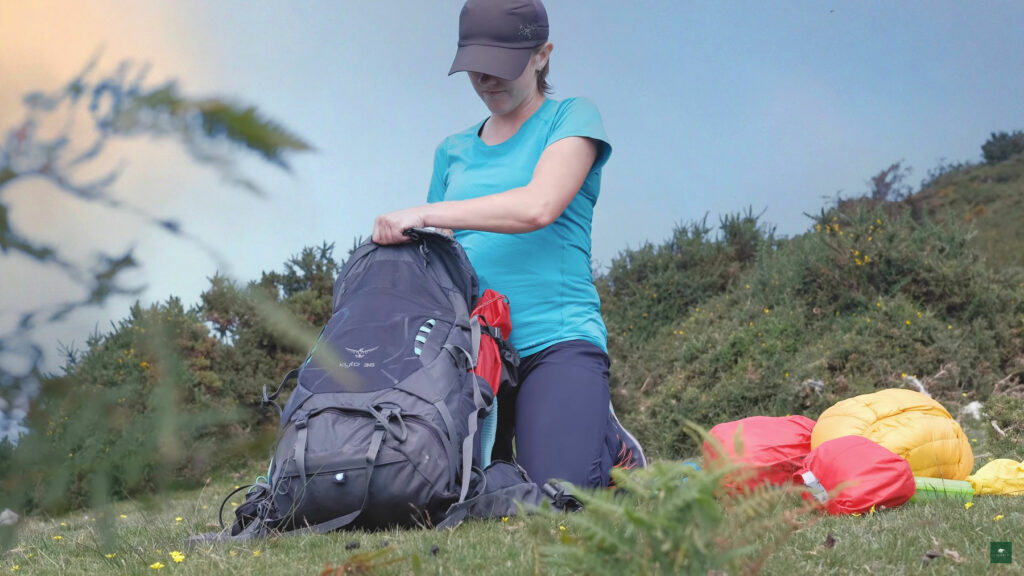
These multicoloured waterproof bags offer a variety of shapes, sizes, and colours, catering to everyone. Their light-coloured interiors help you see what you’re doing. The roll-top design keeps water and dust out and withstands much more wear and tear than a bin liner. You can put your first aid kit in the red one, your clothes in the blue one, your food in the yellow one and so on, making them a brilliant organisational tool as well as a protective one. If you tend to use a selection of different packs, you can also easily transfer these bags across—a much more tedious task when everything is loose. That aforementioned spare layer? This can now be easily removed without the rest of your belongings getting soaking wet.

Right, cost. As I type this, a full set of Exped Fold Drybags (XS-L) will set you back £48 (RRP; we may have it cheaper). Yes, this is more than a bin liner, but it’s cheaper than a new phone and far less hassle than hypothermia.
Packing Like a Pro – Layering for Easy Access
When you’re out on the trail, the last thing you want to do is dig through your pack to find what you need. The key to avoiding this hassle is strategic layering. Think about how often you’ll need each item throughout your hike. Keep things like snacks, maps, and first aid kits in easily accessible outer pockets or at the top of your pack. Store items you might need in changing weather—like your rain jacket or hat—near the top, and pack heavier, less frequently used items, like your tent or sleeping bag, toward the bottom to balance the weight. This way, you can grab what you need on the go without unpacking everything else.
Lightweight & Compact Storage Solutions
Space in your pack is precious, so it’s all about minimising bulk and maximising efficiency. Consider using compression sacks for items like your sleeping bag, puffy jacket, or bulky layers. They help reduce the space these items take up, leaving more room for other essentials. You can also use gear that serves multiple functions, like a lightweight towel that doubles as a blanket or a buff that works as a hat, headband, or neck warmer. Remember: The more you can pack compactly, the more comfortable your hike will be.
Attachments & External Gear Storage
Sometimes, not everything fits neatly inside your pack—and that’s okay! Use gear loops, bungee cords, or carabiners to secure items like trekking poles, sleeping pads, or even wet clothing on the outside of your pack. Just ensure they’re securely fastened and balanced so they don’t swing around or snag on branches as you hike.
Gear Check Before & After Your Hike
A quick check of your gear before hitting the trail can save you from any surprises later. Make sure all drybags are sealed, pockets are zipped, and items are secure. Once your hike is over, take a few minutes to empty your pack, shake out dirt or debris, and let any damp gear dry before storing it away. This simple habit keeps your pack and gear in good condition for your next adventure.
FAQ
If you don’t have drybags, you can use Ziploc bags, plastic grocery bags, or even trash compactor bags as a quick and cost-effective solution. Compactor bags are durable and can be used as pack liners to keep the entire contents of your pack dry. Just be sure to double-bag sensitive items like electronics for extra protection.![]()
A well-packed backpack can make all the difference in comfort. Start by packing the heaviest items closest to your back, such as your water reservoir, food, or cooking gear. Keep softer items like your sleeping bag or clothing on the outside to add cushioning. Adjust your straps regularly as you hike to redistribute the weight and maintain balance.![]()
The key to quick access is grouping items by use and frequency. For example, keep your navigation tools (maps, compass, GPS) in an external pocket, snacks in a top compartment, and first aid kits easily reachable. Use small stuff sacks or colour-coded bags to categorise items like clothing, cooking gear, and toiletries, so you don’t have to dig through your pack to find what you need.![]()
If your backpack gets wet, unpack it as soon as possible and let everything air dry completely before storing it away. Use a towel to wipe down any items that can’t get wet, like electronics or books. If the backpack is soaking wet, turn it inside out to help it dry faster. Packing a rain cover or pack liner for future hikes helps you avoid this issue.![]()
Your sleeping bag is one of the most important items to keep dry. Use a drybag or waterproof compression sack to store it in your backpack. You can also line your sleeping bag’s stuff sack with a plastic bag for an extra layer of protection.![]()
Common Issues & Solutions
Issue: Items Shifting Around Inside the Pack
If your gear is loosely packed, it can shift around and make your pack feel unstable. This not only causes discomfort but also makes it difficult to find what you need quickly.
Solution: Use stuff sacks or compression bags to pack your gear tightly. Place heavier items at the centre of your back for balance. Fill any gaps with clothing or soft items to keep everything snug.
Issue: Damp or Sweaty Gear on the Trail
Hiking generates sweat, and getting caught in the rain can leave your gear damp or wet, which could lead to mould or a stinky pack.
Solution: Store damp clothing or gear in breathable mesh bags on the outside of your pack to keep them separate from dry items. Take breaks to air out sweaty clothes, and if the weather permits, hang wet gear on your pack to dry while you hike.
Issue: Broken Zippers or Damaged Buckles on the Trail
Accidents happen; broken zippers or damaged buckles can make your gear difficult to carry or protect.
Solution: Carry a small repair kit with essential items like duct tape, safety pins, cord, and zipper pull. In a pinch, duct tape can temporarily seal a broken zipper, and a cord can replace a broken buckle or secure loose straps until you get a chance to fix it properly.
Issue: Food & Toiletries Attracting Animals
Improperly stored food and scented items can attract animals, leading to potentially dangerous encounters or gear damage.
Solution: If you’re in bear country, store food and toiletries in odour-proof bags or bear canisters. Keep these items well away from your sleeping area. If you’re on a day hike, consider packing food in resealable, scent-proof bags.
Issue: Water Leaks Inside the Pack
Leaking water bottles or hydration bladders can leave your pack soaked and damage electronics or clothing.
Solution: Always test bottles and hydration bladders before heading out. Secure the hydration hose and bite valve, and keep any electronics or sensitive gear in a waterproof pouch or in a separate drybag, away from potential leaks.
Issue: Uncomfortable Straps or Pack Chafing
Over time, uncomfortable straps or poorly adjusted packs can lead to painful chafing, sore shoulders, and back pain.
Solution: Before your hike, make sure your backpack fits properly—adjust the hip belt to carry most of the weight on your hips, tighten shoulder straps, and adjust the sternum strap to reduce shifting. If needed, add padding to the straps with a soft cloth or neoprene to prevent chafing.
Issue: Keeping Valuables Secure During Rest Breaks
It’s easy to lose track of small valuables like keys, wallets, or phones when you stop for a break.
Solution: Keep valuables in a secure, zippered pocket on your person (like a jacket pocket or hip belt pocket) rather than in the main pack. If you need to take your pack off, make sure valuables are always within sight or within reach.
We hope you found our quick blog on How to Organize and Protect Your Hiking Gear helpful and informative. If you’re eager to learn more about hiking gear, be sure to check out our guide to crampons.
happy dry storing, and many more adventures to come!
Leave a Reply