
How to Prevent Blisters When Hiking

Author: Trekitt Gear Team
With years of hands-on experience fitting and testing hiking footwear across the UK’s varied terrain, our team understands what really causes blisters and how to prevent them. From wet mountain days to long summer hikes, we’ve seen how fit, moisture, friction and sock choice can make or break comfort on the trail. This guide focuses on practical blister-prevention tips that genuinely work in real UK hiking conditions.
Heading out on the trail? This guide shares essential blister-prevention tips to keep your feet happy, dry, and ready for hiking adventures.
In SHORT…
-
Why getting the right fit is non-negotiable: Blisters often start with ill-fitting boots—learn how proper length, width, heel grip, and break-in techniques can make all the difference.
-
How smart sock choices and moisture management protect your feet: Discover layered liners, merino/synthetic hiking socks, anti-chafe powders or lubricants, and why cotton is a no-go. Keep moisture in check for blister-free miles.
-
What to do on the move and at camp to stay blister-free: How to spot hotspots early and tackle them with tape, plasters, or moleskin. How to air out boots with newspaper overnight, and give your feet care at rest stops.
Hiking is a wonderful way to connect with nature, but nothing can ruin an adventure faster than painful blisters. These small but mighty nuisances can turn a delightful trek into a miserable ordeal. Fortunately, there are numerous strategies to prevent blisters on heels, toes, and other parts of your feet while hiking. Here’s a comprehensive guide to keeping your feet blister-free on the trails.
Short on Time? Here Are Our Top Blister-Busting Picks
We’ve picked our favourite socks and blister-care essentials to help keep your feet happy on the trail. You’ll find more details on each of our recommendations further down the guide, but if you’re in a hurry, here’s everything at a glance.
| Product | Best For | Why We Like It |
| Darn Tough Hiking Socks | Everyday hiking & long-distance walks | A secure, comfortable fit that helps reduce movement and bunching |
| Injinji Toe Socks | Blisters between the toes | Individual toe sleeves help reduce skin-on-skin rubbing |
| Lifesystems Blister Plasters 6-Pack | Day hikes & emergency backup | Tiny, easy to pack and ready when that first hot spot appears |
| Lifesystems Blister First Aid Kit | Backpacking & multi-day adventures | A dedicated blister kit for when you’re spending longer on the trail |
| Adventure Medical Kits Blister Medic | Lightweight hiking | Compact blister care without taking up precious pack space |
How Do Blisters Form?
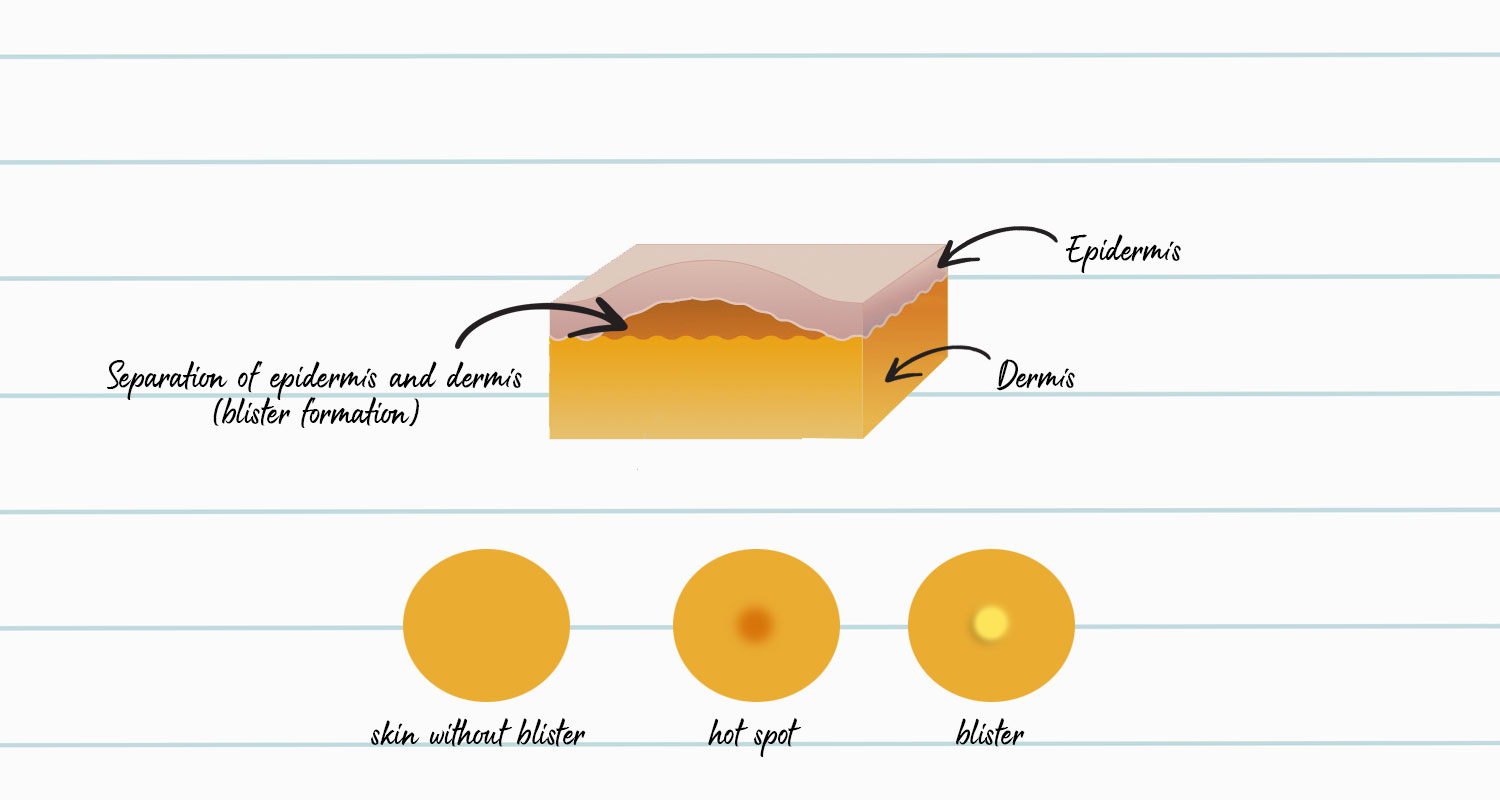
Before we dive into how to prevent blisters when hiking, let’s chat about how do blisters actually form. Picture this: you’re enjoying a scenic hike, surrounded by nature, when suddenly you start to feel a hot spot on your heel. Uh-oh, that’s the first sign a blister might be making an appearance.
Blisters typically form due to friction—when your skin rubs repeatedly against something, like a poorly fitting boot or a wrinkled sock. This constant rubbing causes the layers of your skin to separate. To protect and cushion the area, your body sends fluid into this gap, creating a blister. It’s like your body’s way of making a little water balloon to shield the damaged skin. So, in a way, blisters are just trying to help!
Where Do Hiking Boots Commonly Rub?
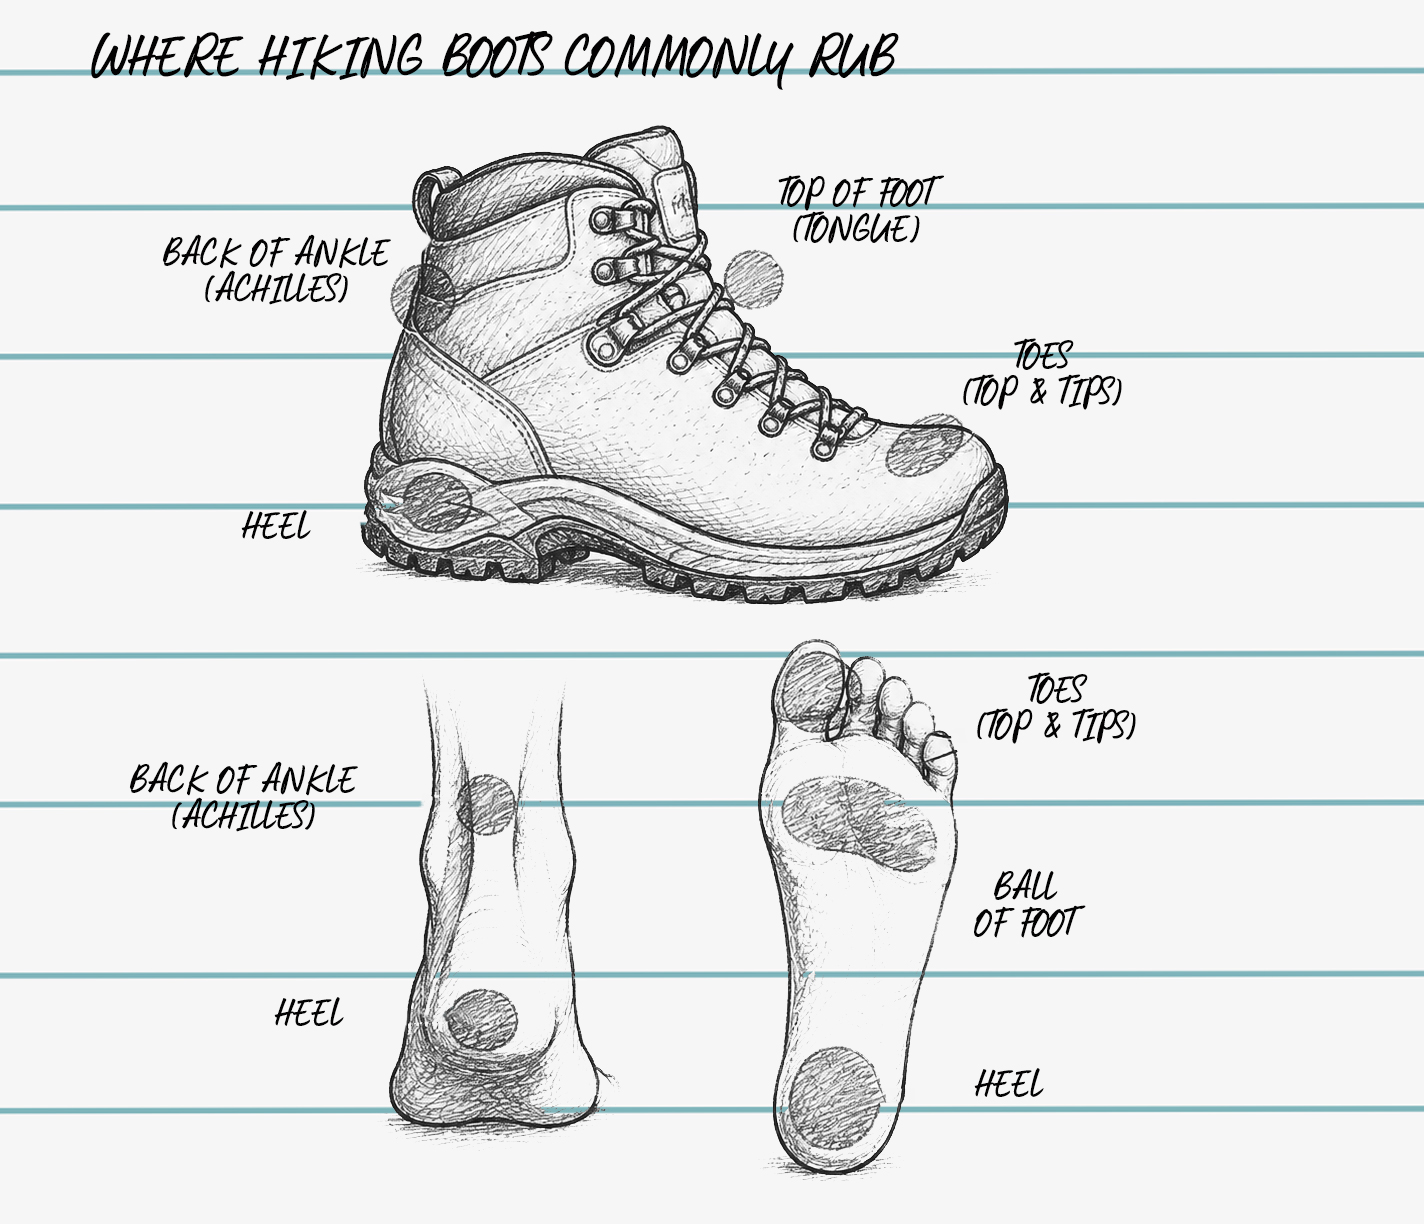
Hiking boots most commonly rub around the heel, toes, sides of the forefoot and ankle collar. Heel lift is one of the biggest causes of blisters, especially during descents, while tight toe boxes can create friction on longer walks or steep climbs. Pressure points can also develop around the arch or instep if the lacing is too tight or the boot shape does not match your foot properly. Hotspots usually appear in areas where moisture, movement and repeated rubbing combine over time.
How to Prevent Blisters When Hiking? Preparing for the Hike
Preventing blisters while hiking is key to having a comfortable and enjoyable adventure. Blisters can quickly turn a fun hike into a painful challenge, but a few easy precautions can keep your feet happy. Here’s how to prepare:
1. Choose the Right Footwear
Selecting the right hiking boots or shoes is paramount. Ensure your footwear fits well and provides adequate support. Boots that are too tight or too loose can cause friction, leading to blisters. It’s also crucial to consider the type of terrain you’ll be hiking on and choose shoes that offer the right balance of durability, flexibility, and protection.
Fit is Paramount
A proper fit is crucial for blister prevention. Here’s what to consider:
Length and Width: Your toes should have enough room to wiggle, but your heel should stay firmly in place. Ensure there’s a thumb’s width of space between your longest toe and the end of the boot.
No Pinching or Tight Spots: Pay attention to any areas where the boot feels too tight. This can lead to pressure points and blisters.
Arch Support: Ensure the boots provide adequate arch support to match your foot’s natural shape. This helps distribute weight evenly and reduces stress on your feet.
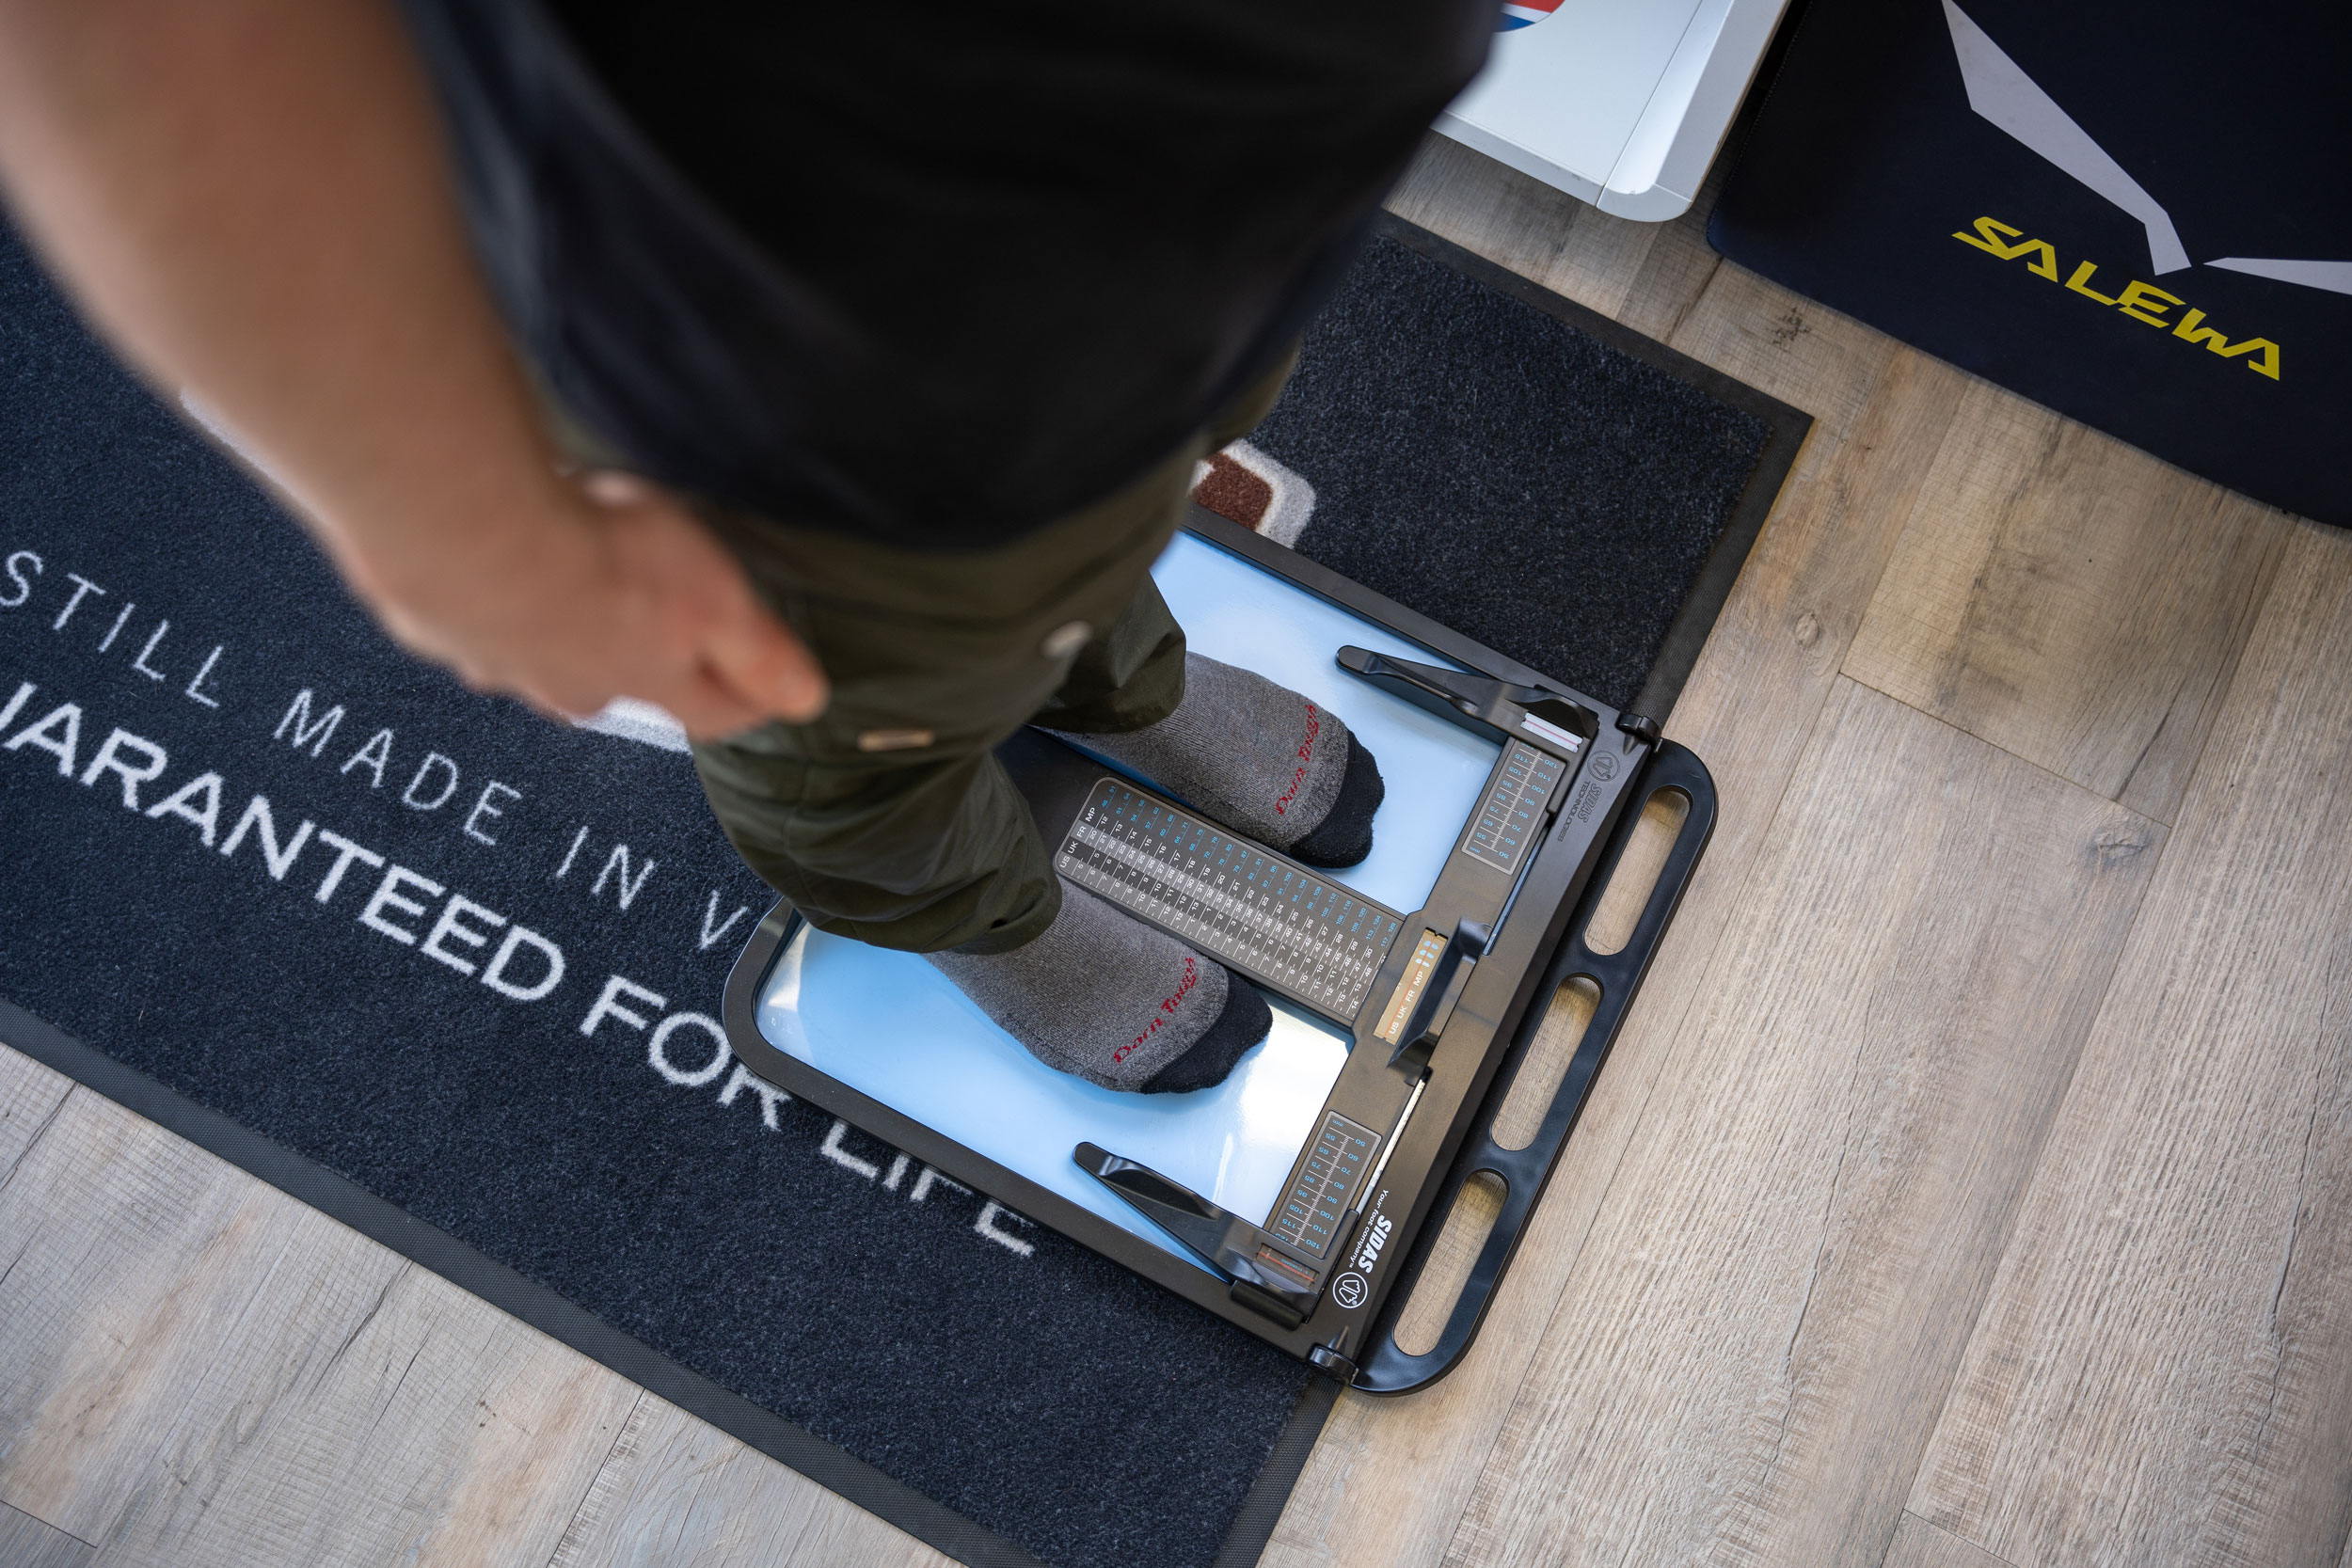
In-Person Fitting: We highly recommend an in-person boot fitting because, let’s face it, no one’s ever conquered a mountain in ill-fitting boots! Trying on boots in person ensures the perfect size and comfort, and you can address any concerns on the spot. Plus, it’s a great excuse to get out and visit us! Schedule a Trekitt Shoe Fitting Appointment today —your feet will thank you!
Types of Hiking Boots
Different types of hiking boots are designed for different terrains and hiking styles:
Lightweight Hiking Shoes: Ideal for well-maintained trails and day hikes. They offer flexibility and comfort but might lack the support needed for rugged terrain.
Midweight Hiking Boots: Suitable for longer hikes and varied terrains. These boots offer a good balance of support, durability, and flexibility.
Heavyweight Hiking Boots: Best for rough terrains, backpacking trips, and carrying heavy loads. They provide excellent support and protection but can be less flexible and heavier.
Consider the Terrain
The terrain you’ll be hiking on plays a significant role in determining the type of boots you need:
Smooth Trails: For well-maintained and flat trails, lightweight hiking shoes or trail runners are usually sufficient.
Rocky or Uneven Terrain: Midweight boots with good ankle support and sturdy soles are better suited for rocky paths and uneven surfaces.
Wet or Muddy Conditions: Waterproof boots with good traction are essential to keep your feet dry and stable in wet conditions.
Snow and Ice: Boots with insulation and compatibility with crampons or micro-spikes are necessary for cold, icy, or snowy conditions.
Materials Matter
The materials of your hiking boots impact their durability, breathability, and water resistance:
Leather: Full-grain leather boots are durable and offer excellent water resistance and support. However, they can be less breathable and heavier.
Synthetic: Boots made from synthetic materials like nylon and polyester are lighter and more breathable but might not be as durable as leather.
Waterproof Membranes: Boots with waterproof membranes like Gore-Tex keep your feet dry in wet conditions but can be less breathable, which may increase the risk of blisters.
Trying on Boots
When trying on hiking boots, keep the following tips in mind:
Wear Hiking Socks: Try on boots with the socks you plan to wear while hiking. This gives a more accurate fit.
Walk Around: Walk on different surfaces to see how the boots feel. Pay attention to any areas that cause discomfort.
Adjust Lacing: Experiment with different lacing techniques to achieve the best fit.
Break Them In
Even the best-fitting boots need to be broken in before a long hike. Wear them on short walks and gradually increase the distance to allow the materials to soften and mould to your feet.
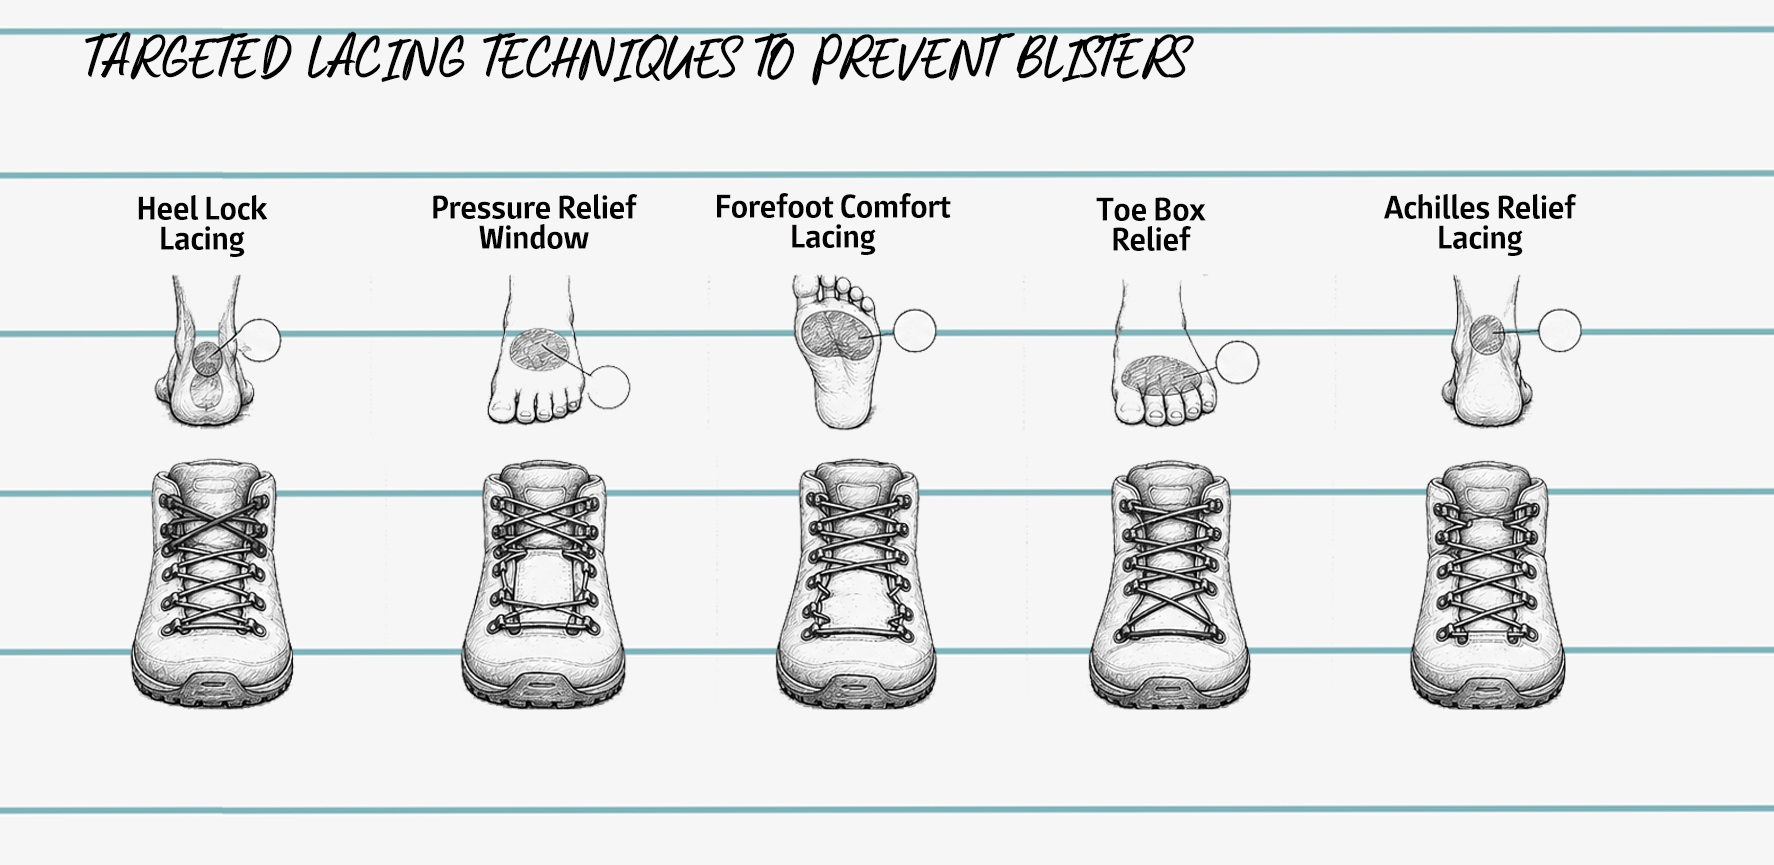
Smart Lacing Techniques for Blister Prevention
The way you lace your hiking boots can significantly affect comfort, pressure points and friction on the trail. Different lacing techniques can help lock your heel in place, relieve pressure over hotspots and reduce rubbing in problem areas such as the toes, Achilles or top of the foot.
Here are some of the most effective hiking boot lacing methods for blister prevention:
HEEL LOCK LACING
For heel blisters & Achilles rubbing
Goal:
Lock the heel in place to prevent excess movement.
HOW TO:
- Lace normally to the top.
- Cross laces and thread each lace through the opposite top hook.
- Pull tight to lock the heel.
- Tie as normal.
BEST FOR:
Heel slippage, Achilles rubbing, downhill control.
PRESSURE RELIEF WINDOW
For pressure on top of the foot (lace bite)
Goal:
Remove pressure from the top of the foot.
HOW TO:
- Lace up to the hotspot area.
- Skip a set (or two) of eyelets over the sore spot.
- Continue lacing above and below as normal.
- Keep snug, not tight.
BEST FOR:
Hotspots, swelling, bone bumps, lace bite.
FOREFOOT COMFORT LACING
For pressure on the ball of the foot
Goal:
Reduce pressure on the ball of the foot.
HOW TO:
- Lace up to just before the ball of your foot.
- Skip a set of eyelets.
- Continue lacing to the top.
- Keep the rest of the boot snug for stability.
BEST FOR:
Ball of foot pain, metatarsal hotspots, long days.
TOE BOX RELIEF
For toe pressure, black toenails & downhill toe bang
Goal:
Give toes more room and reduce impact.
HOW TO:
- Lace securely through the midfoot.
- Use a wider or criss-cross pattern over the forefoot.
- Do not overtighten the lower eyelets.
- Ensure toes can move freely.
BEST FOR:
Toe pressure, black toenails, long descents.
ACHILLES RELIEF LACING
For rubbing on the back of the ankle
Goal:
Reduce pressure and friction on the Achilles area.
HOW TO:
- Lace up to just below the problem area.
- Skip the top eyelets or use only the lower hook.
- Avoid pulling tight over the Achilles.
BEST FOR:
Achilles rubbing, pressure from boot collar.
2. How to prevent blisters when hiking: Socks Matter
Wearing liner socks under your regular hiking socks can significantly reduce friction. Liner socks wick moisture away from your skin and provide an extra layer of protection. Investing in high-quality, blister-resistant socks can make all the difference on your hike. Look for socks made from moisture-wicking materials like merino wool or synthetic blends, which help keep your feet dry and comfortable. Steer clear of cotton socks, as they hold onto moisture and can cause friction, leading to blisters. For more tips on choosing the perfect hiking socks, check out our full blog post on which hiking socks you should be using
3. Look After Your Foot Hygiene and Boot Maintenance
Before heading out on your hike, it’s crucial to pay attention to your foot hygiene and the condition of your boots. Here’s why and how to do it:
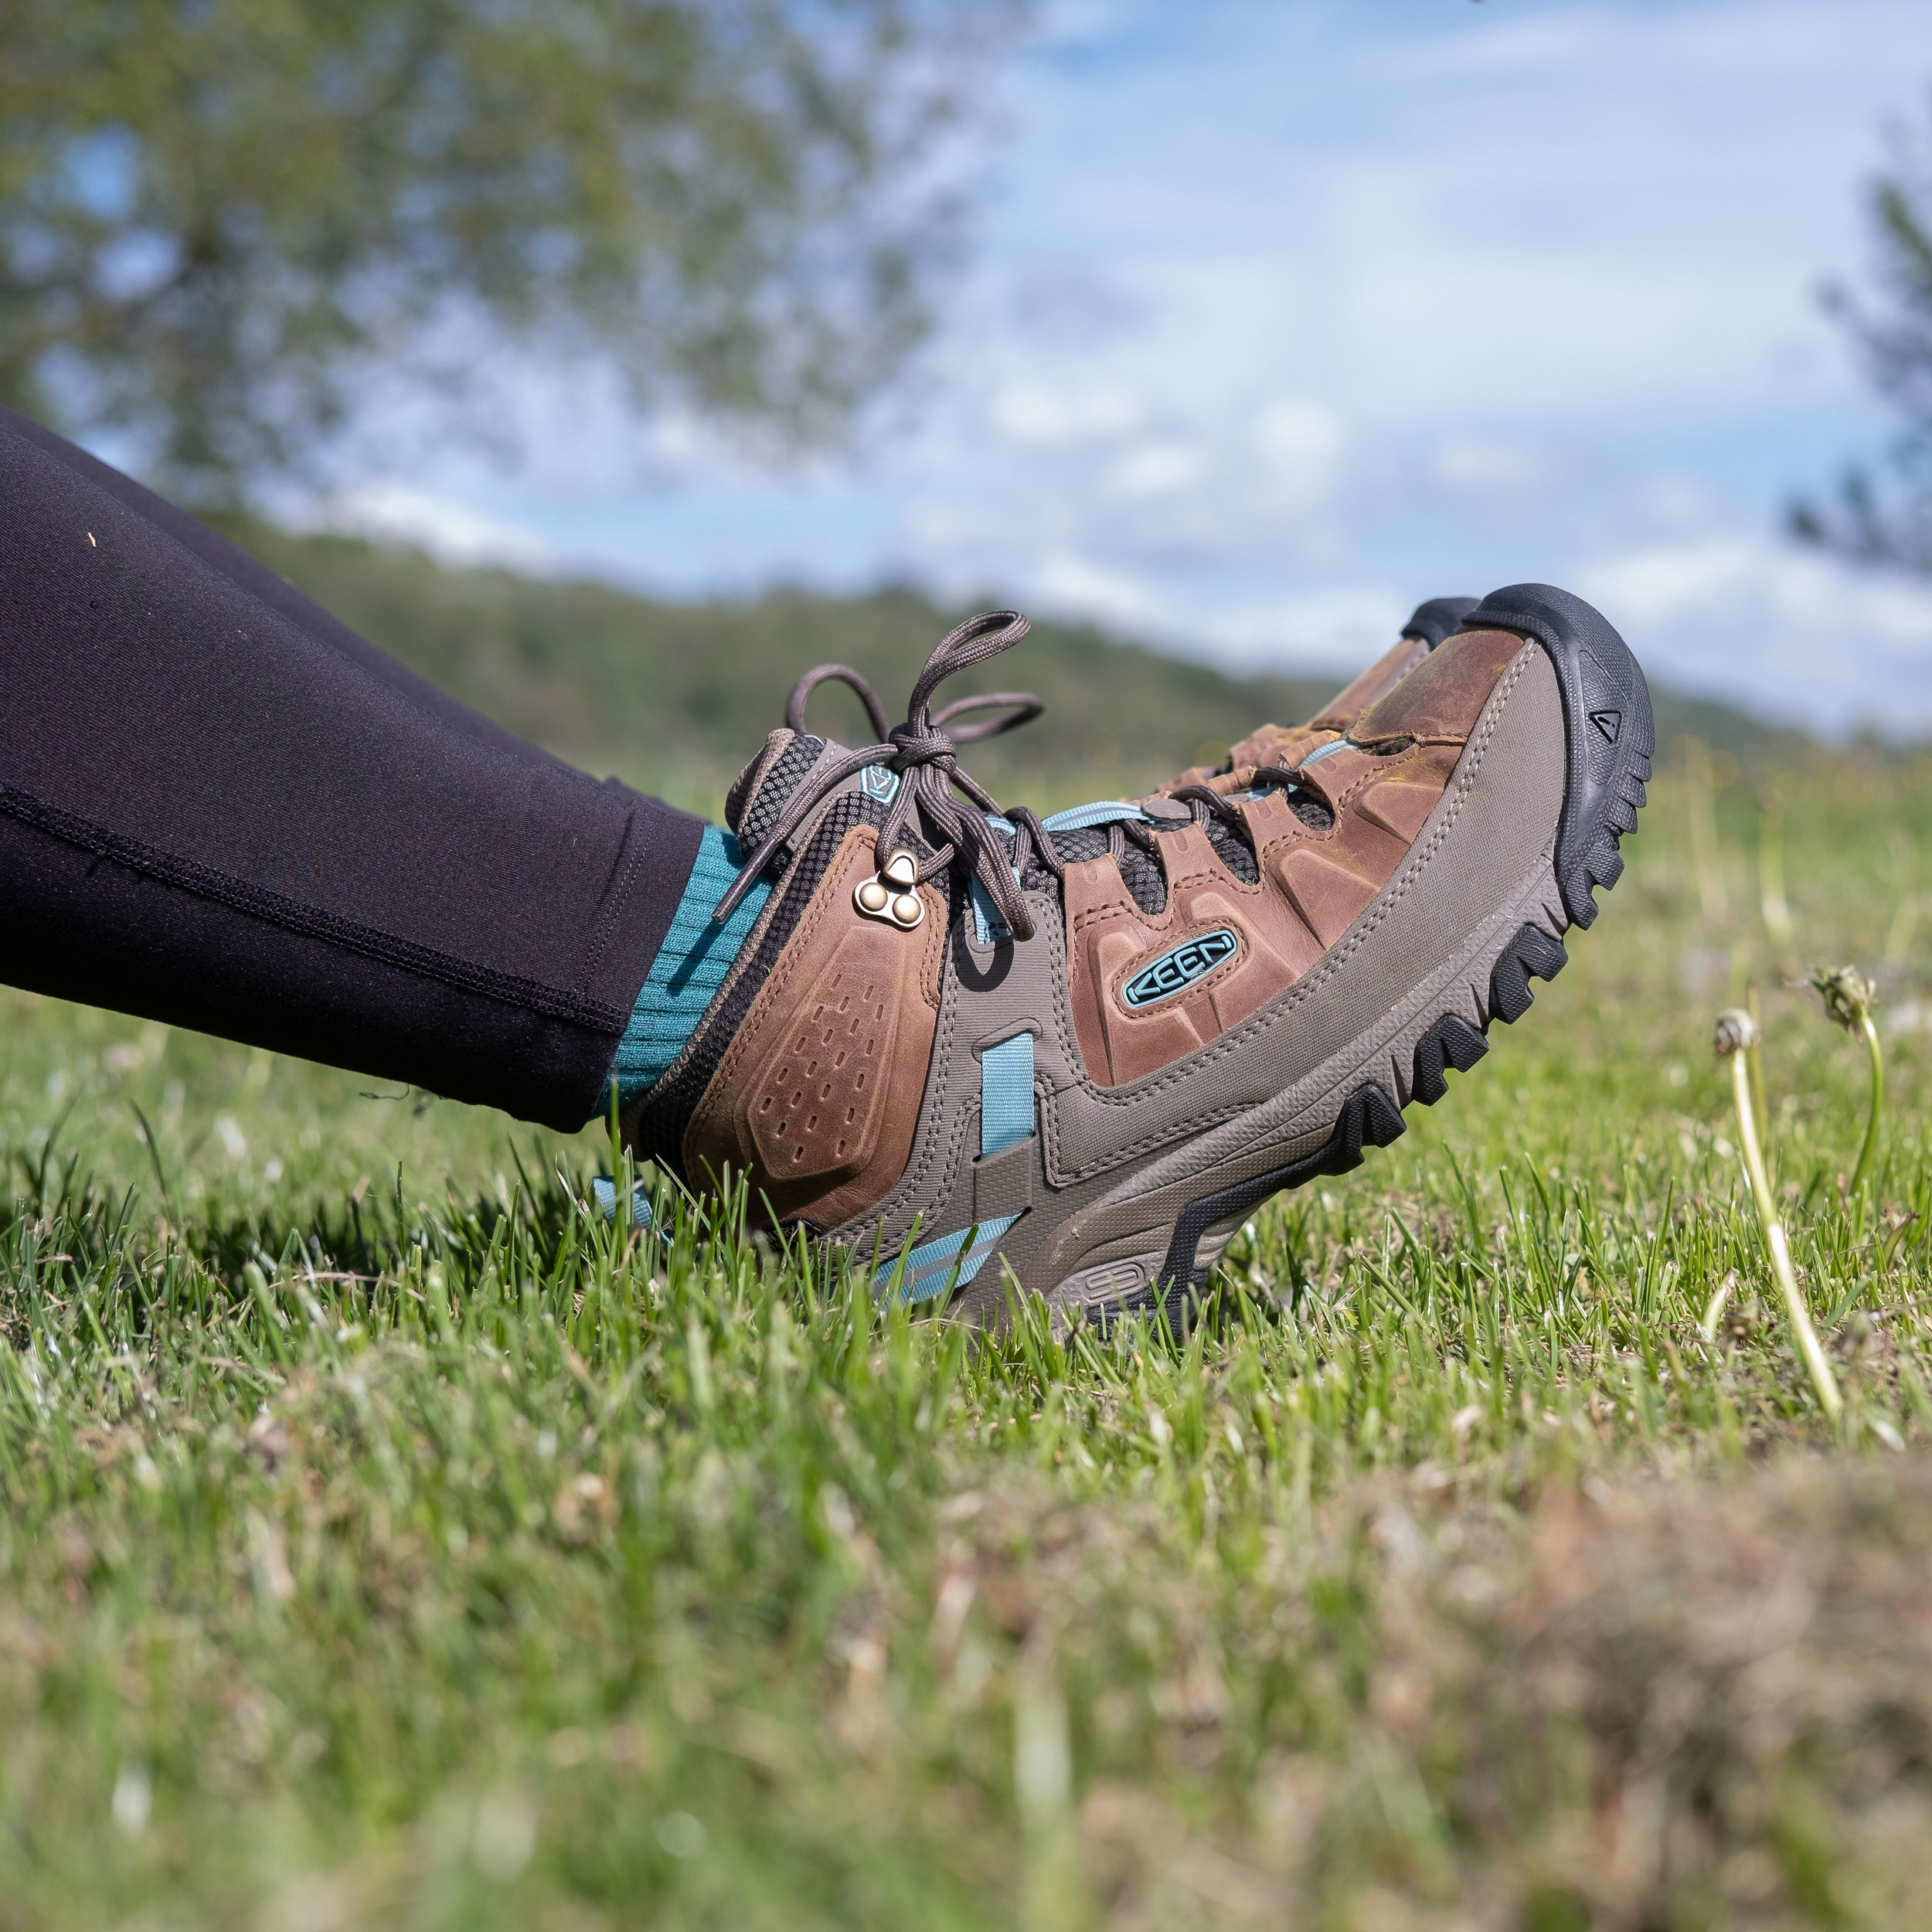
Foot Hygiene:
Clean Feet: Make sure your feet are clean before putting on your hiking socks and boots. Dirt and sweat can increase friction, leading to blisters.
Dry Feet: Ensure your feet are completely dry before putting on socks. Moisture can soften your skin, making it more prone to blisters.
Boot Maintenance:
Clean Your Boots: Dirt and grime inside your boots can create additional friction points. Regularly clean the insides of your boots to remove any debris.
Re-apply DWR : If your boots are waterproof, it’s crucial to maintain their waterproofing. Over time, the Durable Water Repellent (DWR) coating on your boots can wear off. This can make your boots less breathable, causing your feet to get clammy much quicker and increasing the risk of blisters. To keep your boots in top condition, re-apply DWR with a suitable waterproofing treatment. This involves using a spray or wash-in product specifically designed to restore the waterproofing layer, ensuring your boots remain more breathable and dry.
By keeping your feet clean and ensuring your boots are well-maintained, you can reduce the likelihood of developing blisters. Clean, dry feet and properly treated boots can make a big difference in your hiking comfort.
How to Prevent Blisters During the Hike?
Once you’re on the trail, it’s important to monitor your feet and take preventive measures to avoid blisters:
1. Address Uncomfortable Spots Immediately
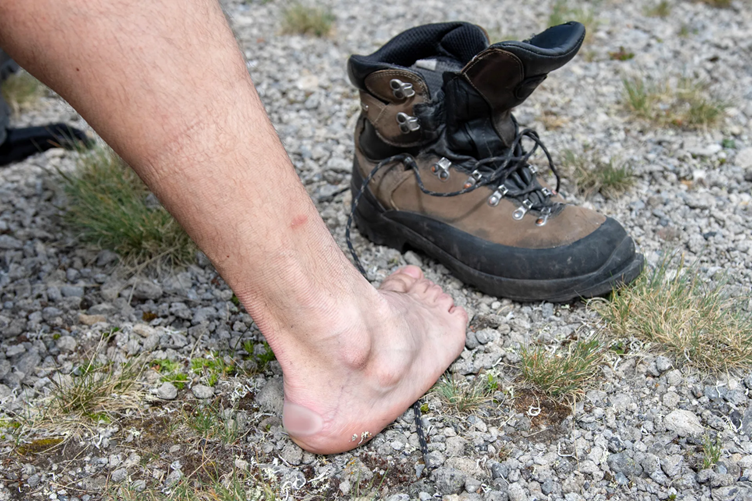
As soon as you feel any discomfort or unusual sensation on your foot, stop right away. Those hot spots you’re feeling are basically your skin’s way of saying, “Help me now, or you’ll regret it later!” Ignoring them and continuing to hike can quickly turn a minor irritation into a painful blister. Here’s what you should do:
Find a Safe Spot: Look for a safe and comfortable place to sit down. This could be a rock, a log, or a clear area off the trail.
Remove Your Shoe and Sock: Take off your shoe and sock to examine the area. Check for anything that might be causing the discomfort, such as a small pebble, a wrinkle in your sock, or an ill-fitting part of your shoe.
Adjust Your Gear: If your sock was bunched up, straighten it out. If your shoelaces were too tight or too loose, adjust them accordingly.
Apply a Plaster or Moleskin: If you notice any redness or a hot spot, cover it with a plaster, moleskin, or a blister pad. These can help reduce friction and protect the area from further irritation.
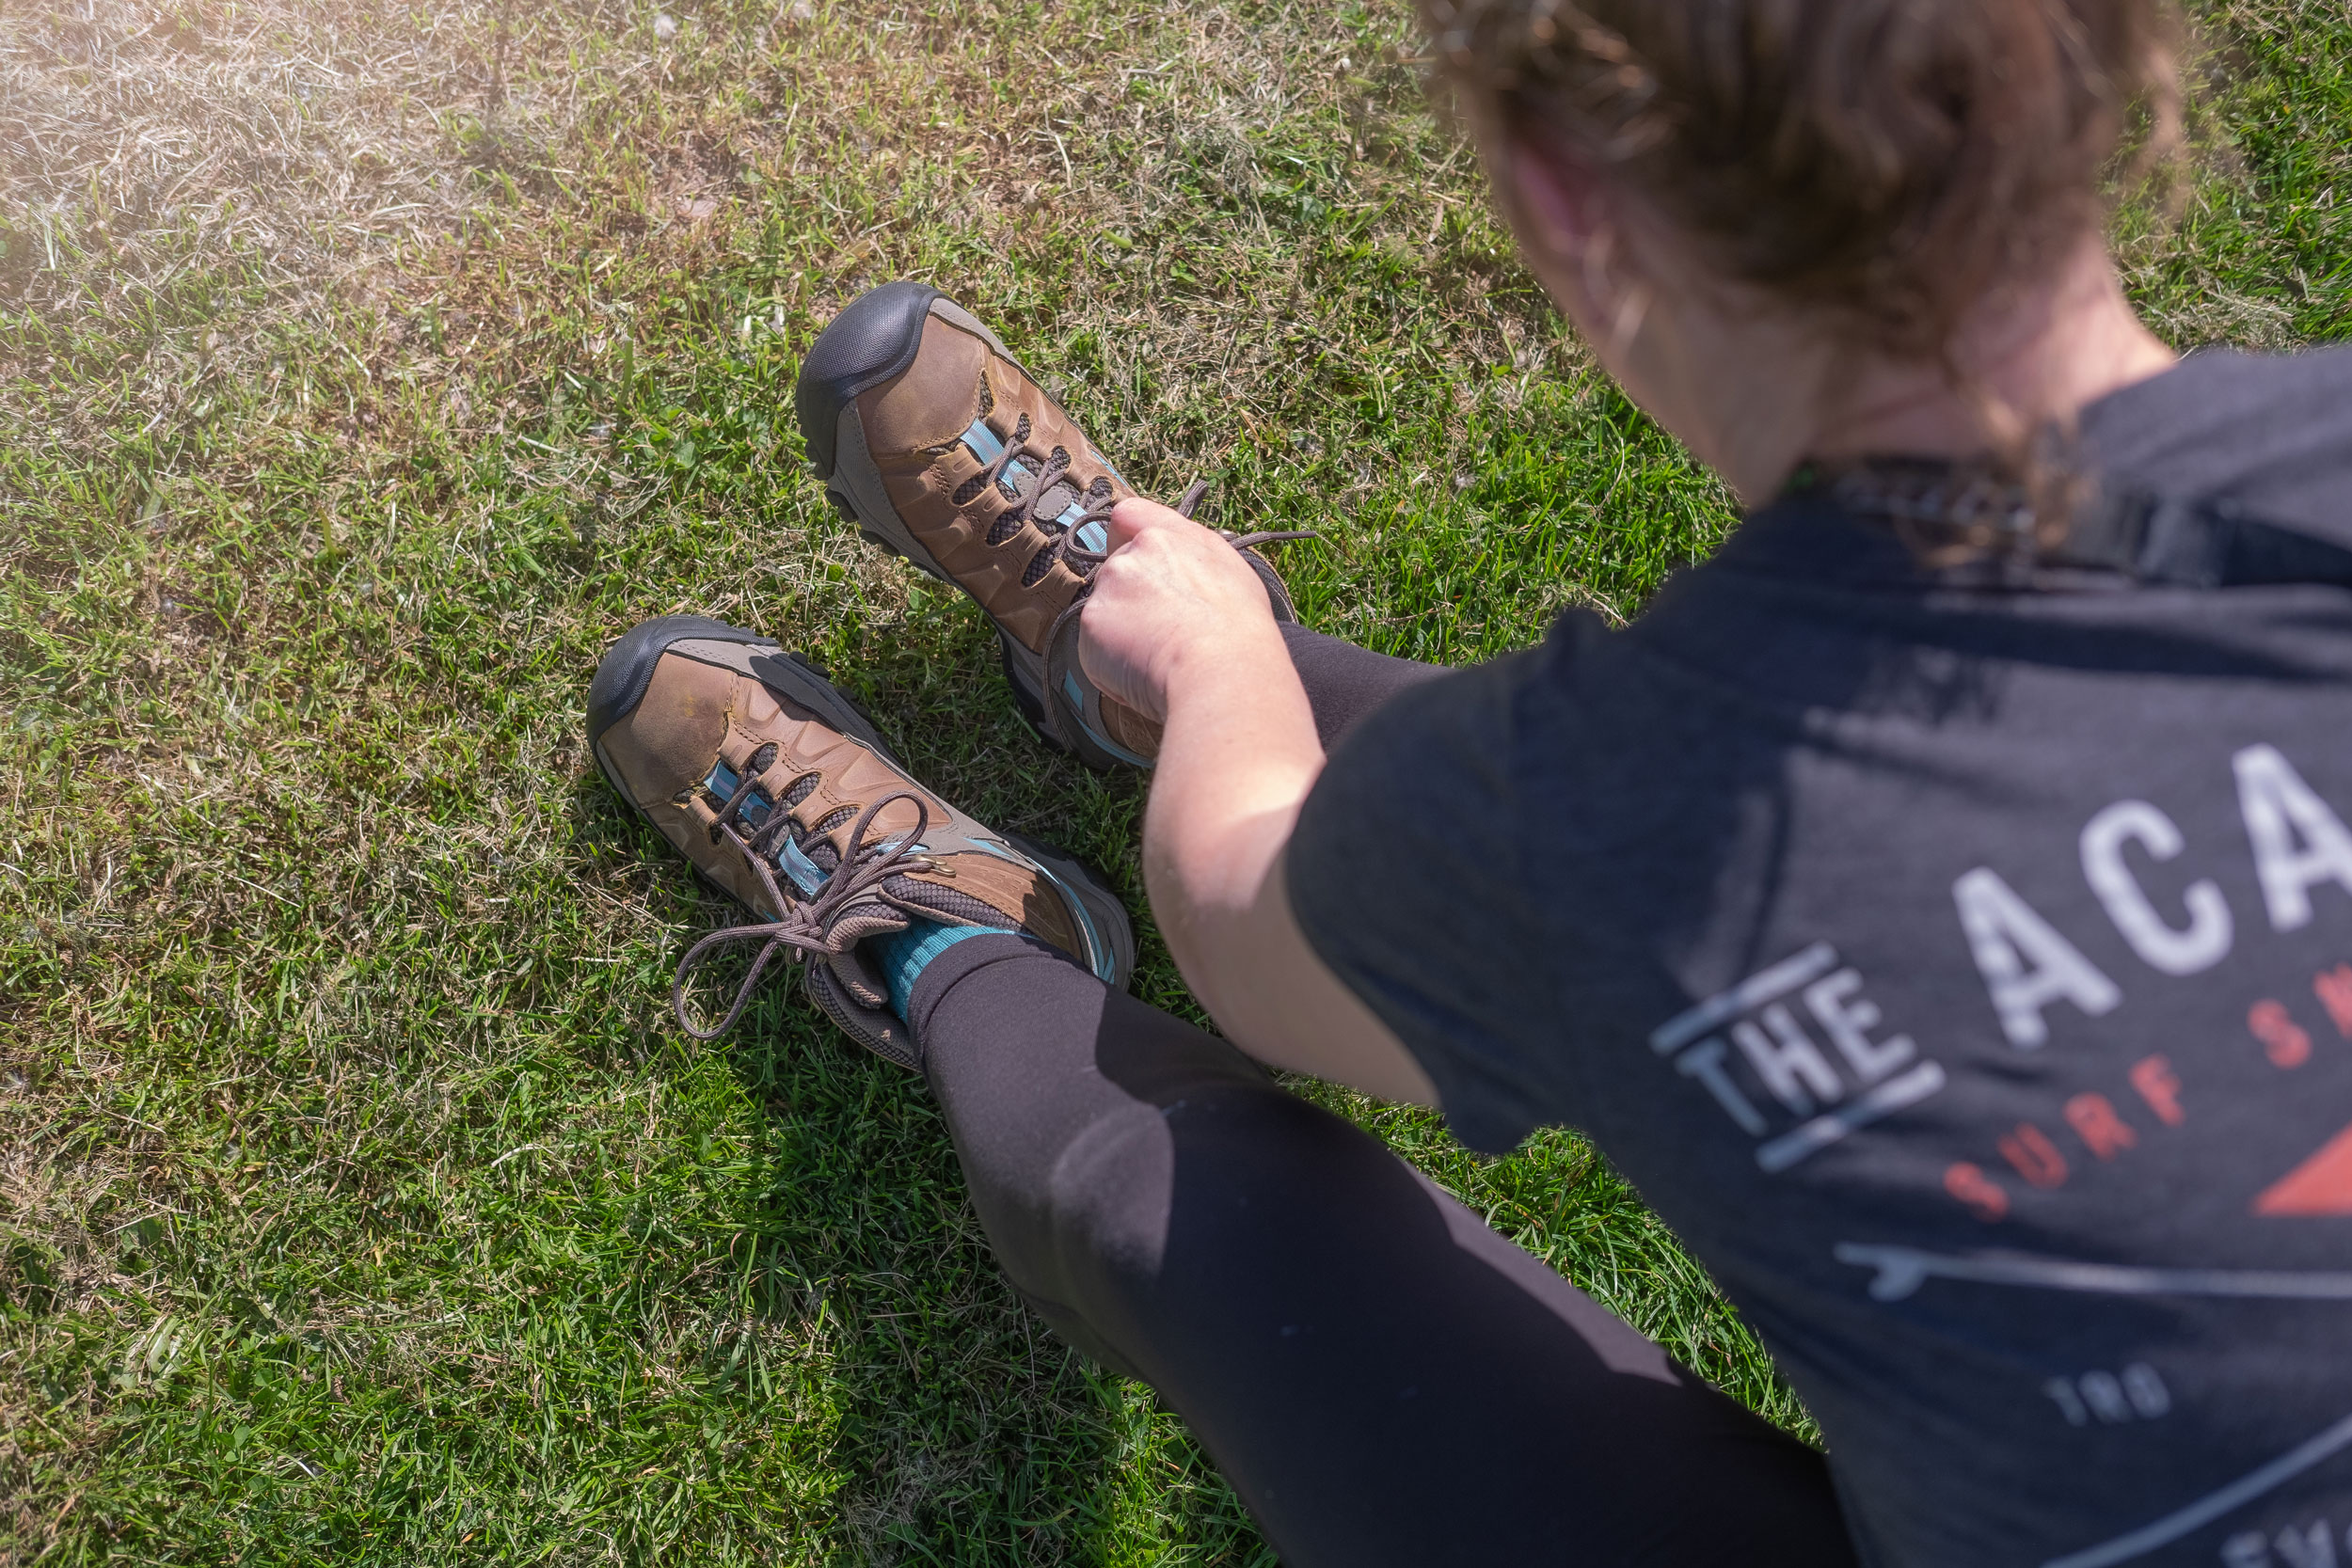
2. Swap Your Socks Regularly
If you’re particularly prone to blisters, one effective strategy is to carry additional pairs of socks and change them frequently. Here’s why and how this can help:
Moisture Management: Over time, your socks can become damp from sweat, which softens your skin and makes it more prone to friction and blisters. By changing into a fresh, dry pair of socks, you can keep your feet dry and reduce the risk of blisters.
Reduced Friction: Fresh socks can also help reduce friction, as they are less likely to have wrinkles or areas that bunch up and cause irritation.
How Often to Change: Aim to swap your socks every 2-3 hours during your hike. This frequency helps manage moisture levels and keeps your feet comfortable.
3. Proper Foot Care and Preparation
Keeping your feet dry is key. Apply foot powders or use moisture-wicking liners to minimize moisture buildup. Pay attention to hot spots—areas where you feel increased friction—and address them immediately by adjusting your socks or applying blister prevention tape.
Using blister tape or moleskin on known problem areas can provide an additional layer of protection. Some hikers swear by duct tape for its durability and adhesive strength.
Applying a thin layer of Vaseline or another lubricant on your feet before putting on socks can reduce friction. This is especially useful for long-distance hikes where prolonged friction can be a problem.
How to Prevent Blisters When Hiking: Camping and Resting Time Tips
When you take breaks or set up camp, take steps to ensure your feet remain blister-free:
1. Dry Your Boots Overnight with Newspaper
When you’re on a multi-day hike, keeping your boots dry is crucial to prevent blisters. Wet boots can make your feet clammy and more susceptible to friction, leading to painful blisters. Here’s an effective tip for drying your boots overnight:
Why Newspaper?
Newspaper is excellent for absorbing moisture. The porous paper quickly draws out and retains water, helping to dry your boots from the inside out.
How to Do It:
Remove Insoles: Take out the insoles from your boots. This allows more air circulation inside the boot and helps the drying process.
Crumple the Newspapers: Crumple up several sheets of newspaper into loose balls. The more surface area the paper has, the more moisture it can absorb.
Stuff the Boots: Insert the crumpled newspaper balls into your boots, making sure to fill them completely. Push the paper into the toe area and around the sides to ensure maximum coverage.
Replace as Needed: Depending on how wet your boots are, you might need to replace the newspaper after a few hours. If your boots are very damp, changing the newspaper once or twice can significantly speed up the drying process.
Benefits:
Quick Drying: Using newspaper can help your boots dry much faster than air drying alone.
Cost-Effective: Newspaper is inexpensive and readily available, making this method both practical and economical.
Lightweight: Bringing a few sheets of newspaper on your hike doesn’t add much weight to your pack, making it an easy addition to your gear.
How to Prevent Blisters When Hiking: Additional Tips
Elevate Your Boots: If possible, place your boots in a well-ventilated area or near a heat source (but not too close to avoid damaging the boots). Elevating them slightly off the ground can also help air circulate better.
Avoid Direct Heat: Never place your boots directly next to a campfire or heater, as excessive heat can damage the materials and compromise the integrity of your boots.
By drying your boots overnight with newspapers, you can ensure they are dry and comfortable for the next day’s hike, reducing the risk of developing blisters from damp, clammy feet.
2. Air Out Your Feet
Remove Boots and Socks: During extended breaks or when you set up camp, take off your boots and socks to let your feet breathe. This helps keep your feet dry and reduces moisture buildup.
Foot Powders: Apply foot powders to absorb moisture and keep your feet dry. Look for powders with antifungal properties to prevent infections.
3. Elevate Your Feet
Whenever possible, elevate your feet to reduce swelling and improve blood circulation. This can help your feet recover faster and prevent blisters.
4. Massage and Stretch
Foot Massage: Gently massage your feet to relieve tension and improve circulation. Use your hands or a small massage ball to target sore areas.
Stretching: Perform foot and ankle stretches to keep your muscles and tendons flexible. This can help reduce the risk of blisters and other foot issues.
5. Check for Hot Spots and Blisters
Regular Inspection: Frequently check your feet for any signs of hot spots or developing blisters. Address these issues immediately to prevent them from worsening.
Blister Care Kit: Keep a blister care kit handy with moleskin, blister pads, antiseptic wipes, and bandages to treat any issues promptly.
6. Change into Camp Shoes
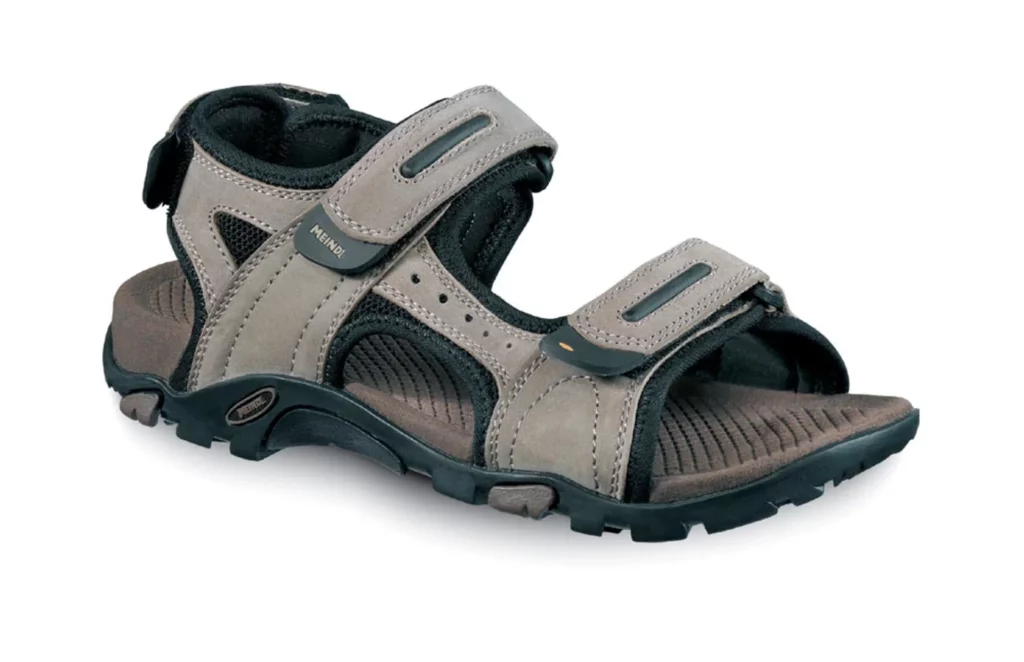
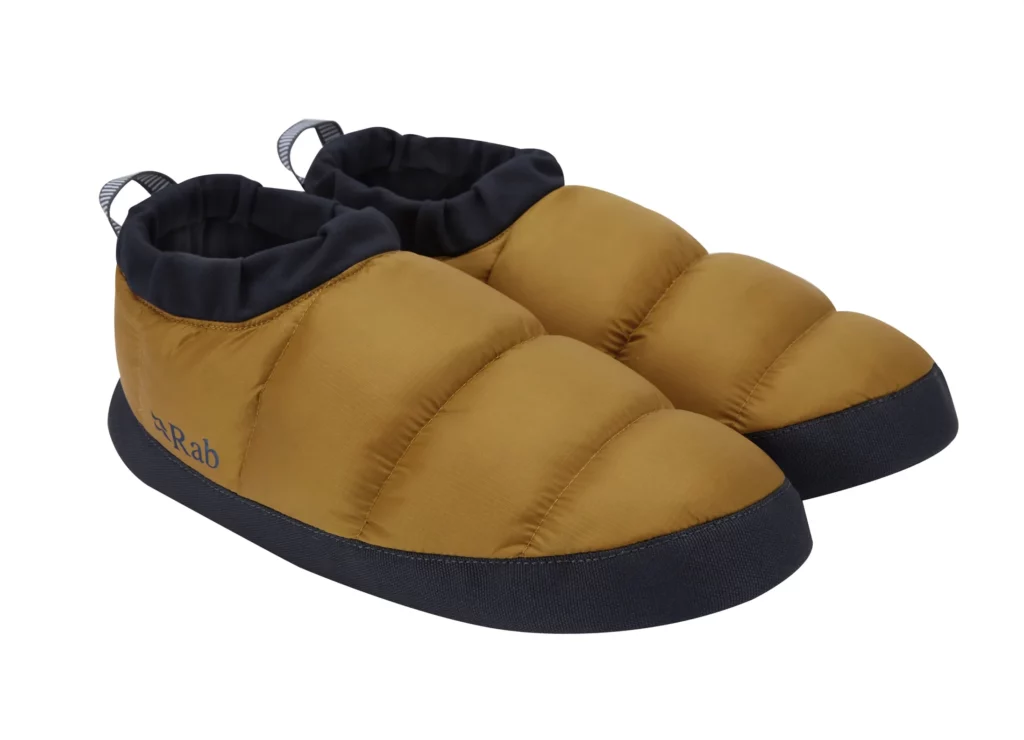
Comfortable Camp Shoes: Bring a pair of lightweight, comfortable shoes or sandals to wear around camp. This allows your feet to relax and breathe while providing protection from the elements.
Keep Your Feet Warm
Warm Socks: If you’re camping in cold conditions, make sure to keep your feet warm. Cold, damp feet are more prone to blisters. Wear warm, moisture-wicking socks and avoid tight-fitting footwear.
After the Hike: Proper Foot Care for Long-Term Blister Prevention
Once your hiking trip is over, taking care of your feet is crucial to ensure they recover well and are ready for your next adventure. Here are some detailed steps and tips to provide proper care for your feet after a hike:
1. Clean and Inspect Your Feet
Thorough Cleaning: Wash your feet with mild soap and warm water to remove dirt, sweat, and bacteria. This helps prevent infections and keeps your feet healthy.
Inspect for Damage: Check for any signs of blisters, cuts, or abrasions. Pay attention to any hot spots or areas of irritation that could develop into blisters if not addressed.
2. Moisturise and Soothe
Moisturise: Apply a good quality foot cream or moisturiser to keep the skin on your feet hydrated. Dry skin can crack and become more susceptible to blisters.
Soothe Irritated Areas: Use aloe vera gel or a soothing foot lotion to calm any irritated areas. If you have blisters, use an antiseptic cream and cover them with sterile bandages to prevent infection.
3. Treating Blisters
Don’t Pop Blisters: If you have blisters, avoid popping them as this can lead to infection. Instead, clean the area, apply a blister pad, and cover it with a sterile bandage.
If Blisters Burst: If a blister does burst, clean it with an antiseptic solution, apply an antibiotic ointment, and cover it with a sterile bandage. Keep it clean and change the dressing regularly.
4. Elevate and Rest
Elevate Your Feet: Elevating your feet can help reduce swelling and improve blood circulation. Prop your feet up on a pillow or cushion for a few hours after your hike.
Rest: Give your feet time to recover. Avoid any strenuous activity that puts pressure on your feet for at least a day after a long hike.
5. Proper Footwear
Wear Comfortable Shoes: After a hike, switch to comfortable, supportive footwear. Avoid tight or ill-fitting shoes that could aggravate any blisters or sore spots.
Air Out Your Feet: Allow your feet to breathe by wearing open-toed sandals or going barefoot when it’s safe and hygienic to do so.
6. How to prevent blisters when hiking: Long-Term Foot Care Practices
Regular Foot Exercises: Strengthen the muscles in your feet with regular exercises. Stretching and strengthening exercises can improve foot health and reduce the risk of blisters.
Foot Soaks: Soak your feet in warm water with Epsom salts or a few drops of essential oils like tea tree oil, which has antibacterial properties. This can help soothe tired feet and reduce inflammation.
Regular Pedicures: Keep your toenails trimmed and smooth to prevent them from catching on your socks and causing blisters. Regular pedicures can also help maintain overall foot health.
7. Consider Orthotics
Custom Orthotics: If you have ongoing blisters or foot pain issues, consider getting custom orthotics. They provide additional support and can help correct any biomechanical issues contributing to your foot problems. Custom orthotics are tailored to the contours and needs of your feet, ensuring a precise fit that can address specific problems such as flat feet, high arches, or plantar fasciitis. By redistributing pressure and providing enhanced cushioning, custom orthotics can alleviate discomfort and prevent the recurrence of blisters.
Insoles: In addition to custom orthotics, over-the-counter insoles can be valuable to your footwear. Insoles provide extra cushioning and support, helping to absorb shock and reduce the strain on your feet during daily activities. They come in various types, such as gel, foam, and air-cushioned, each designed to offer different comfort levels and support. While not as precisely tailored as custom orthotics, high-quality insoles can still significantly improve foot comfort, enhance stability, and prevent foot-related problems, making them a convenient and cost-effective option for many individuals.

8. Monitor and Adapt
Monitor Your Feet: Keep an eye on how your feet respond to different hiking conditions and footwear. Adapt your strategies based on what you learn to continuously improve your blister prevention techniques.
Consult a Specialist: If you experience persistent foot problems, consult a podiatrist or foot specialist. They can provide personalised advice and treatment options to keep your feet in top condition.
By following these post-hike care tips, you can ensure that your feet remain healthy and strong, reducing the risk of blisters and other foot issues in the long term. Proper foot care after a hike is just as important as the preparations you make before and during your trek, ensuring you’re always ready for your next adventure.
Best Products for Preventing Hiking Blisters
Blisters have an impressive ability to turn a brilliant day in the hills into a very long walk back to the car. Luckily, a few clever additions to your hiking kit can help keep rubbing, hot spots and unhappy toes under control. Here are our top picks for keeping your feet happy on the trail.
Darn Tough Hiking Socks
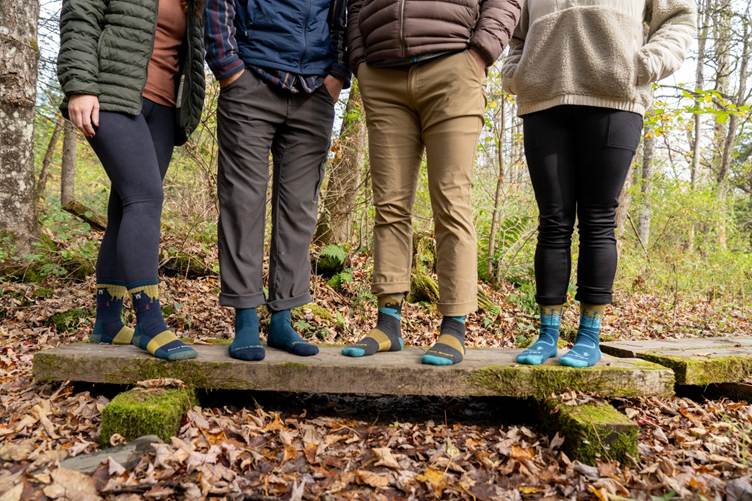
There’s a reason Darn Tough socks have built such a loyal following among hikers. They’re made in Vermont, USA, and are particularly well known for their merino wool construction, durable knit and snug performance fit. That close fit helps prevent the sock from slipping, bunching, or forming folds inside your boots, which is exactly the kind of friction you want to avoid.
Merino wool is another big part of their appeal. It naturally helps manage moisture and temperature, keeping your feet more comfortable across changing conditions while also resisting odours. That’s particularly welcome on long-distance and multi-day hikes when changing into a fresh pair every few hours isn’t exactly an option.
They’re also famous for their durability and lifetime guarantee, which is a pretty bold promise for something that spends its life being walked on. Add different weights and cushioning levels into the mix, and it’s easy to see why so many hikers swear by them.
Injinji Toe Socks
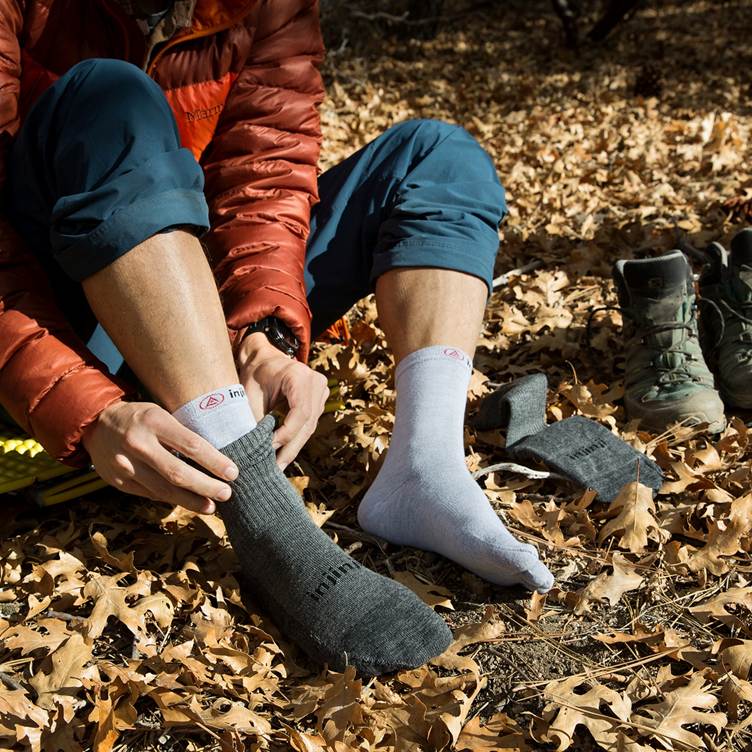
Injinji socks certainly look different, but there’s a clever reason behind those five little toe sleeves. Their signature design wraps each toe individually, creating a fabric barrier that eliminates skin-on-skin rubbing between your toes, one of the classic trouble spots for hiking blisters.
But their blister-fighting credentials don’t stop at your toes. Injinji socks are designed to fit closely around the foot, helping reduce slipping, bunching, and movement that can create friction elsewhere inside your hiking boots or shoes. Their moisture-wicking fabrics also draw sweat away from the skin, helping keep feet drier and more comfortable when you’re clocking up the miles.
It’s this combination of less friction, better moisture management and a secure fit that has made Injinji a favourite among hikers, runners and long-distance walkers. They’re particularly brilliant if between-the-toe blisters are your usual nemesis, but they’re far from being a one-trick sock.
Some styles can even be worn as liners underneath your favourite hiking socks, giving you an extra layer of protection without completely changing a sock-and-boot combination you already love.
Lifesystems Blister Plasters Six-Pack
Sometimes you don’t need a full first-aid kit. You just need something to stop that one angry blister from making every step miserable.
These Lifesystems plasters use hydrocolloid technology to cushion and protect the affected area while absorbing small amounts of fluid to create better conditions for healing. They also stay firmly in place and help protect against further rubbing, making them a brilliantly simple addition to your hiking pack.
With six in a pack, they’re small enough to stash away and forget about until your feet remind you they’re there.
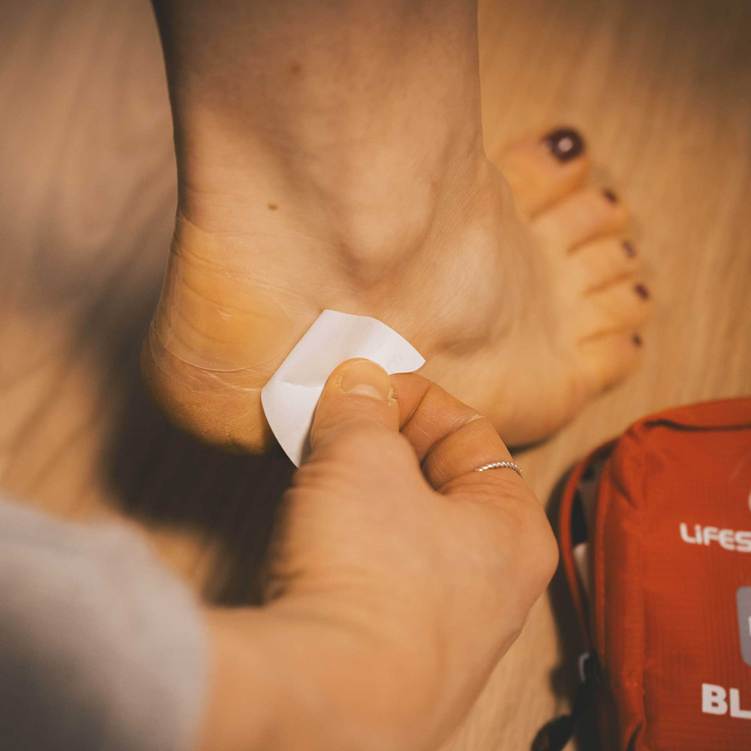
Lifesystems Blister First Aid Kit
If you’re heading further afield, it pays to give your feet a little more backup.
Rather than just providing blister plasters, this compact kit includes five blister plasters, two hygienic cleansing wipes, a blister stick, and a pack of assorted plasters, giving you several ways to tackle unhappy feet on the trail.
Everything comes packed inside a lightweight, water- and rip-resistant case that’s small enough to slip into a trouser pocket or rucksack. It’s a particularly handy choice for longer walks when a tiny hot spot on mile five could become a considerably bigger problem by mile fifteen.
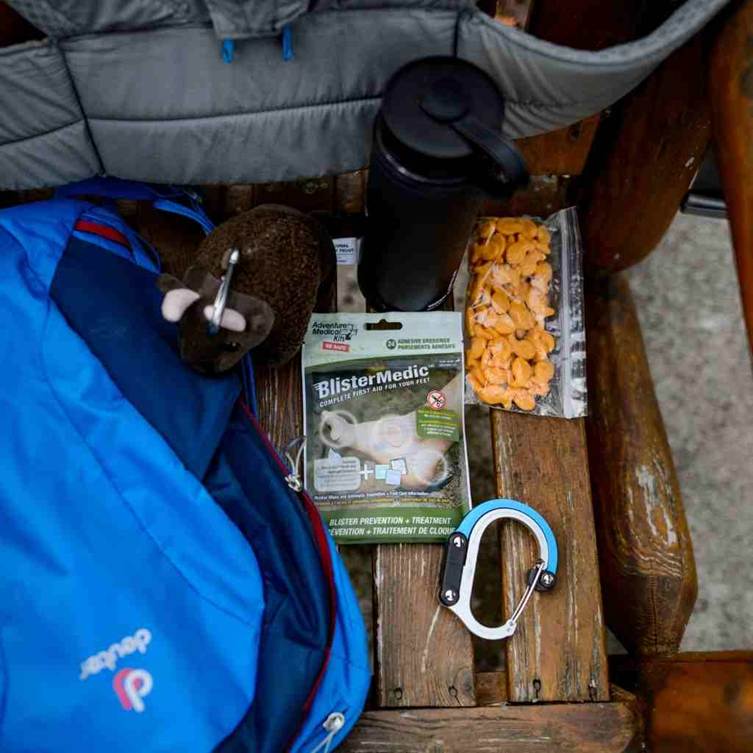
Adventure Medical Kits Blister Medic
For the hiker who likes to be prepared for more than the occasional hot spot, the Blister Medic takes things up another notch.
Inside you’ll find 24 dressings, 12 wipes, GlacierGel dressings, pre-cut and shaped moleskin patches, antiseptic wipes and alcohol wipes. The moleskin is already shaped for common blister areas, so there’s no need to start performing delicate scissor work halfway up a mountain.
The GlacierGel dressings are designed to provide pain relief, while the antiseptic wipes help clean the affected area. Despite everything packed inside, the kit remains lightweight and packable.
Final Word
Now that you’ve learned how to prevent blisters when hiking, remember to combine proper footwear, moisture management, and attentive foot care.
Don’t forget about scheduling your shoe fitting appointment with Trekitt
Looking for More Ways to Prevent Blisters?
If you’re serious about keeping your feet blister-free, don’t miss our YouTube video on why using technical socks is essential.
Watch the videonow and learn how technical socks can be a game-changer for your hiking comfort!
By following these tips, you can keep your feet comfortable and blister-free, allowing you to fully enjoy your hiking adventures. Happy hiking!
FAQ
The best way to prevent blisters when hiking is to reduce friction, moisture and pressure on your feet. Start with properly fitted hiking boots or hiking shoes that don’t rub at the heel or toes. Wear quality merino wool or synthetic hiking socks rather than cotton and keep your feet dry throughout the day. Many hikers also use blister-prevention tape, liner socks, or anti-chafe products on hotspots before problems start.
Hiking blisters are usually caused by repeated friction against the skin. Poorly fitting footwear, damp feet, sock movement, heat and long periods of walking can all increase friction and make blisters more likely.
Choose hiking socks that fit closely without bunching and are designed to manage moisture. Merino wool and technical synthetic hiking socks are popular choices. Toe socks, such as Injinji socks, can also help hikers who experience friction between their toes.
Stop as soon as you notice rubbing, warmth or discomfort. Check your socks and footwear, remove any debris and protect the affected area with suitable blister tape or a blister plaster. Acting early can prevent continued friction from turning the hot spot into a full blister.
If you know you regularly develop blisters in a particular area, applying suitable blister protection before a long hike can help reduce friction. It’s still important to address the underlying cause, such as footwear fit, sock choice or excess moisture.
Yes, many hikers use Vaseline on their feet before hiking to reduce friction and help prevent blisters. Applying a thin layer to common hotspot areas, such as the heels, toes, and sides of the feet, can help reduce rubbing in your boots. However, too much petroleum jelly can make feet overly soft or slippery, so it works best when paired with moisture-wicking hiking socks and well-fitting footwear.
The best way to toughen your feet for hiking is through gradual exposure and consistent walking. Start with shorter hikes before attempting long-distance treks, and wear the same socks and footwear you plan to use outdoors. Over time, your skin adapts to pressure and friction, helping reduce the likelihood of blisters.
Yes, new hiking boots can cause blisters if they haven’t been properly broken in. Stiff materials and pressure points may create friction on the heels, toes or ankles during the first few hikes. Gradually breaking in boots, properly adjusting the laces, and wearing quality hiking socks can help minimise discomfort.
Experienced hikers usually treat hotspots early before they become full-blown blisters. They often stop to adjust socks, re-tie boots, apply tape or use blister plasters immediately when rubbing starts. Quick treatment is one of the most effective ways to prevent minor irritation from turning into a painful hiking blister.
Most hiking blisters heal within a few days to a week, depending on their size and severity. Small friction blisters may improve quickly with rest and protection, while larger or broken blisters can take longer. Keeping feet dry and reducing further rubbing helps speed up healing.
On multi-day hikes, blister care becomes part of daily foot maintenance. Many hikers clean and dry their feet at camp, change into fresh socks and cover any hotspots before the next day. Carrying blister plasters, tape and spare socks is considered essential for long-distance hiking and backpacking trips.
Leave a Reply